AutoBRIDGE Modeler
Autodesk Revit add-in
AutoBRIDGE Modeler is a groundbreaking Revit add-in developed by the AutoBRIDGE team, leading the way in BIM infrastructure automation. This innovative plugin streamlines and accelerates the 3D infrastructure modeling process, providing engineers and modelers with a comprehensive toolkit for precise and efficient design within the Revit environment. Key features include corridor creation, instance array addition, girder modeling, variation parameter control, and superelevation management.
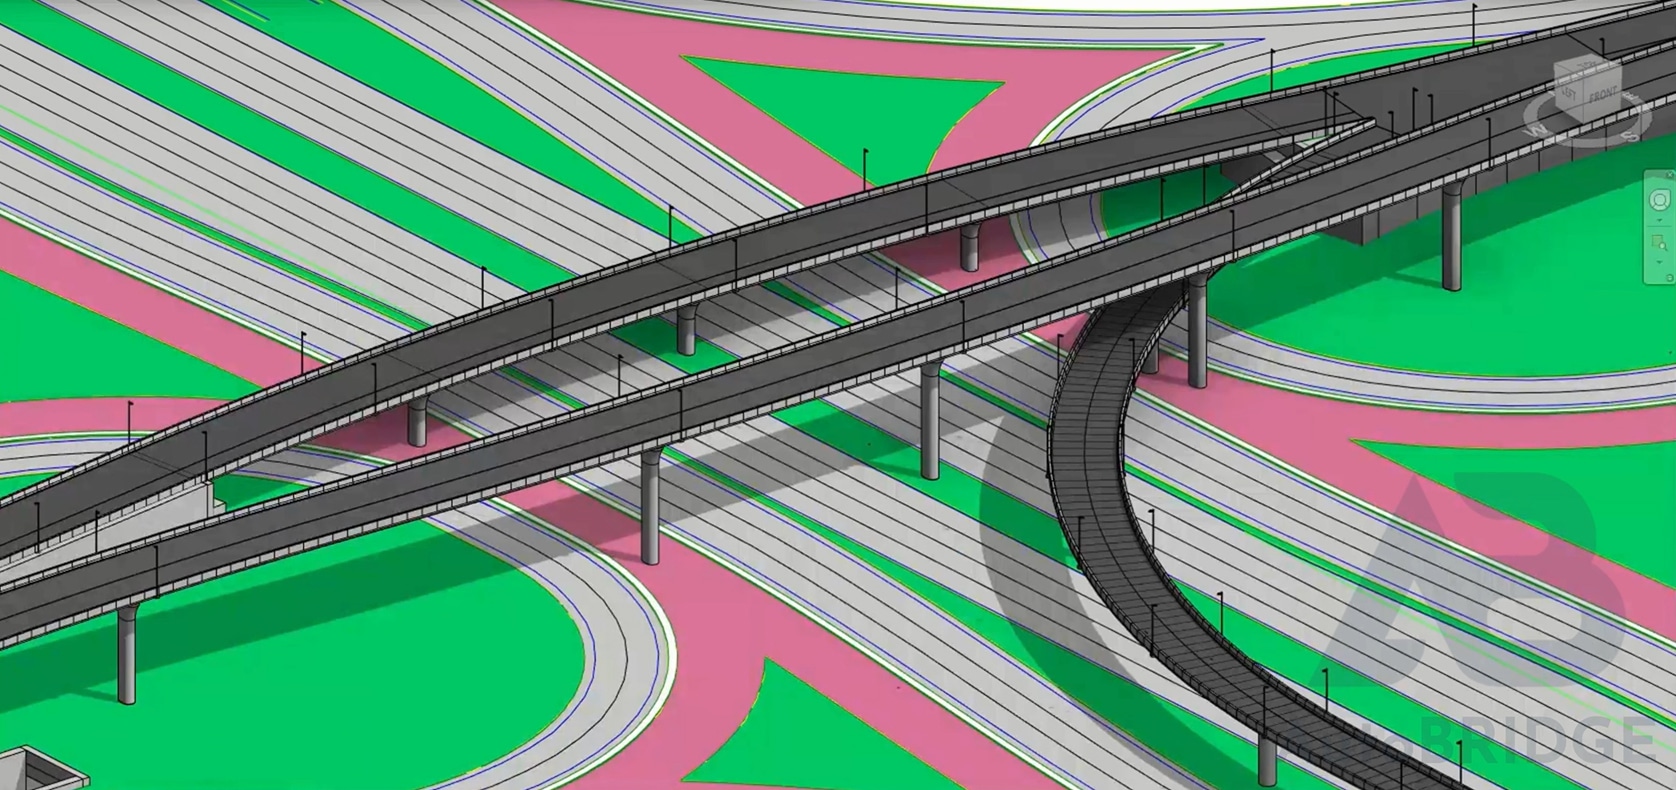
Powerful extension for bridge and tunnel modeling with Autodesk® Revit®
Effortlessly Elevate Your Infrastructure BIM Projects with AutoBRIDGE
AutoBRIDGE, an add-on for Autodesk® Revit®, empowers infrastructure modelers and engineers to:
- Easily create 3D corridors using Civil3D alignments or imported 3D polylines.
- Add various types of arrays along alignments and create bridge girders with unmatched parametric precision, accuracy, and simplicity.
- Modify parameter variations for horizontal and vertical adjustments along the corridor.
- Incorporate superelevation variations using superelevation data from Civil3D or similar applications.
- Utilize the family manager to save templates for future projects, eliminating the need to recreate nested families.
What you can do with AutoBridge
Feature
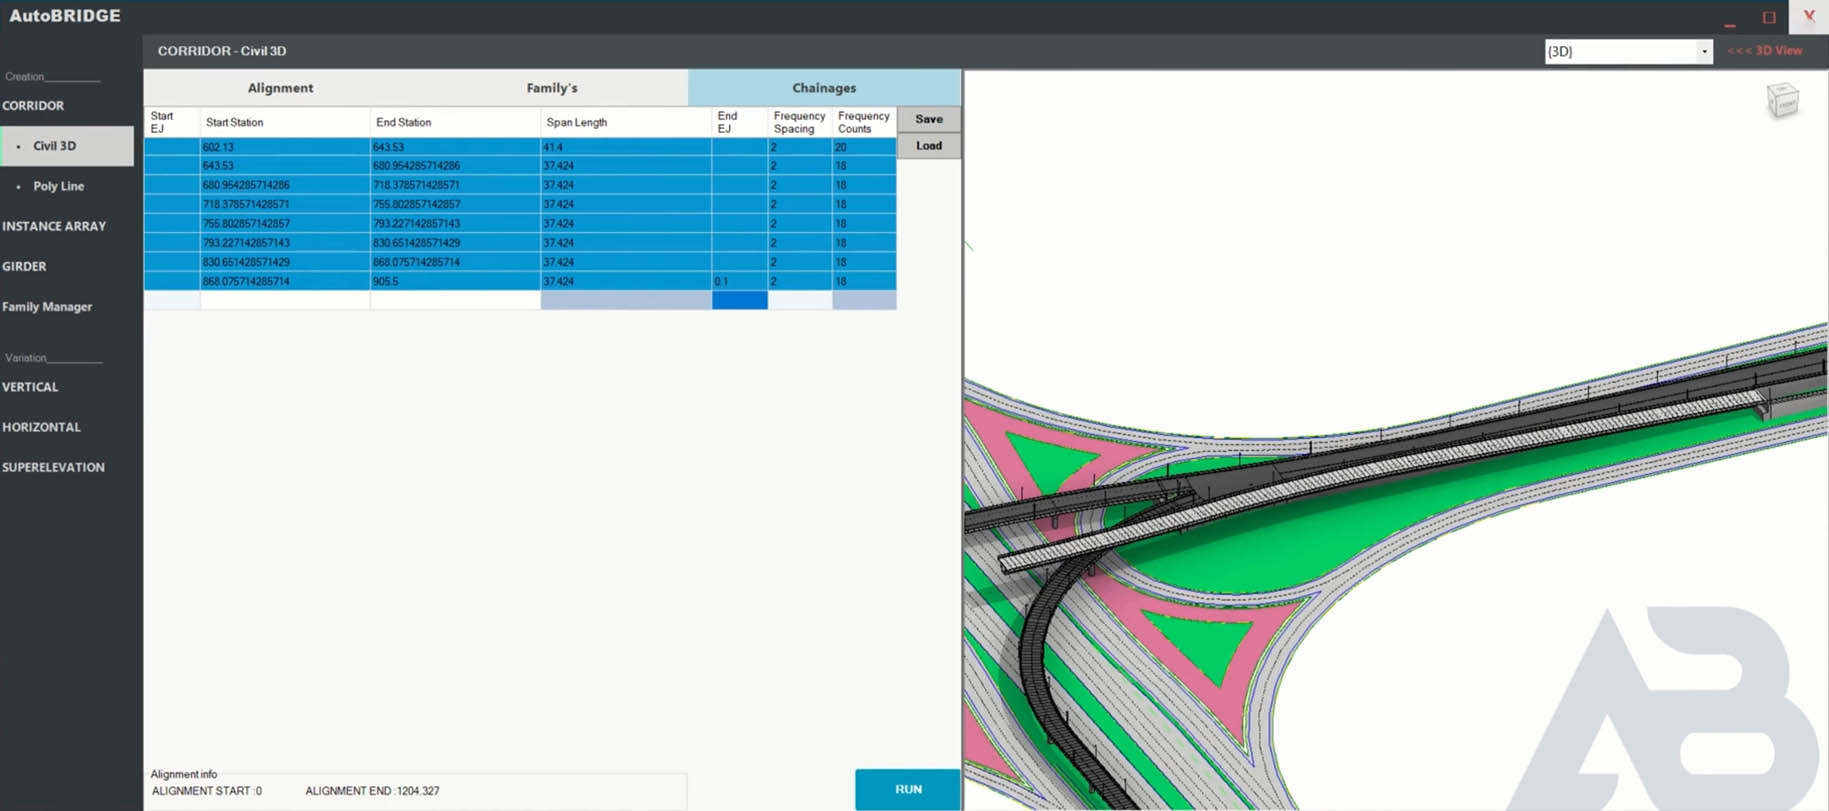
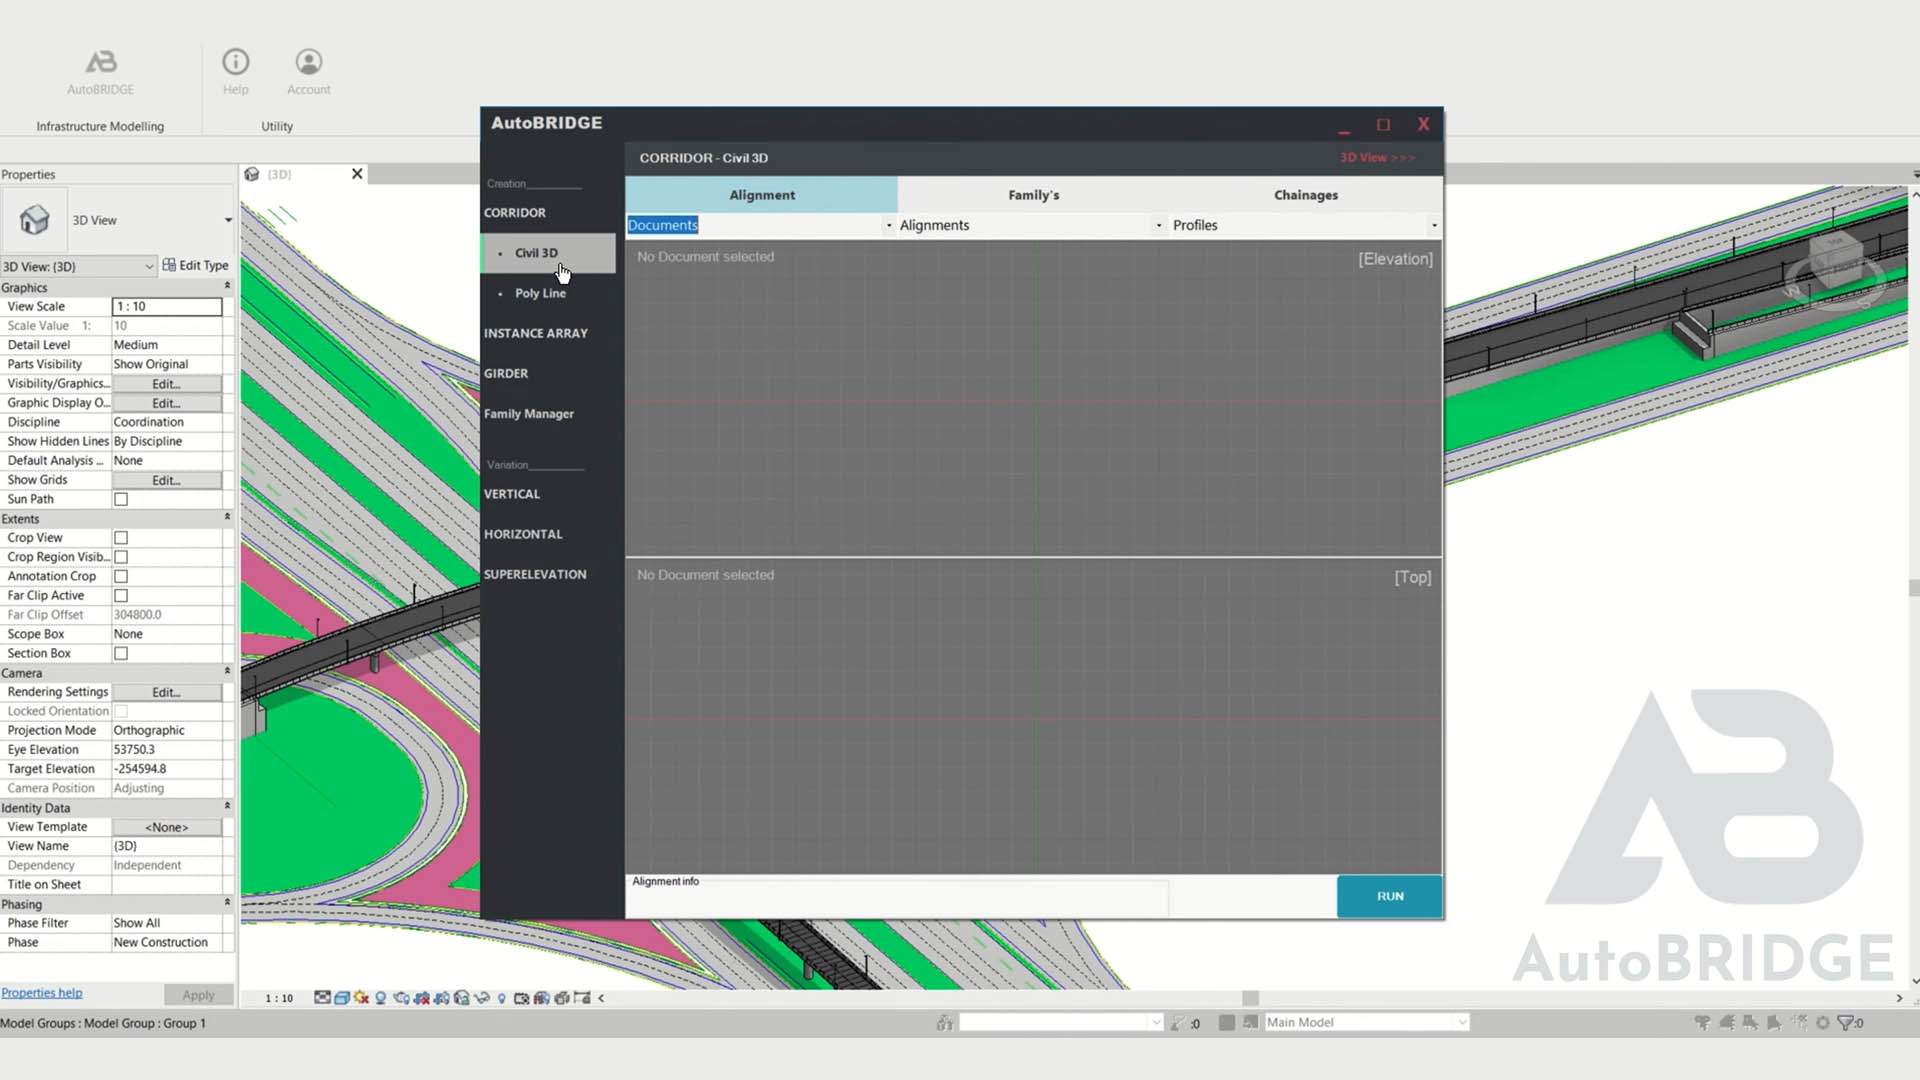
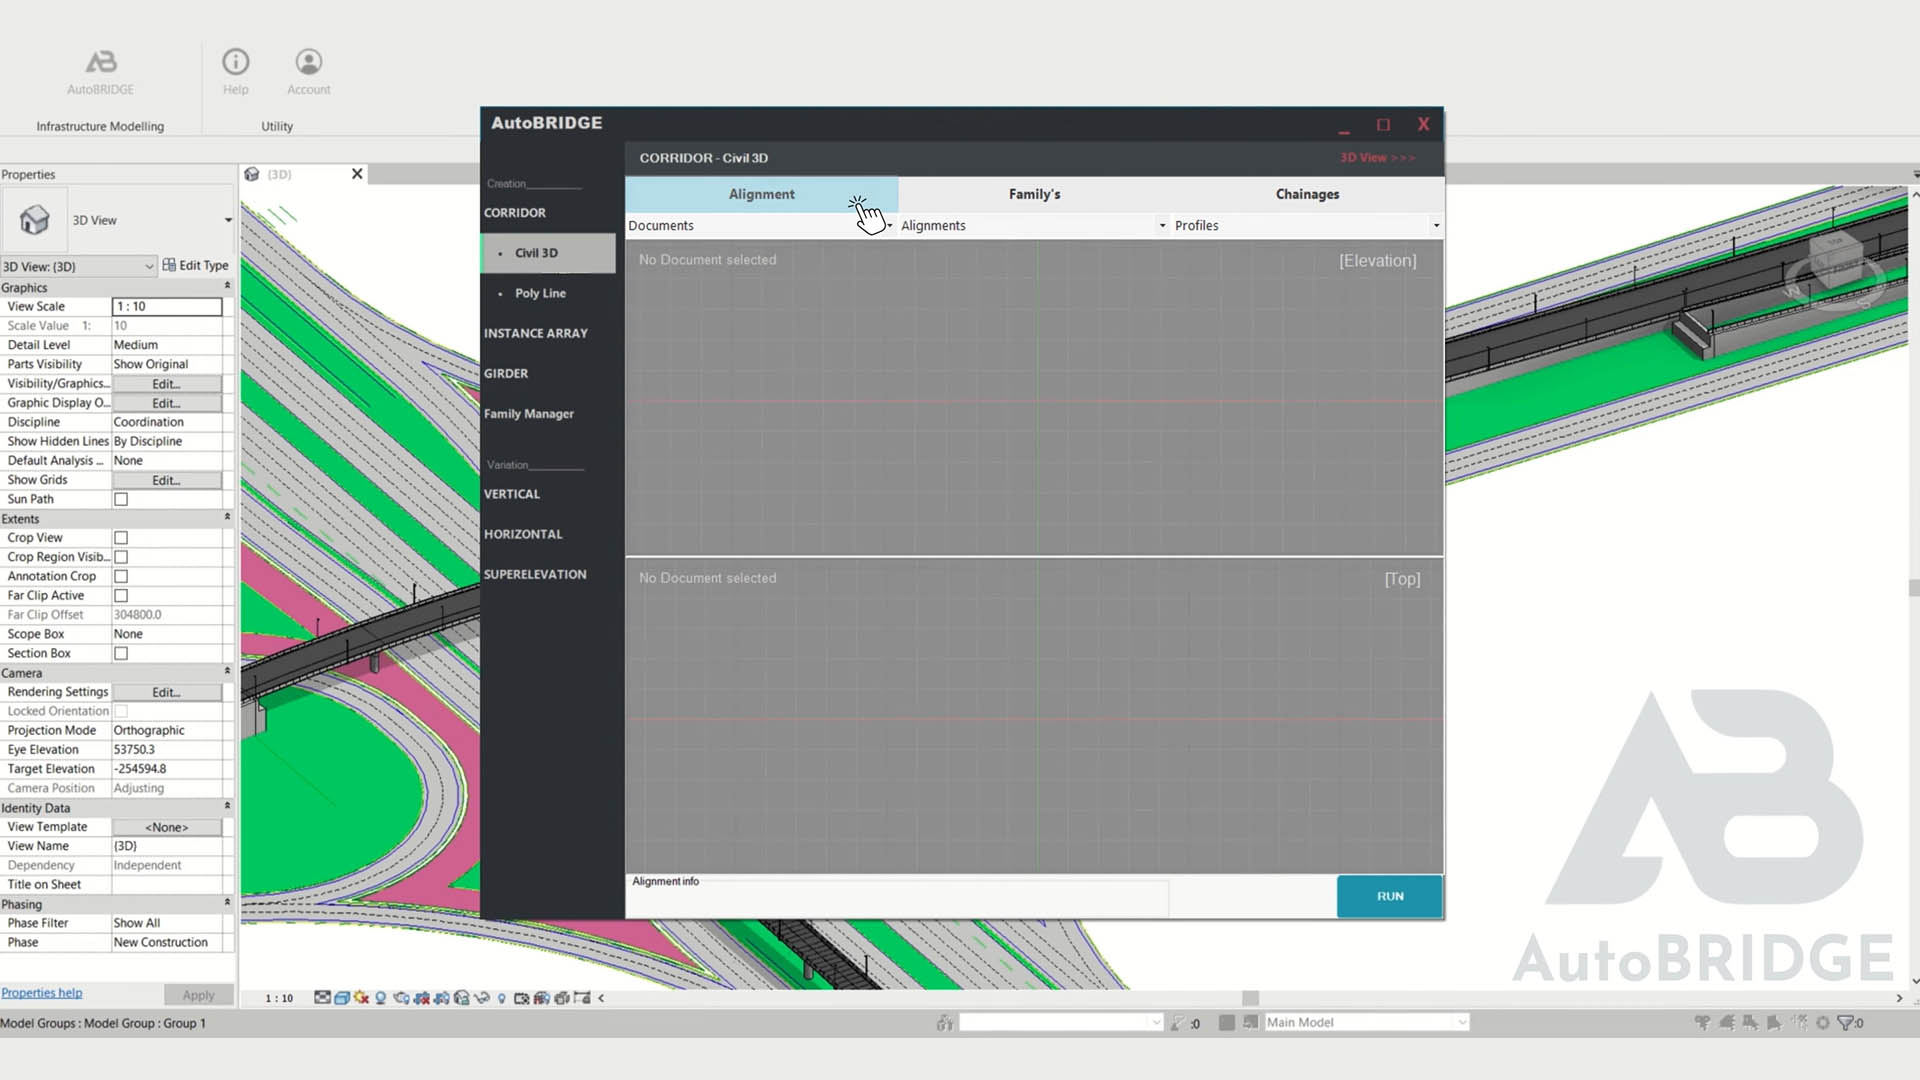
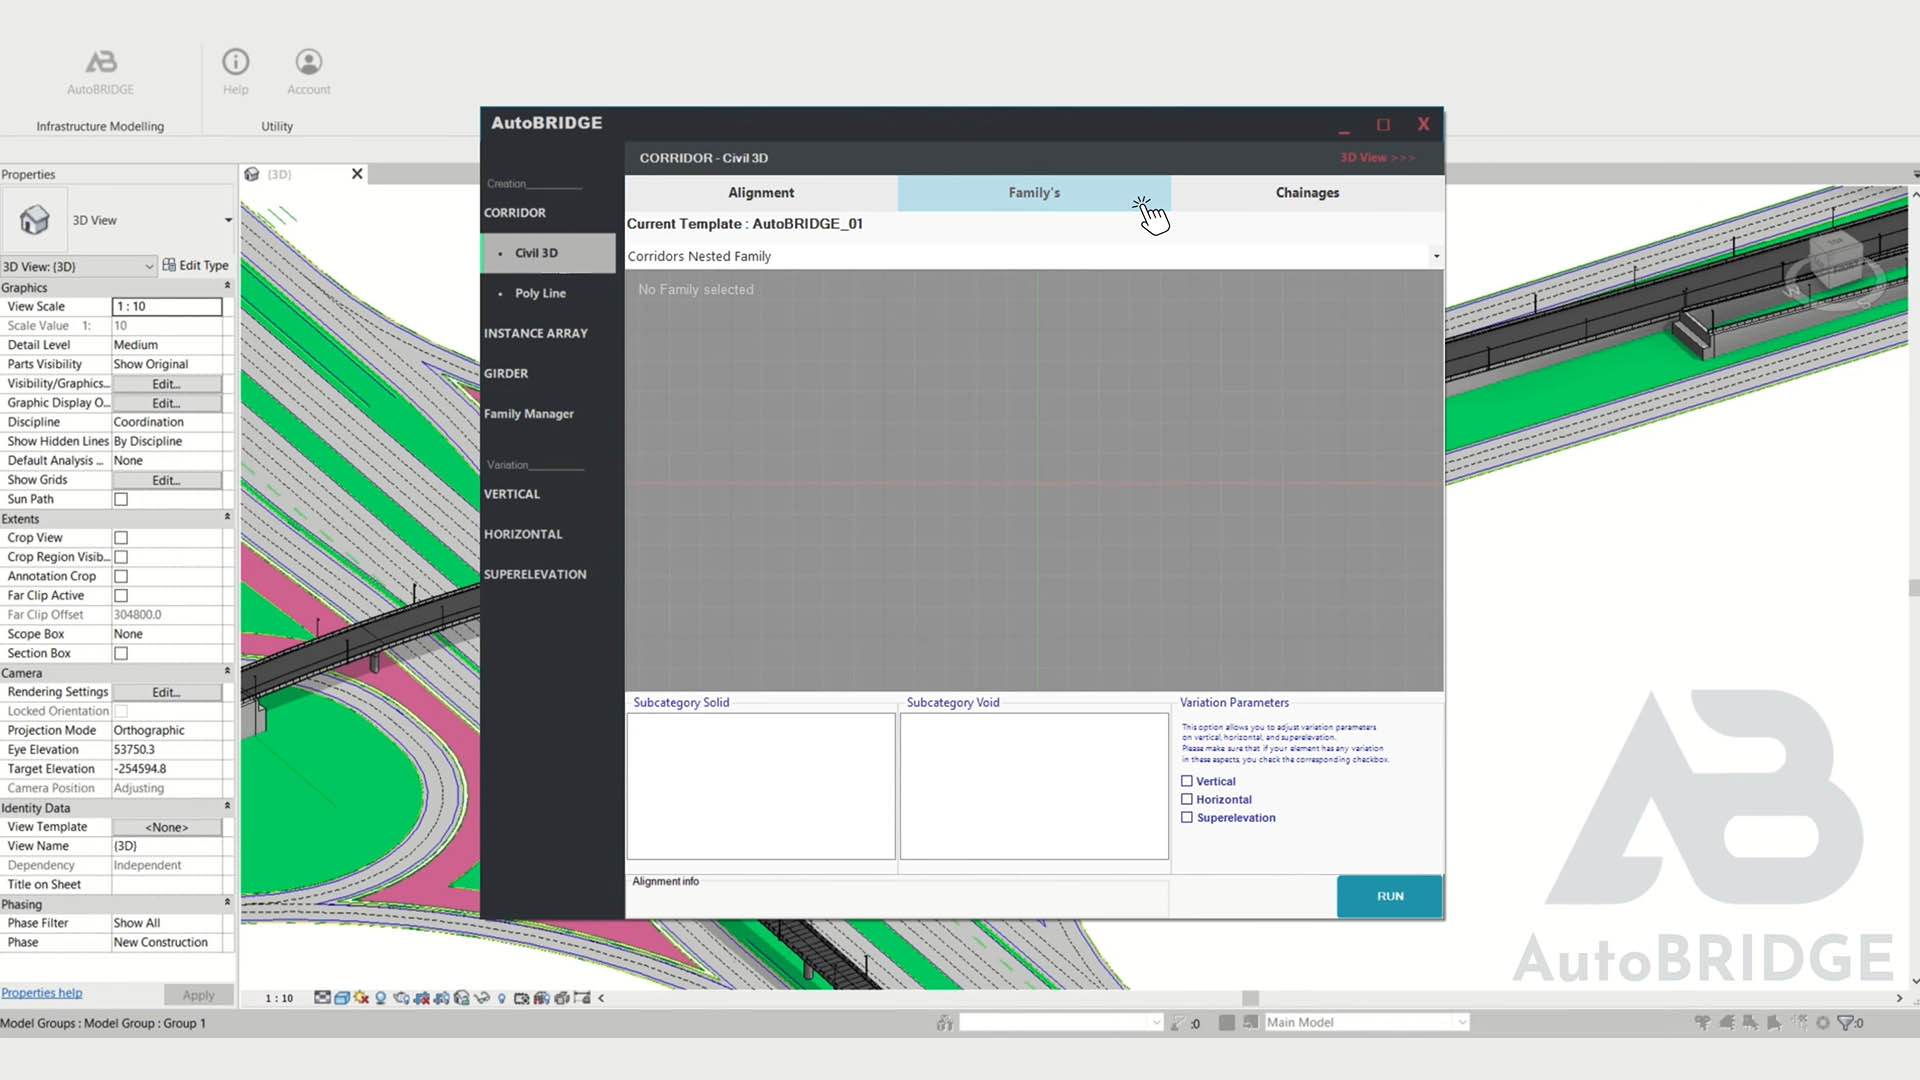
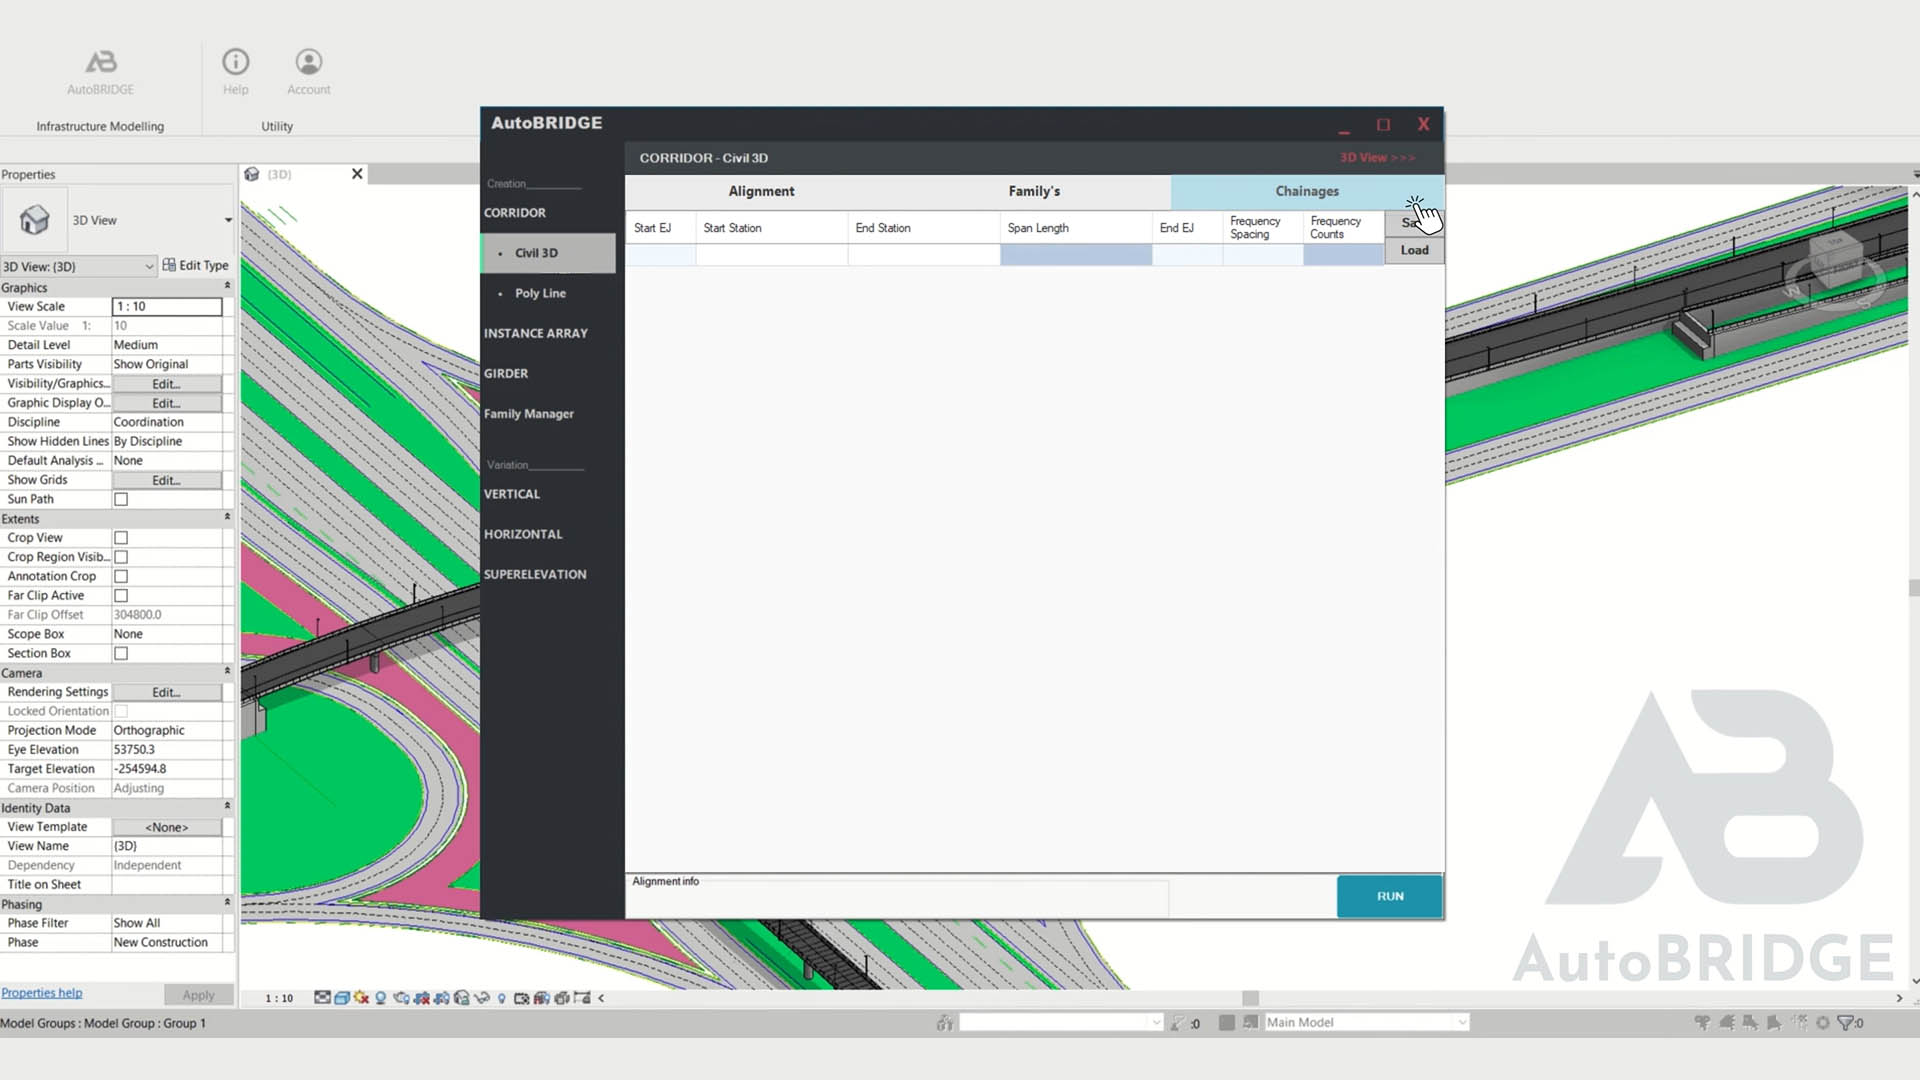
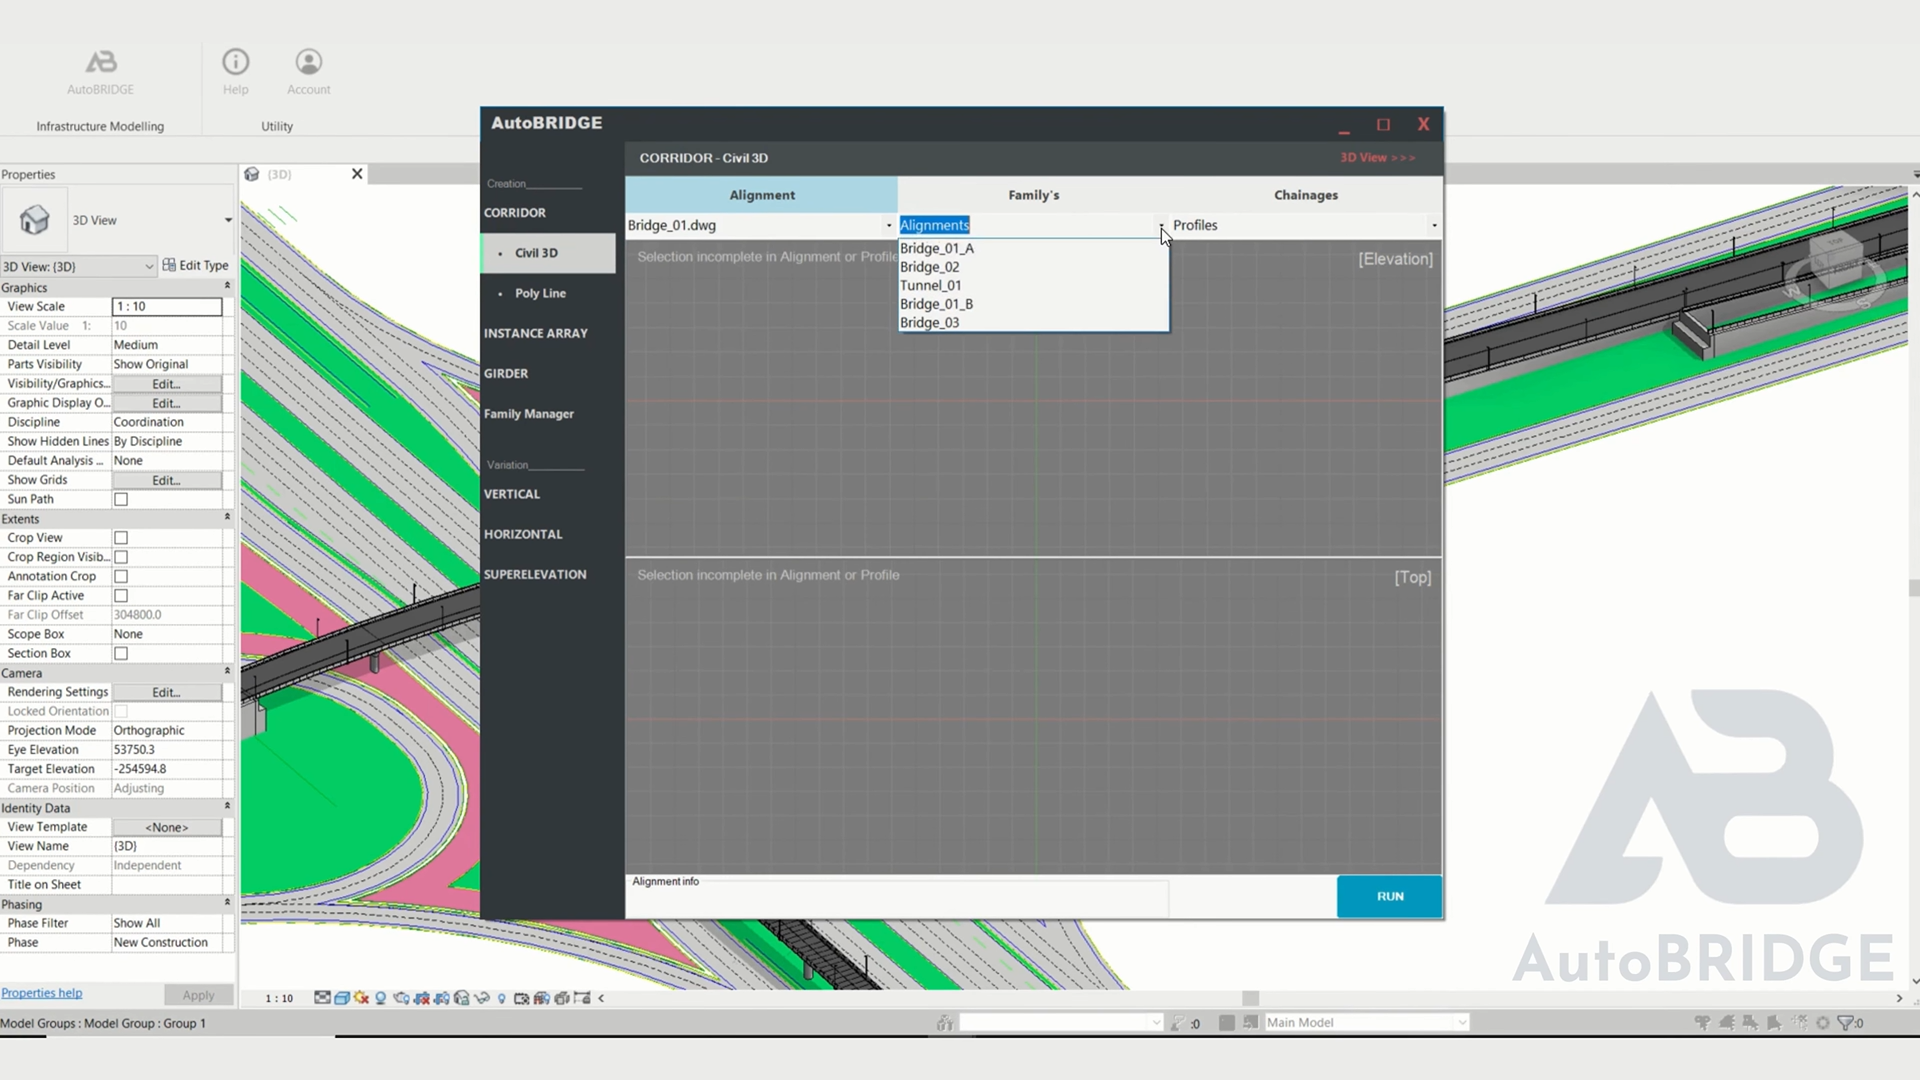
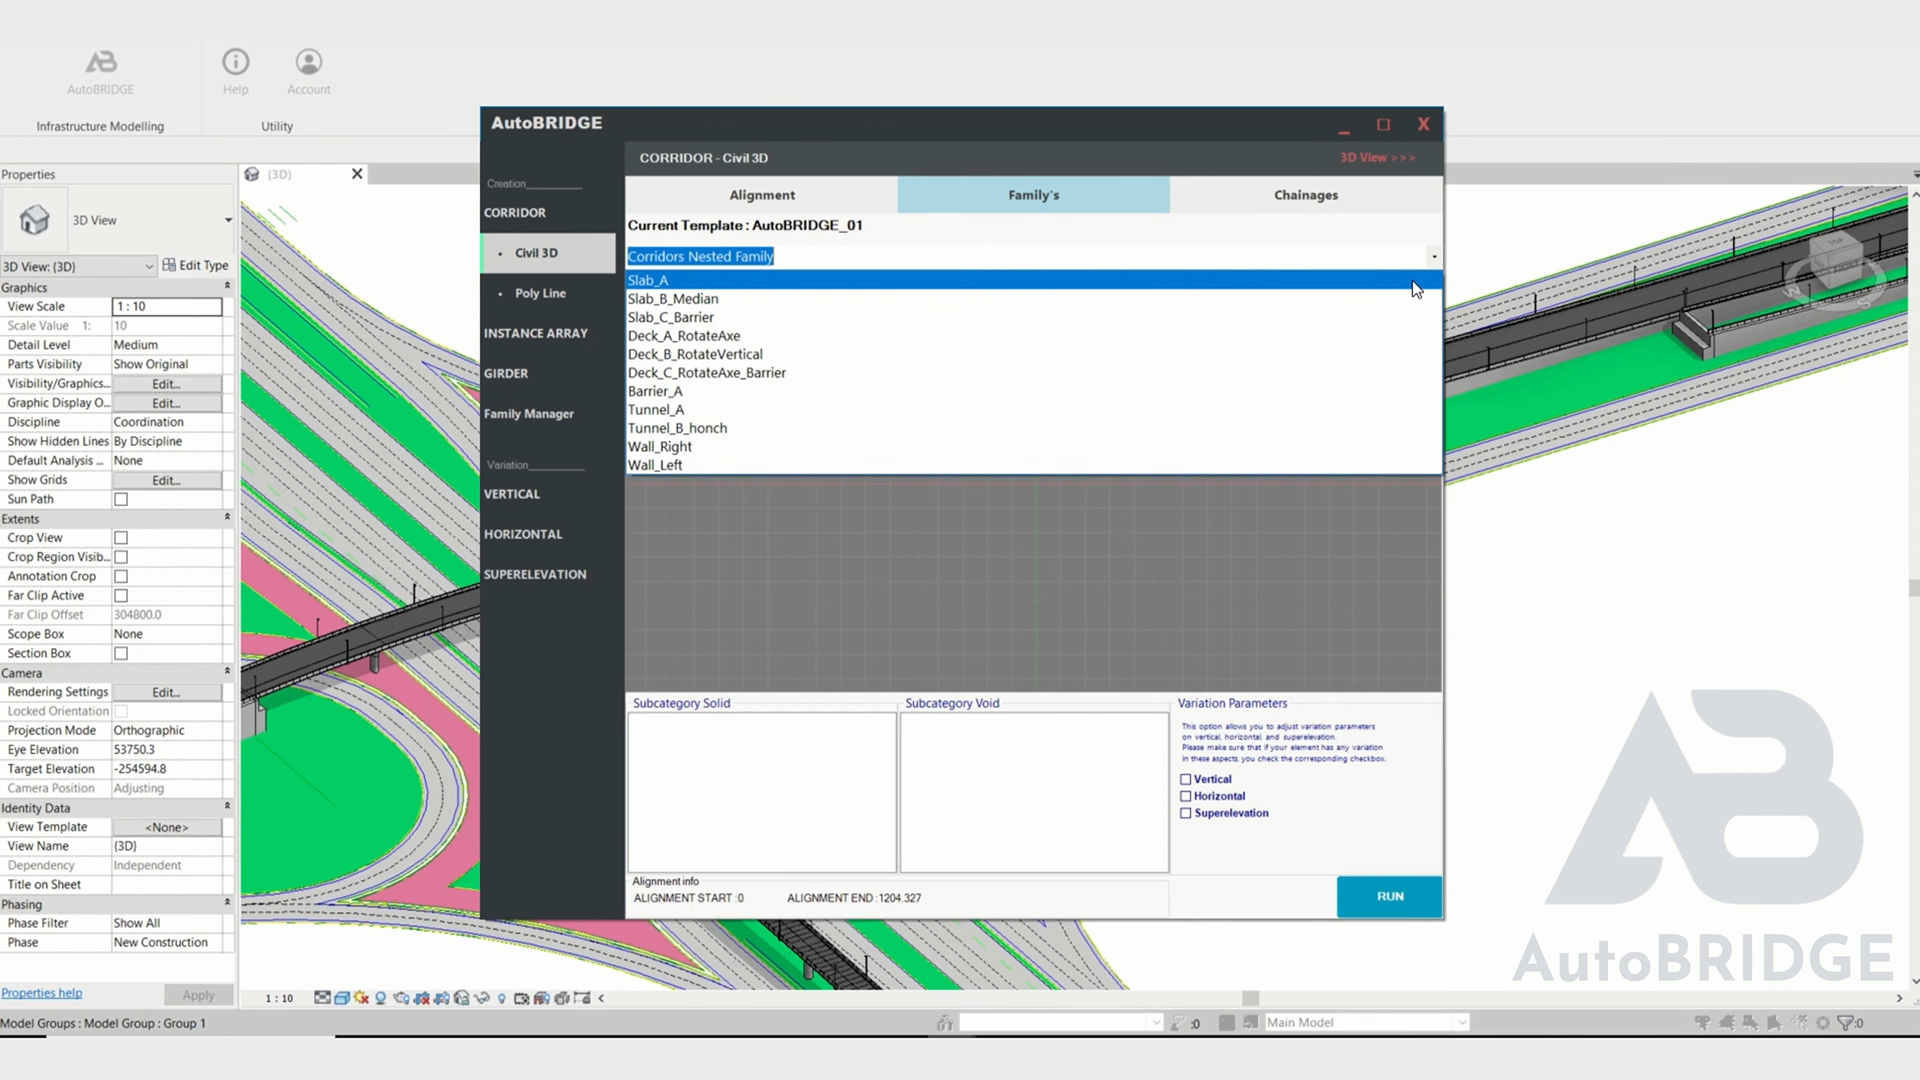
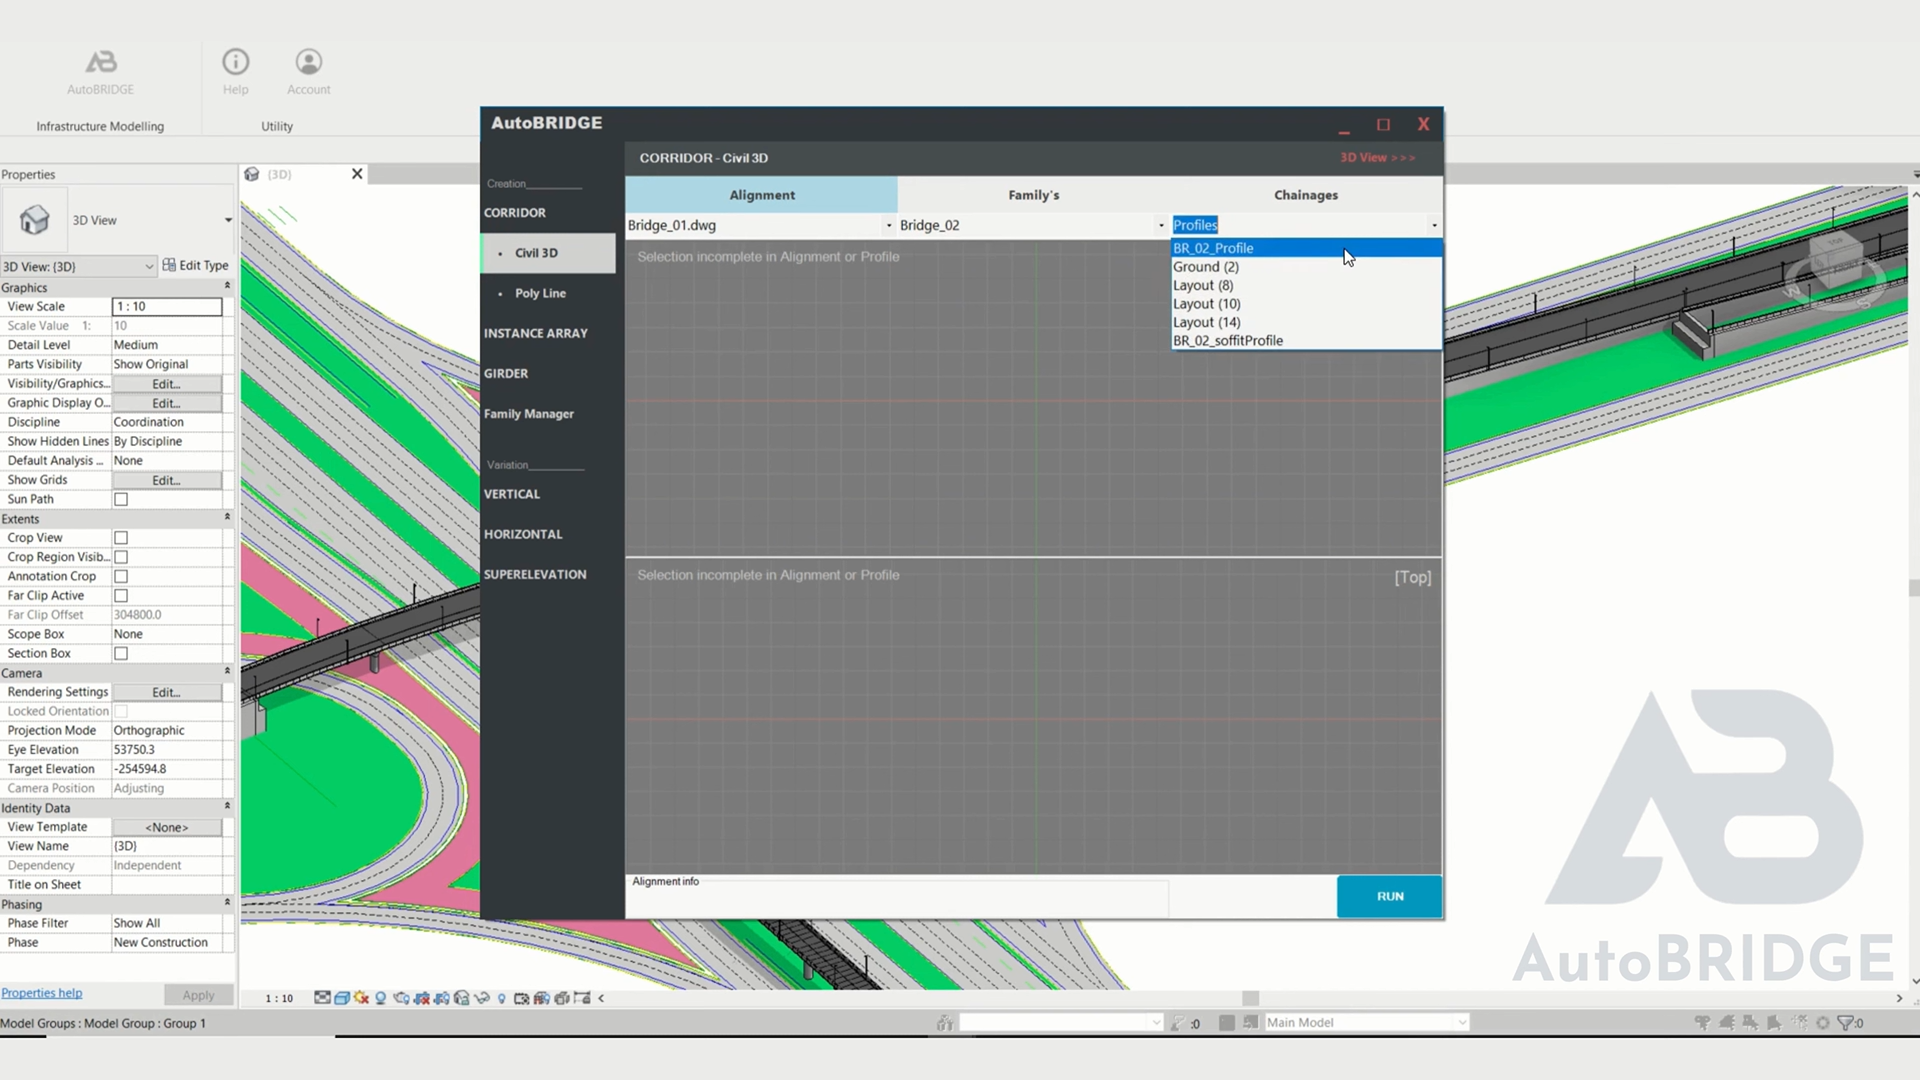
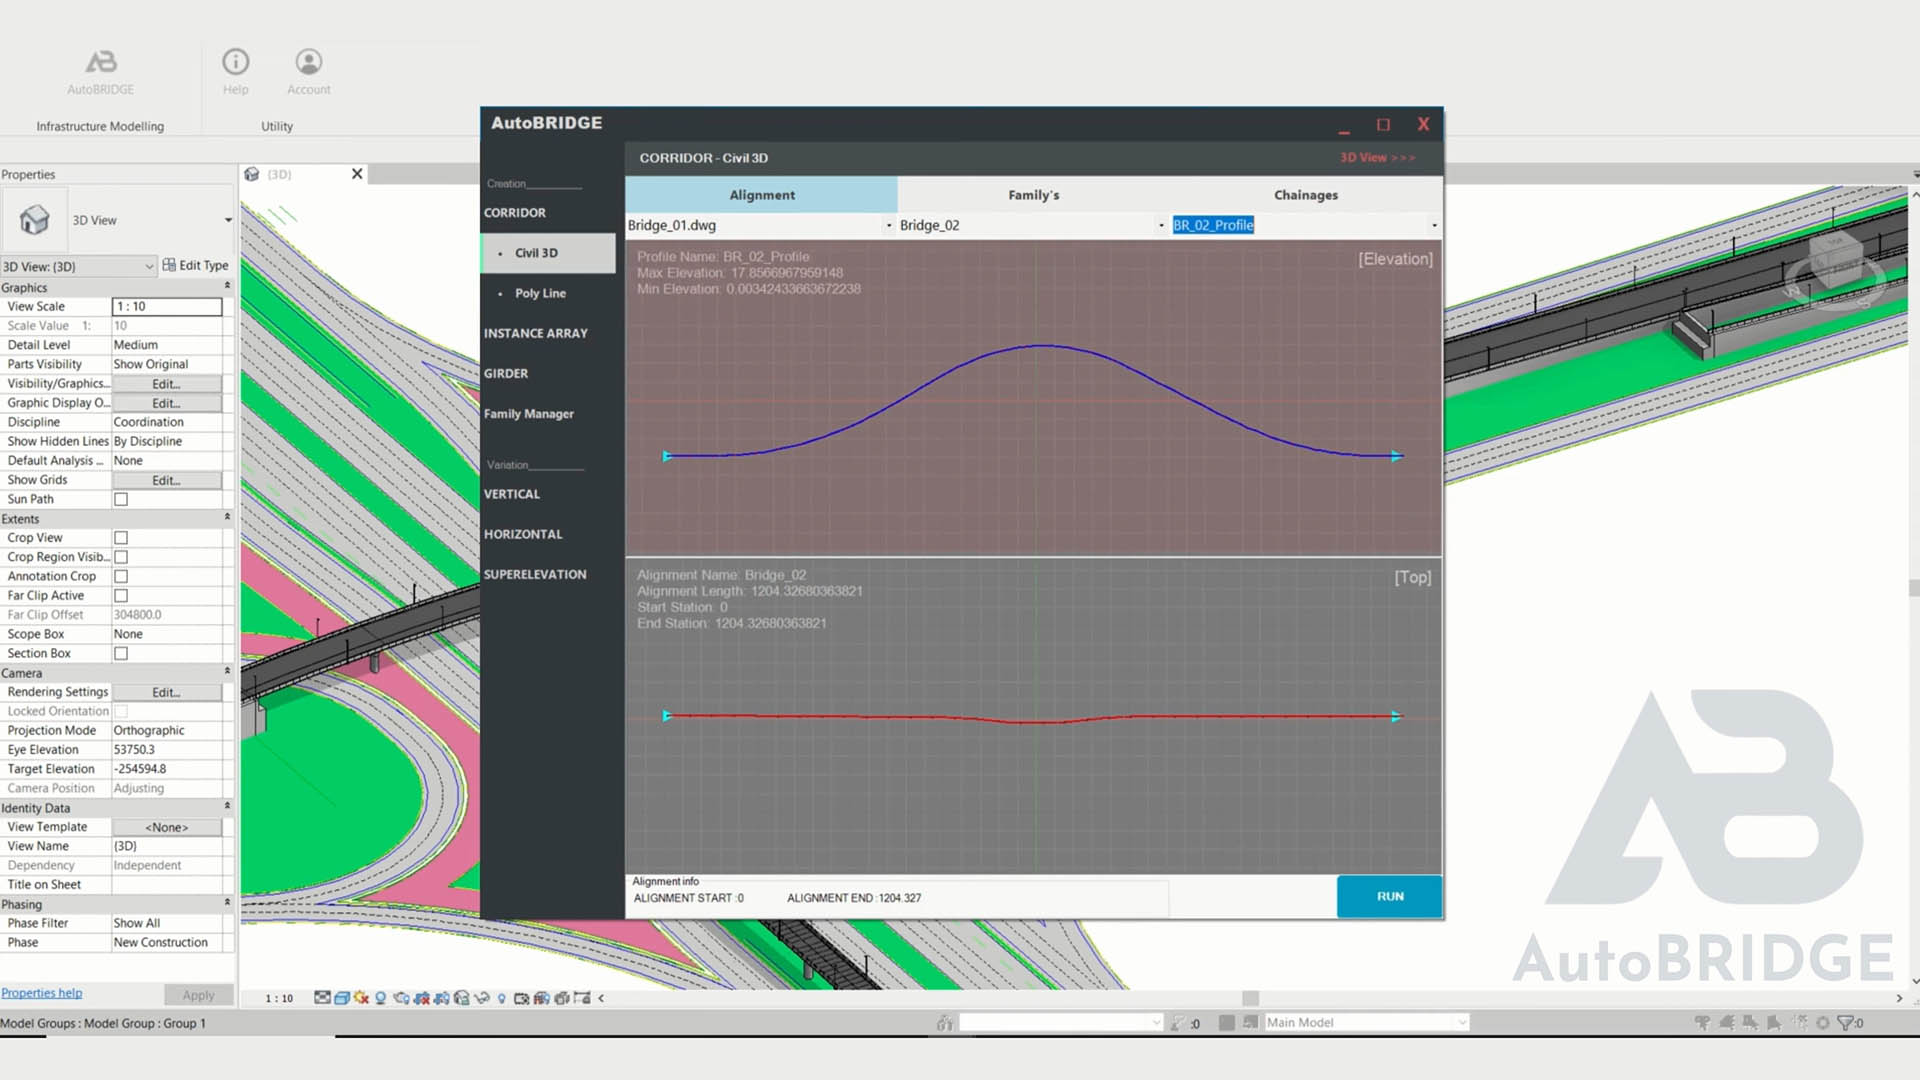
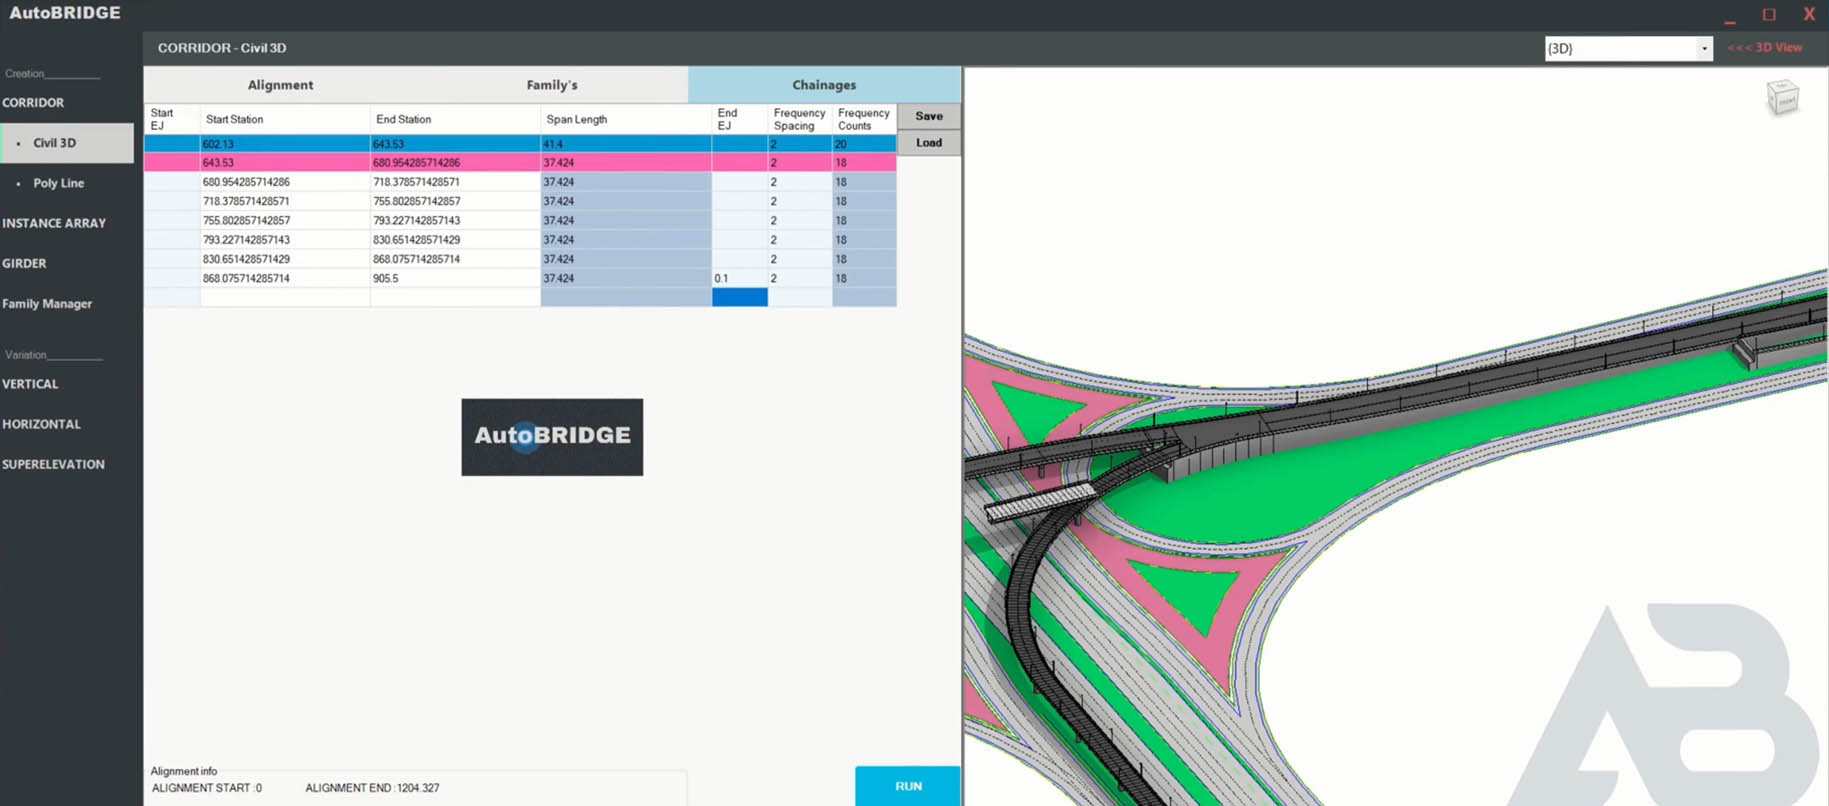
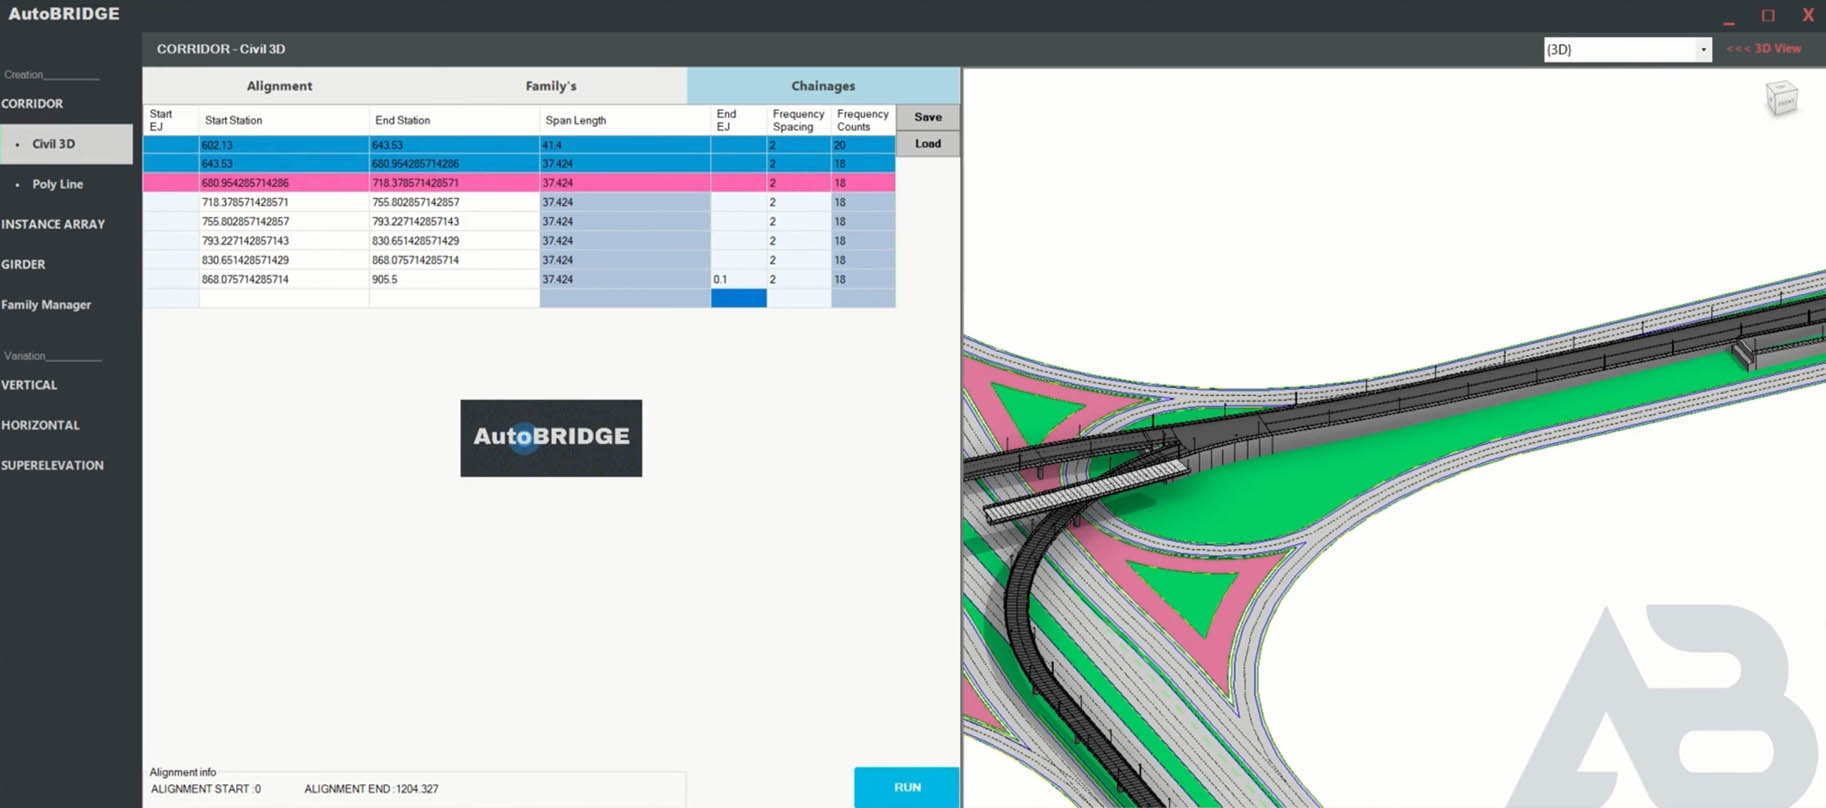
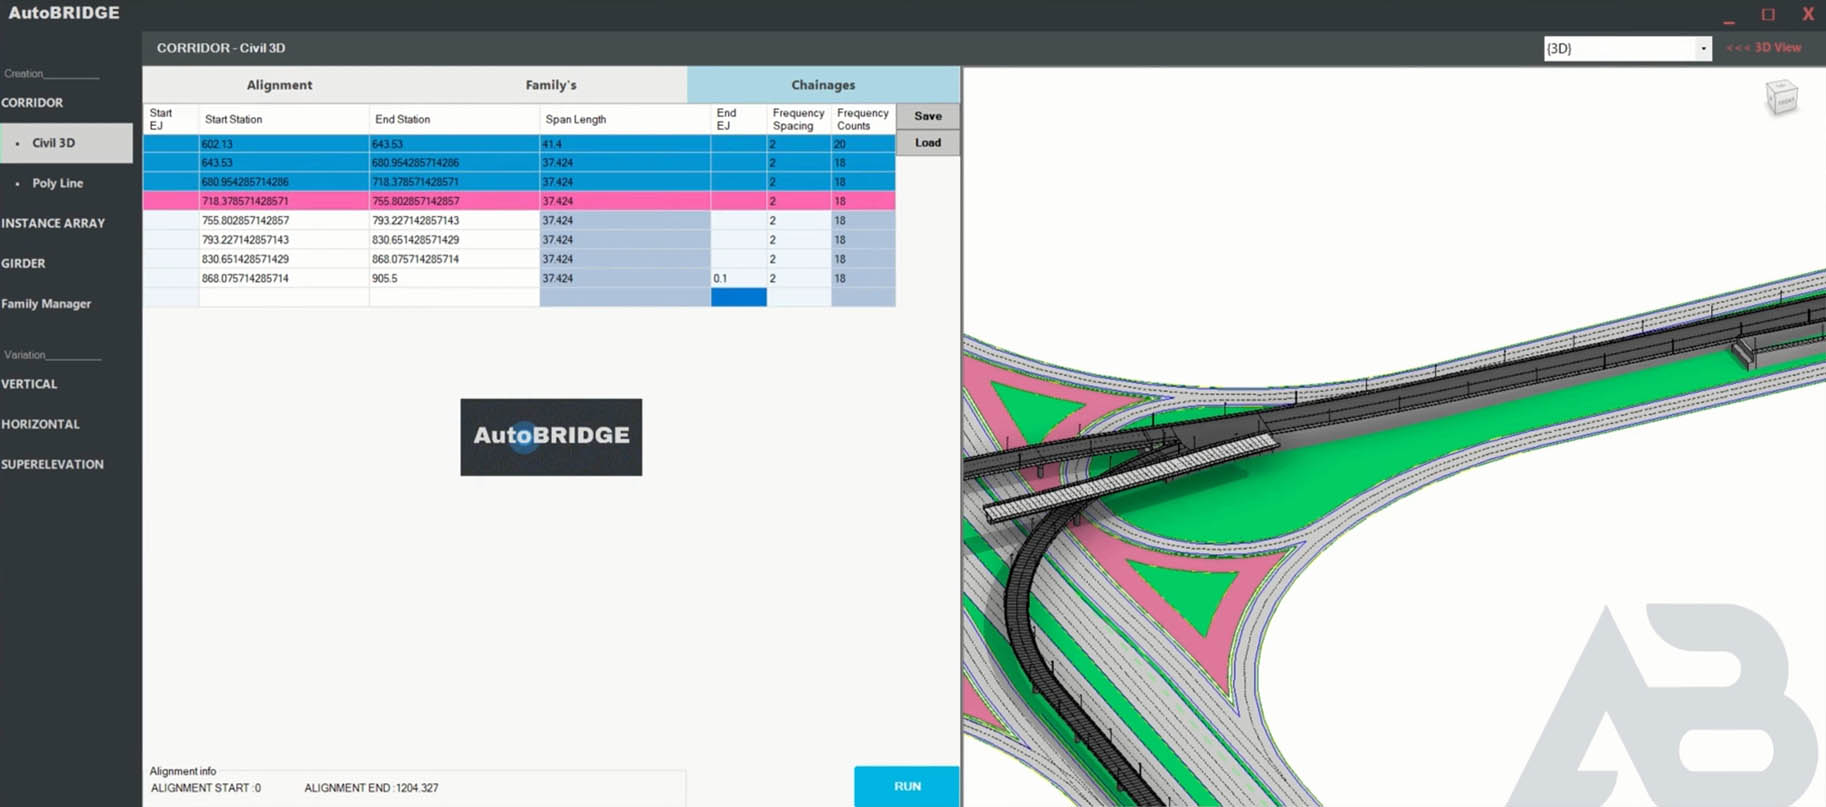
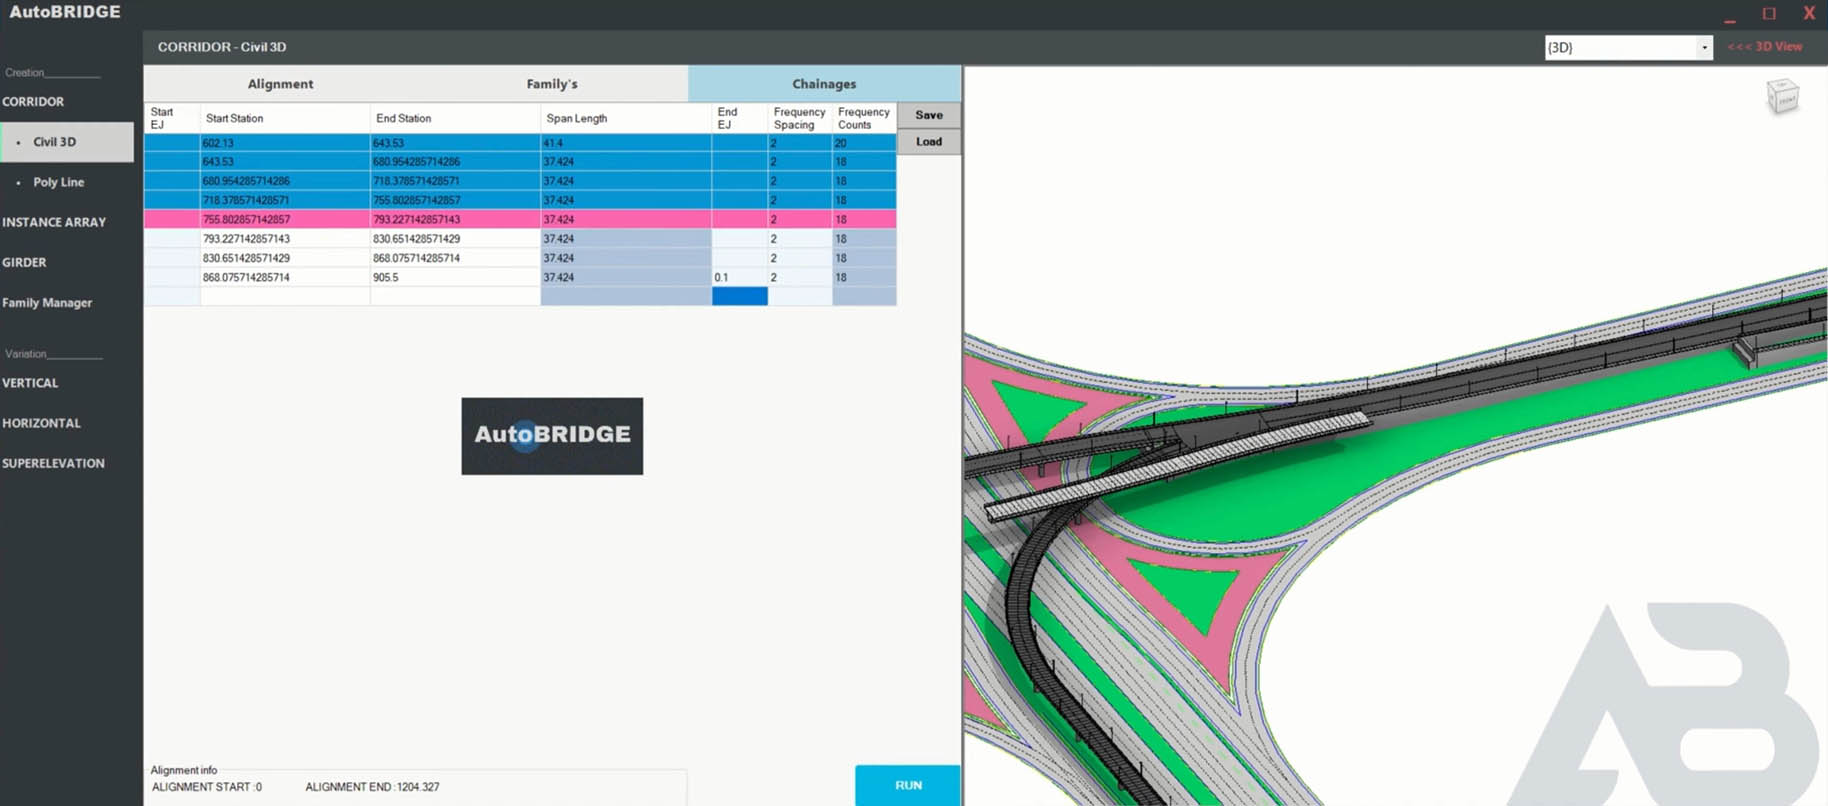
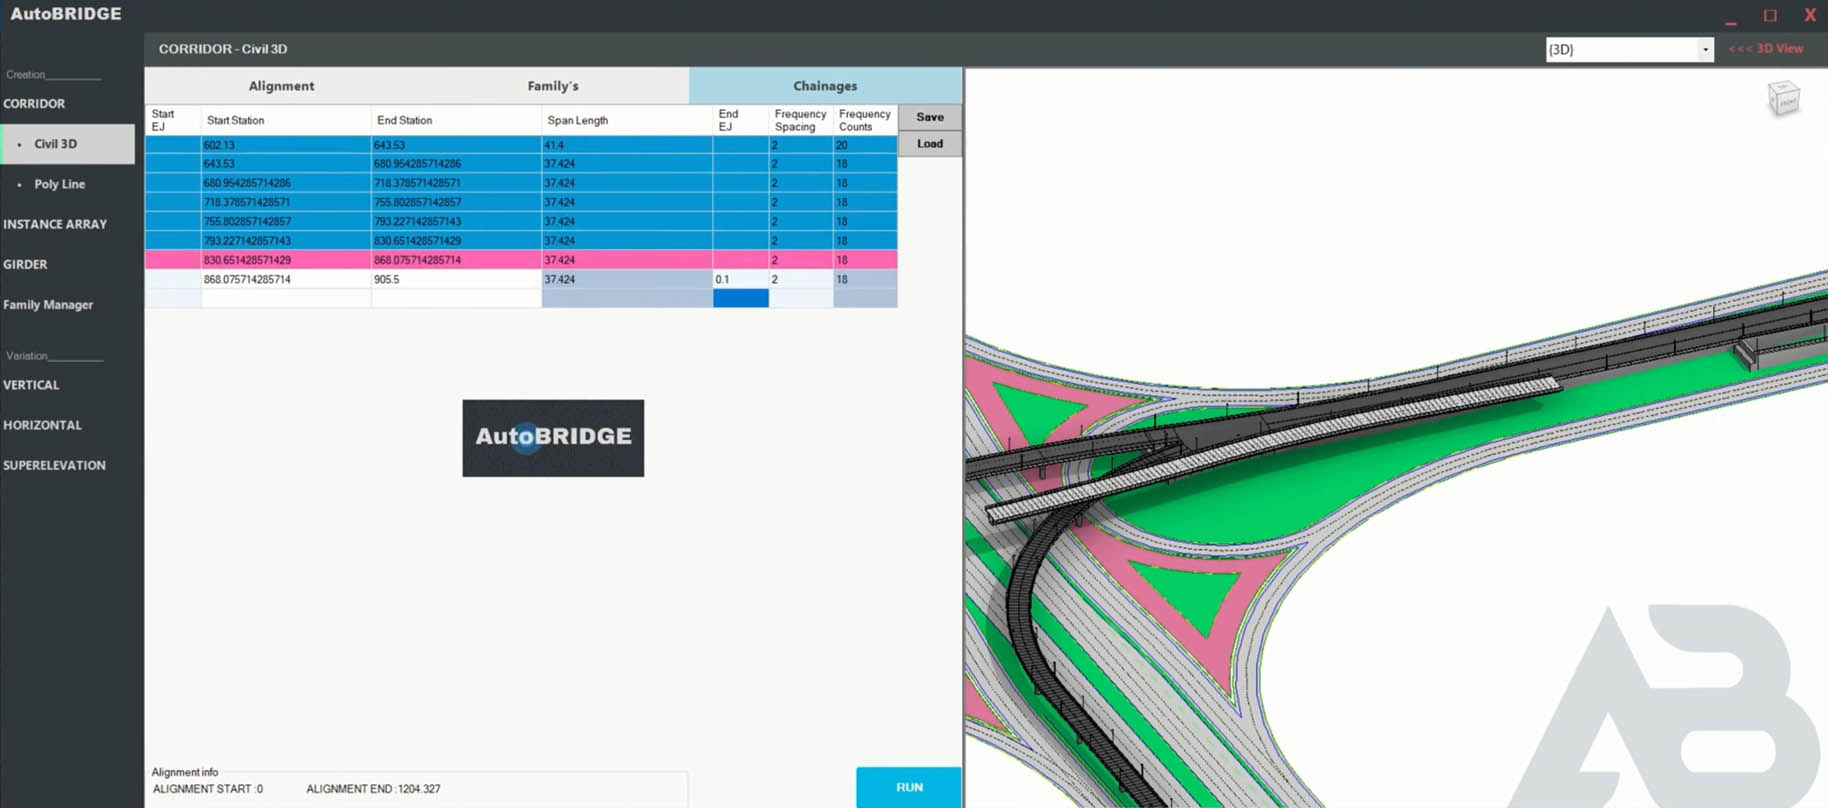
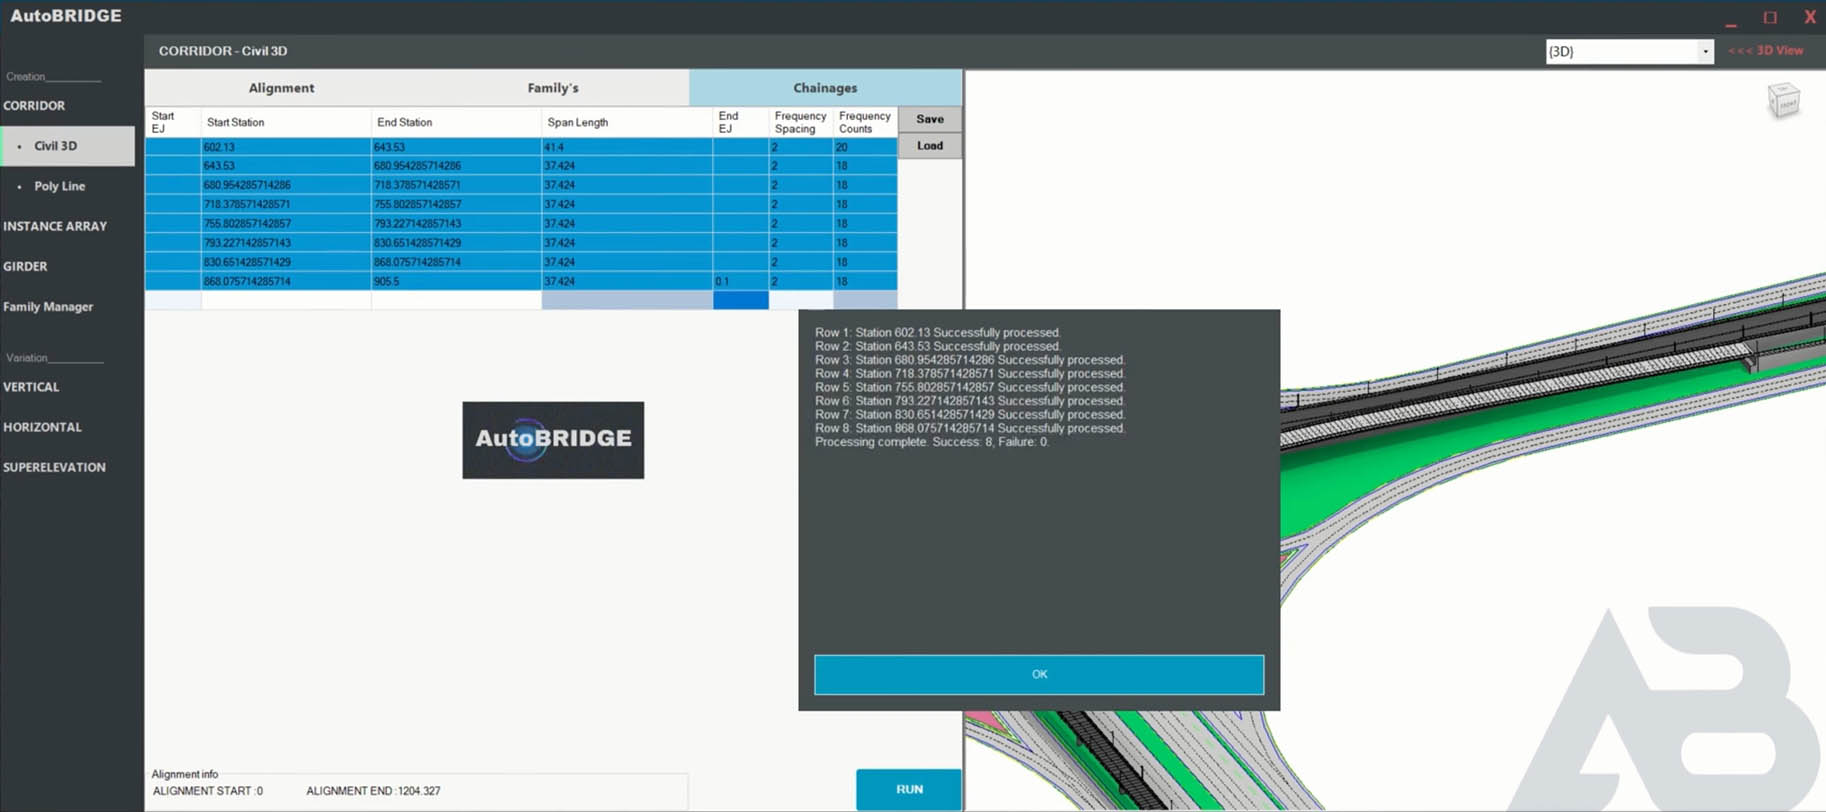
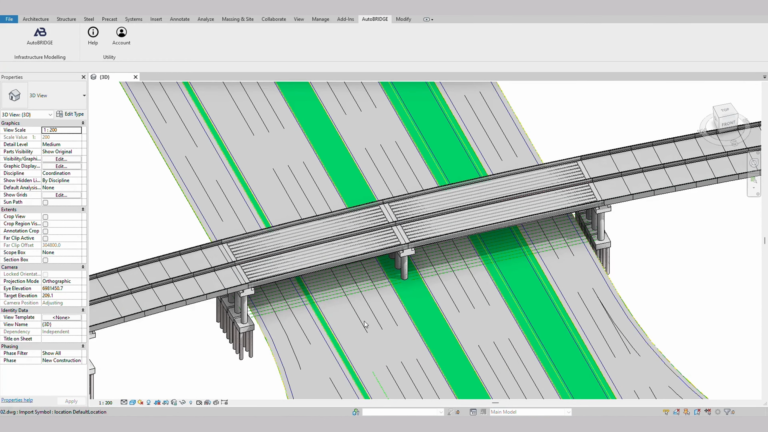
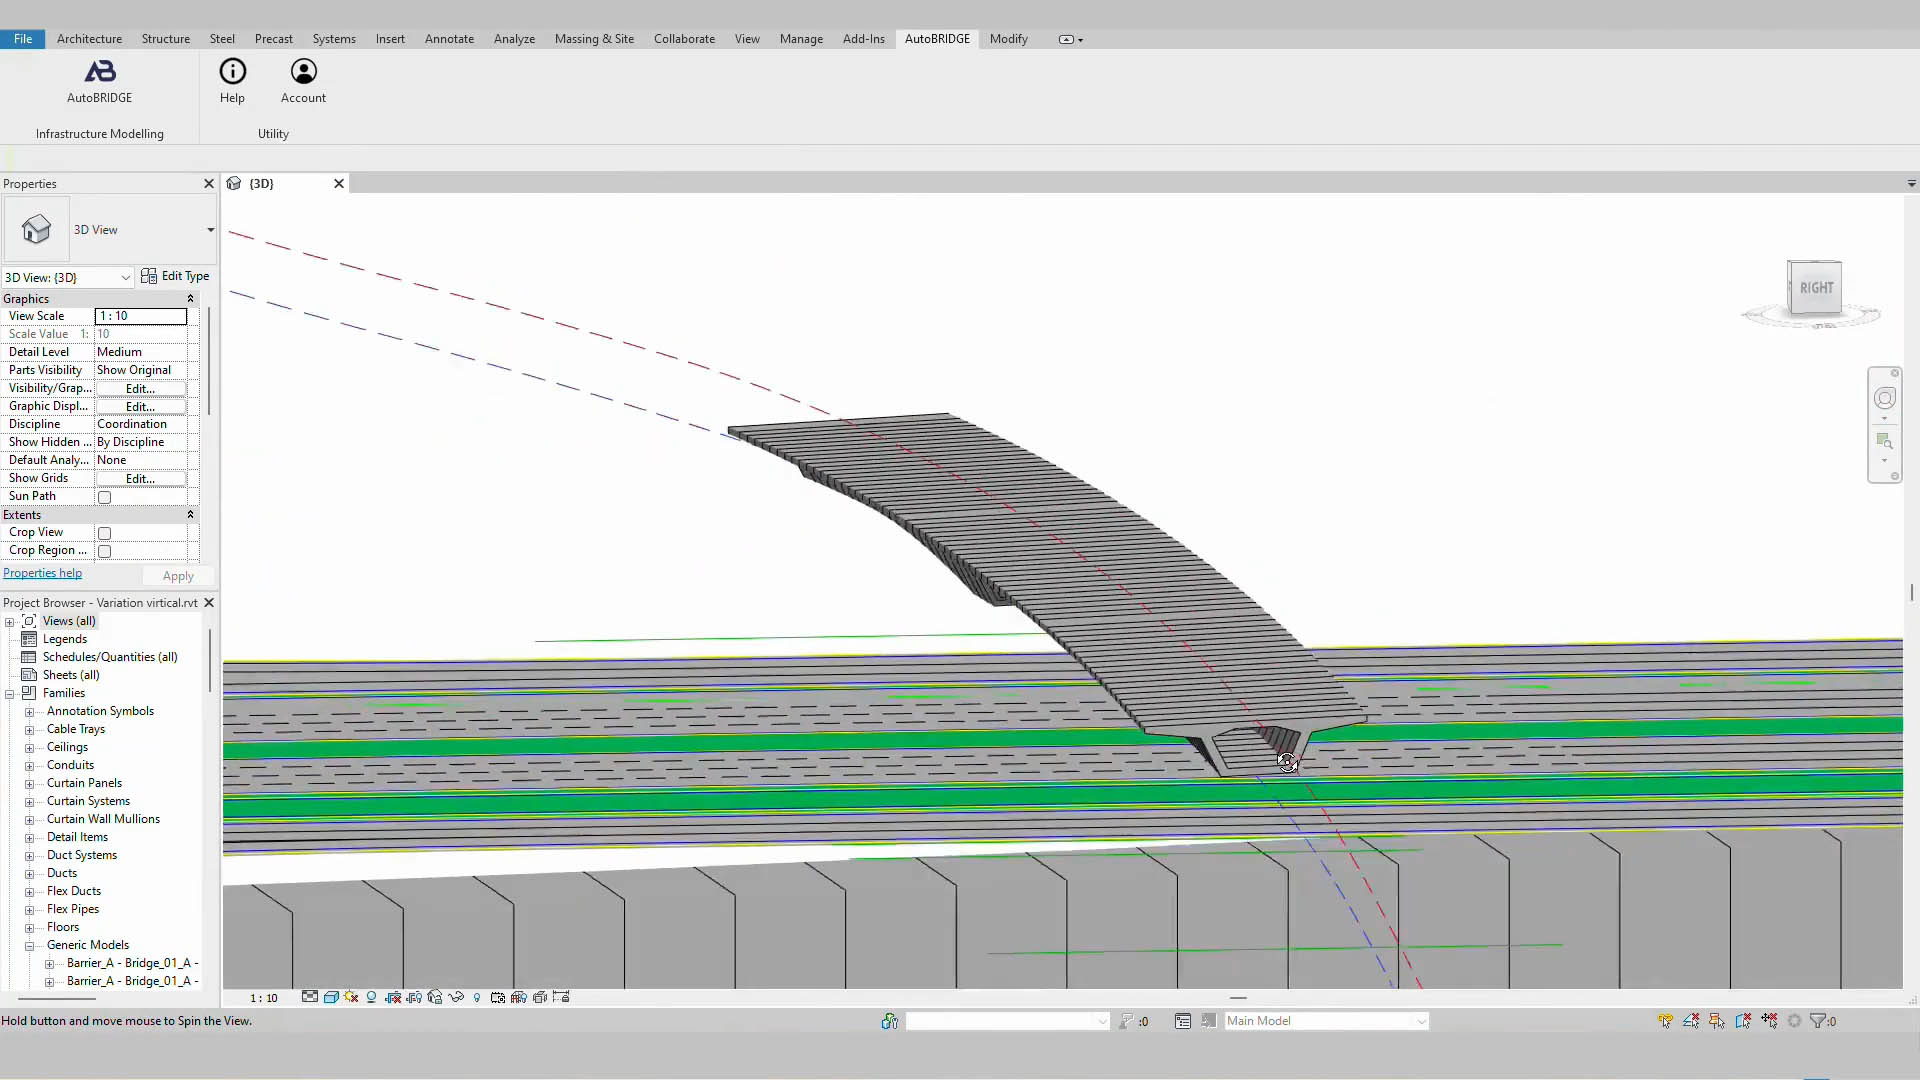
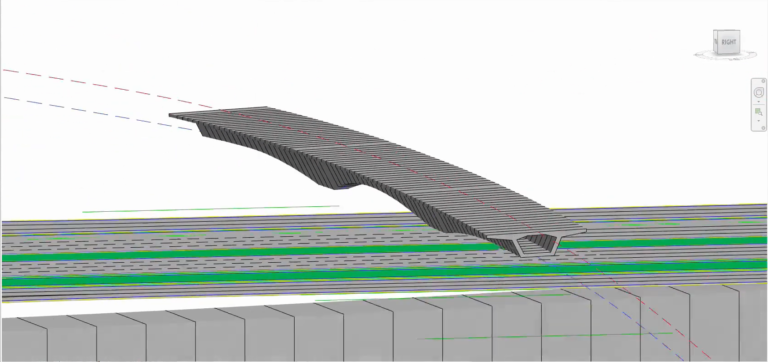
Corridor Creation Using Civil 3D Alignment Data
Streamline the creation of detailed infrastructure corridors by seamlessly integrating alignment and profile data from Civil 3D. AutoBRIDGE accelerates corridor development by enabling users to define alignments, select Revit nested families, and execute precise corridor creation tasks with ease.
Unlock precision and efficiency with our comprehensive video tutorial on mastering the Corridor Creation feature!
Feature
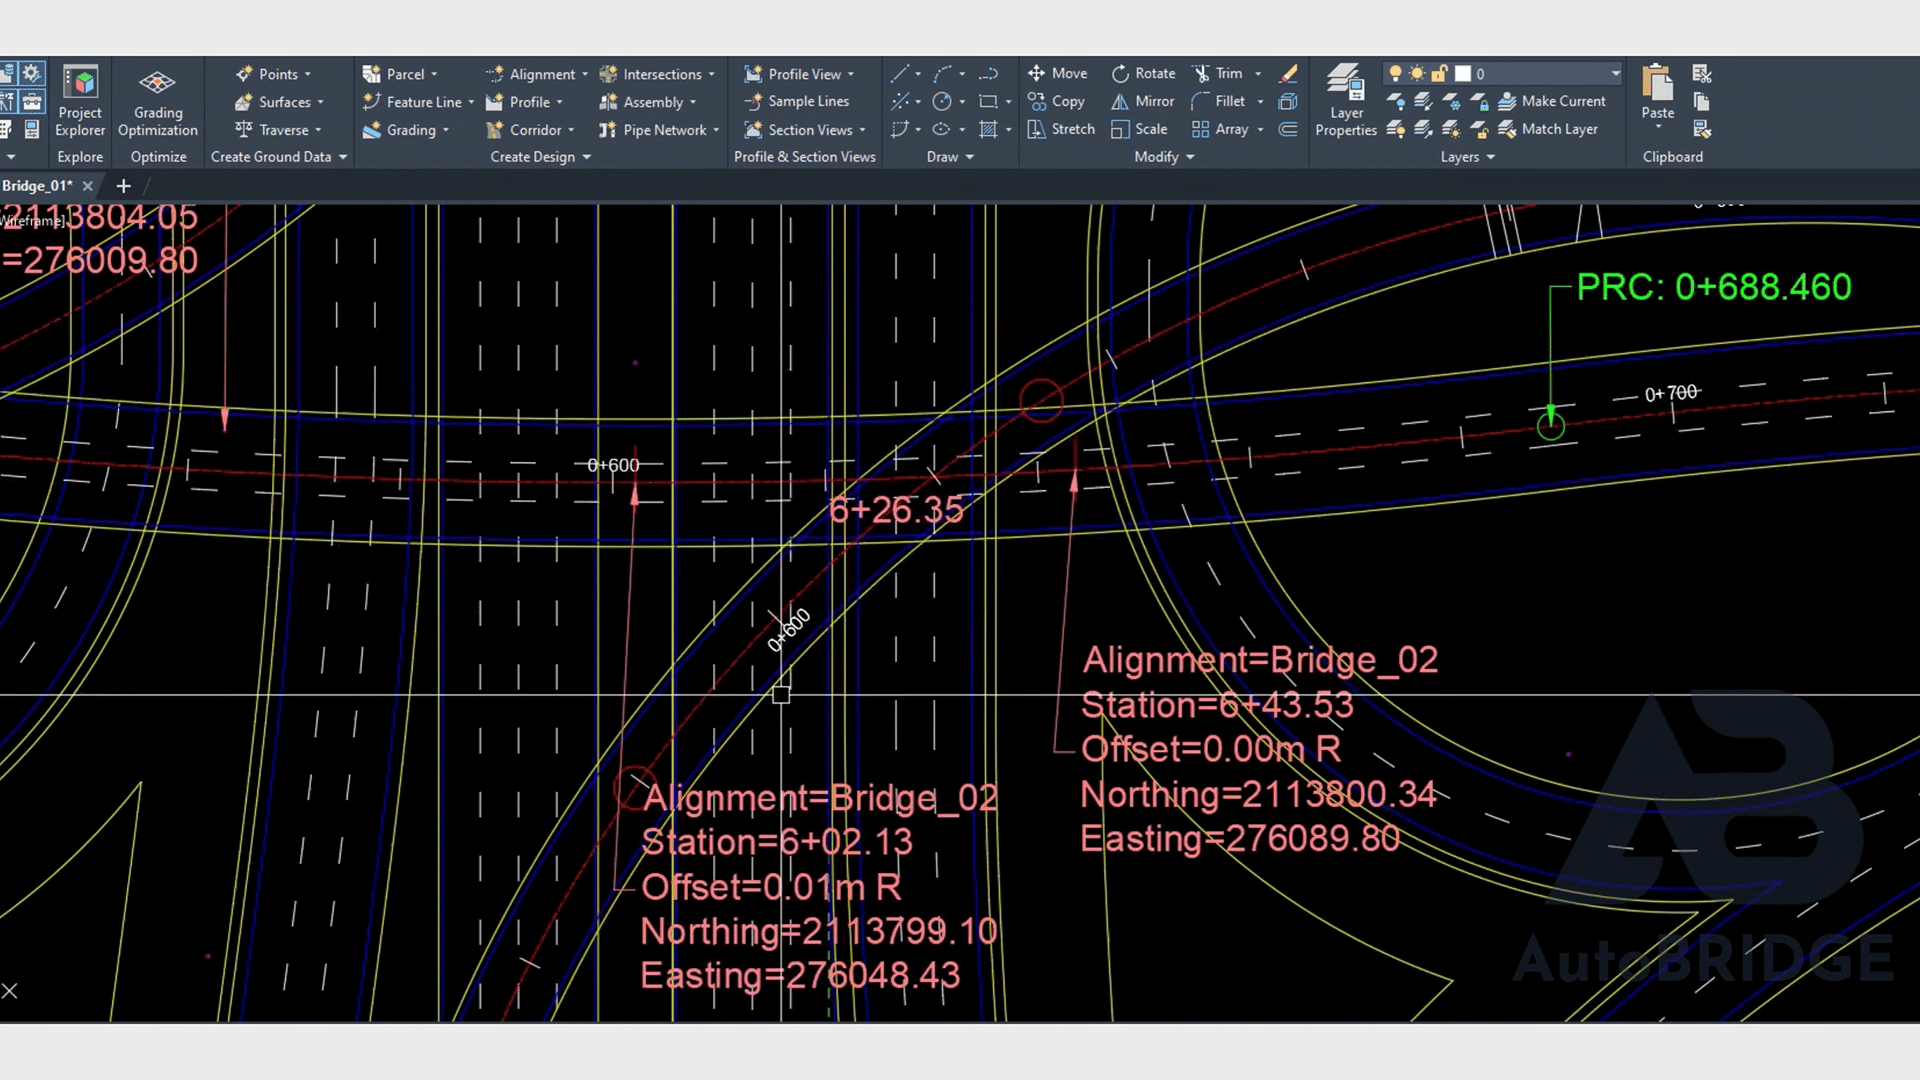
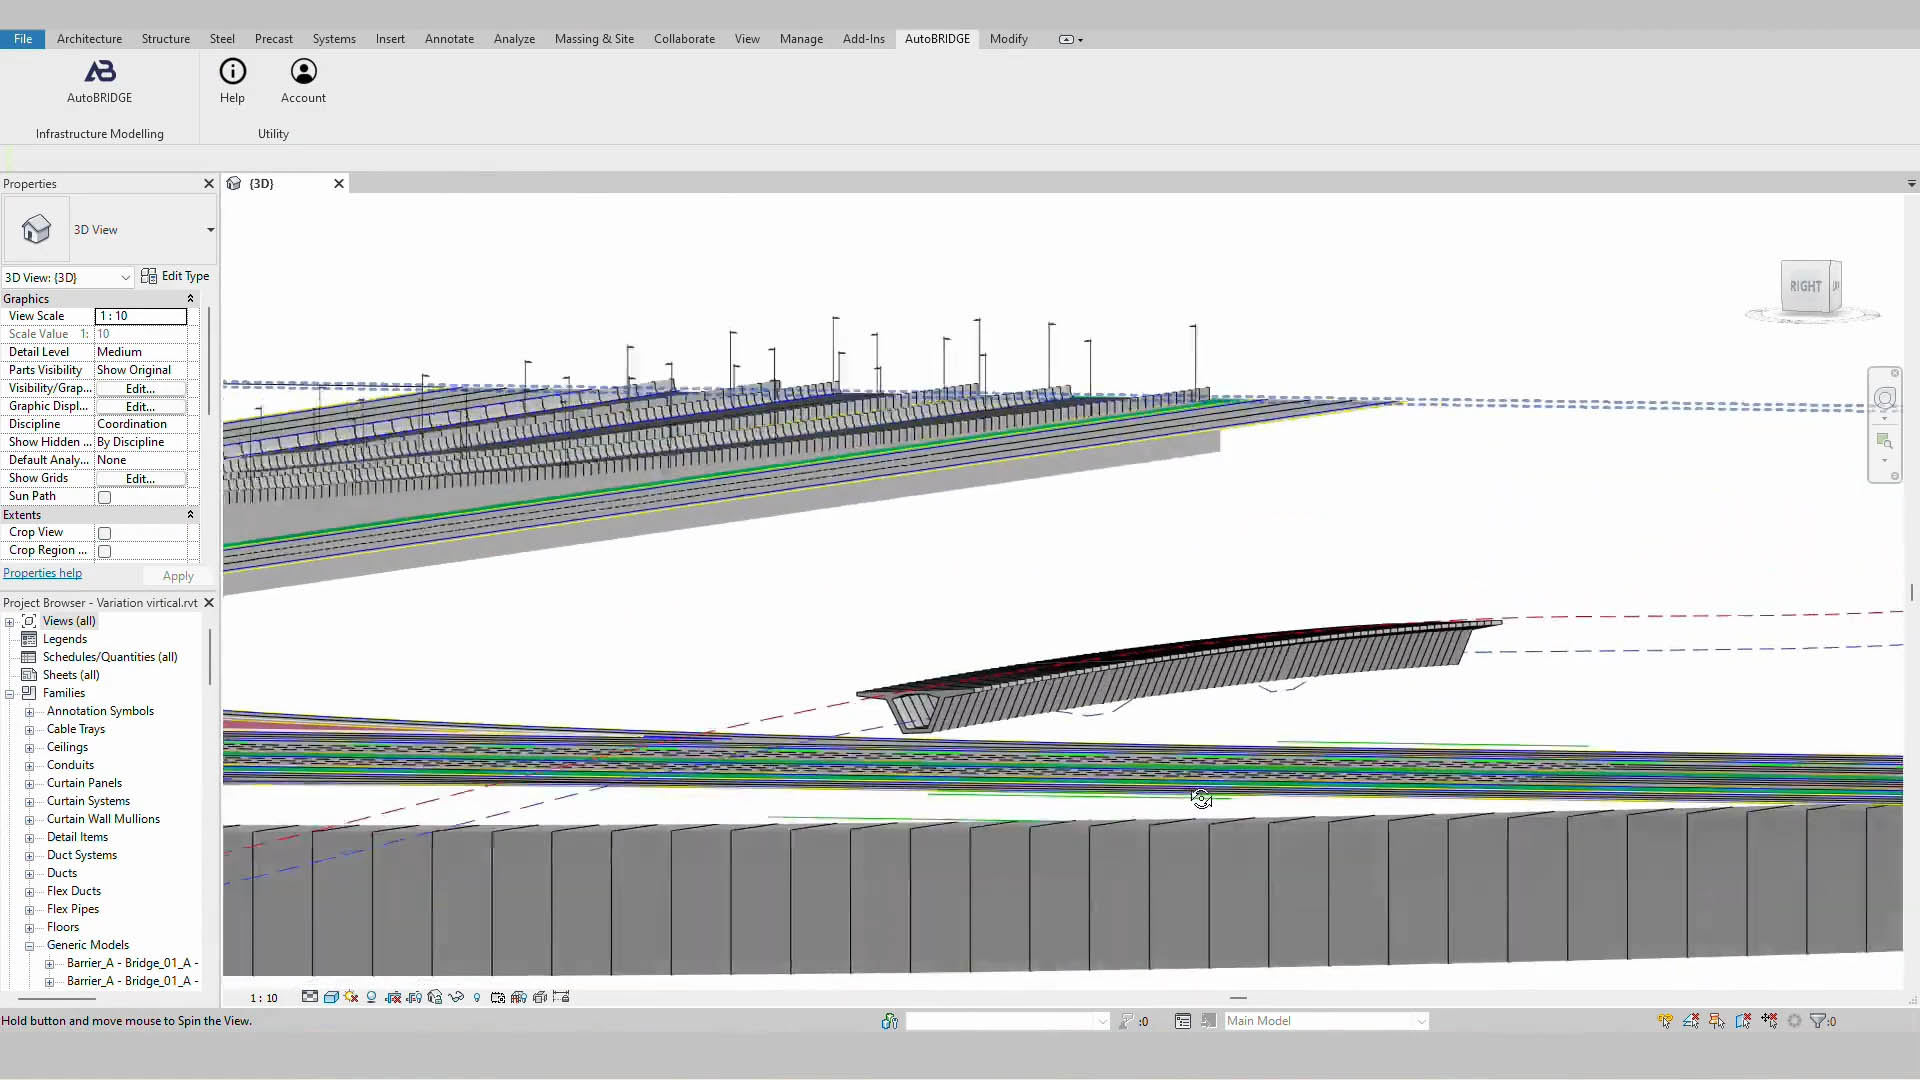
Corridor Creation Using 3D Polyline
Streamline the creation of detailed infrastructure corridors by seamlessly integrating alignment and profile data from imported 3D polyline. AutoBRIDGE accelerates corridor development by enabling users to define alignments, select Revit nested families, and execute precise corridor creation tasks with ease.
Watch our step-by-step video tutorial to master corridor creation using 3D Polylines in AutoBRIDGE.
Feature
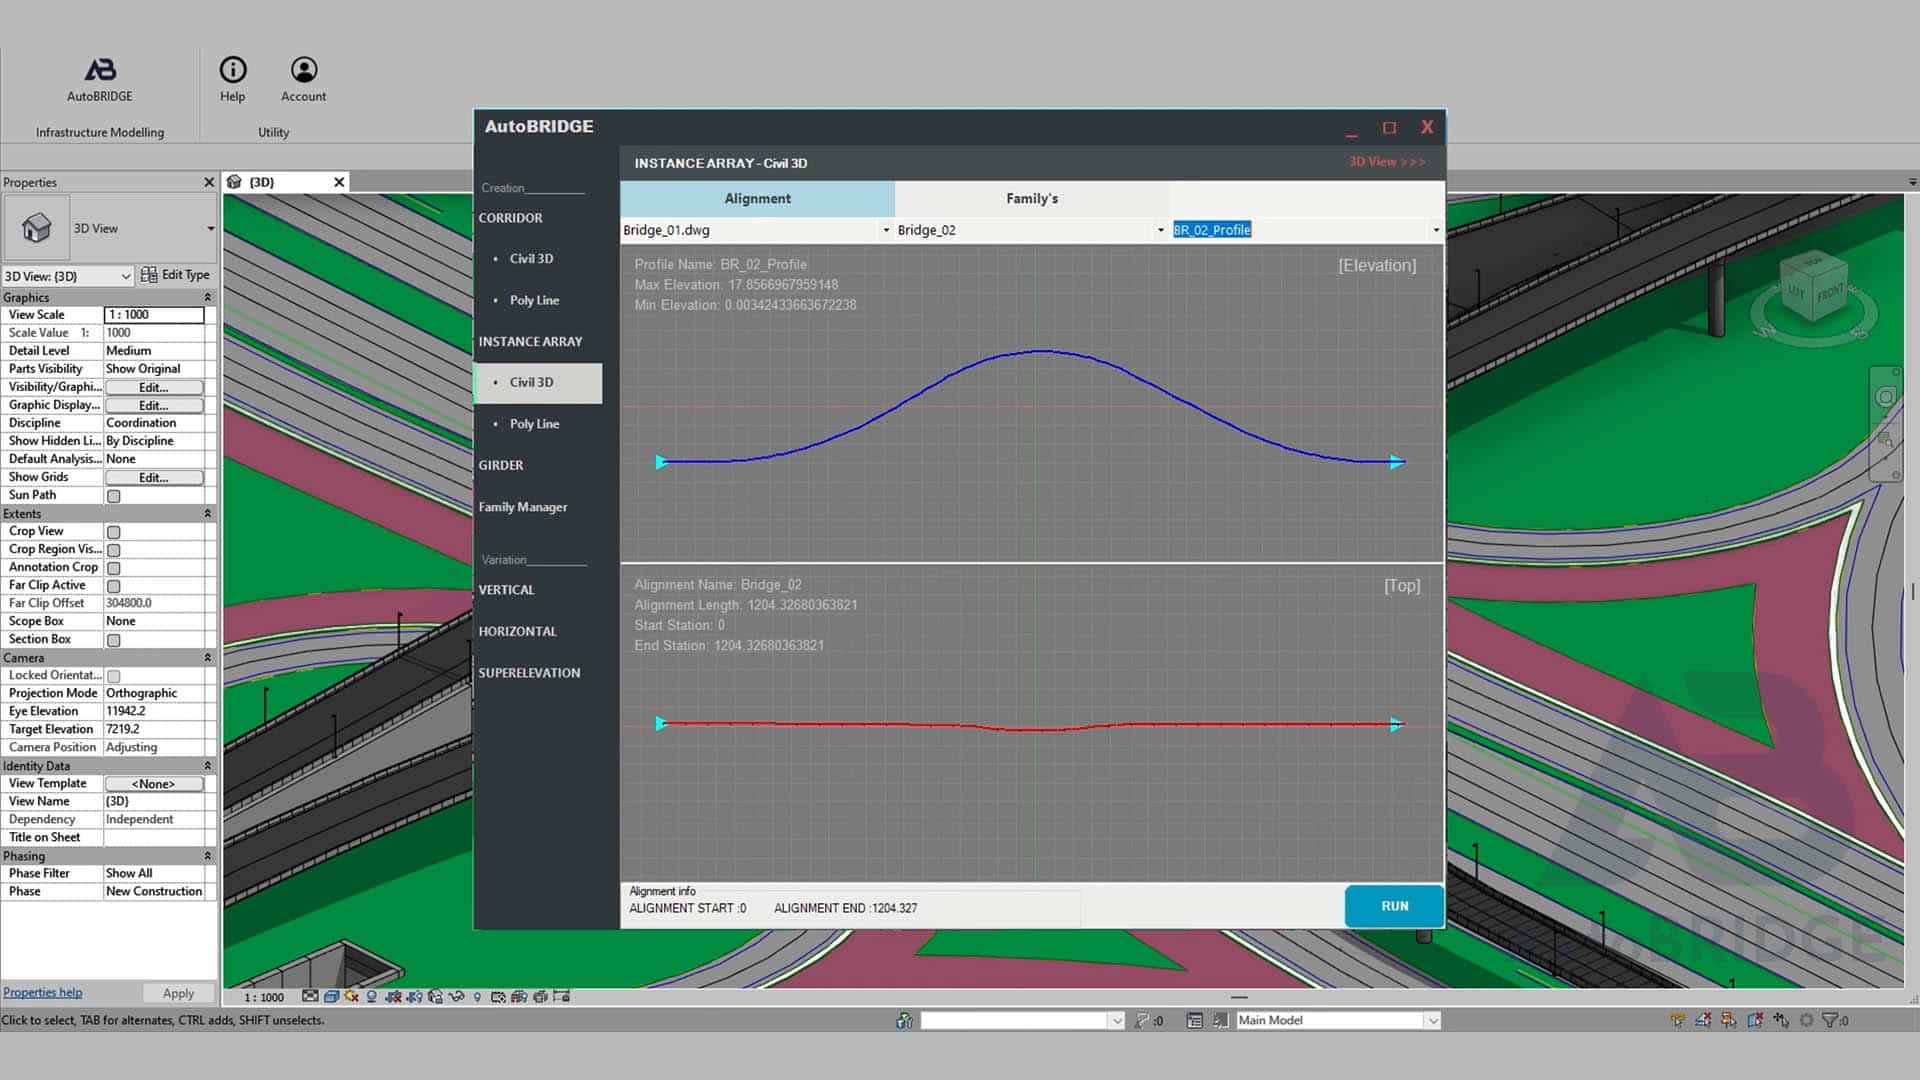
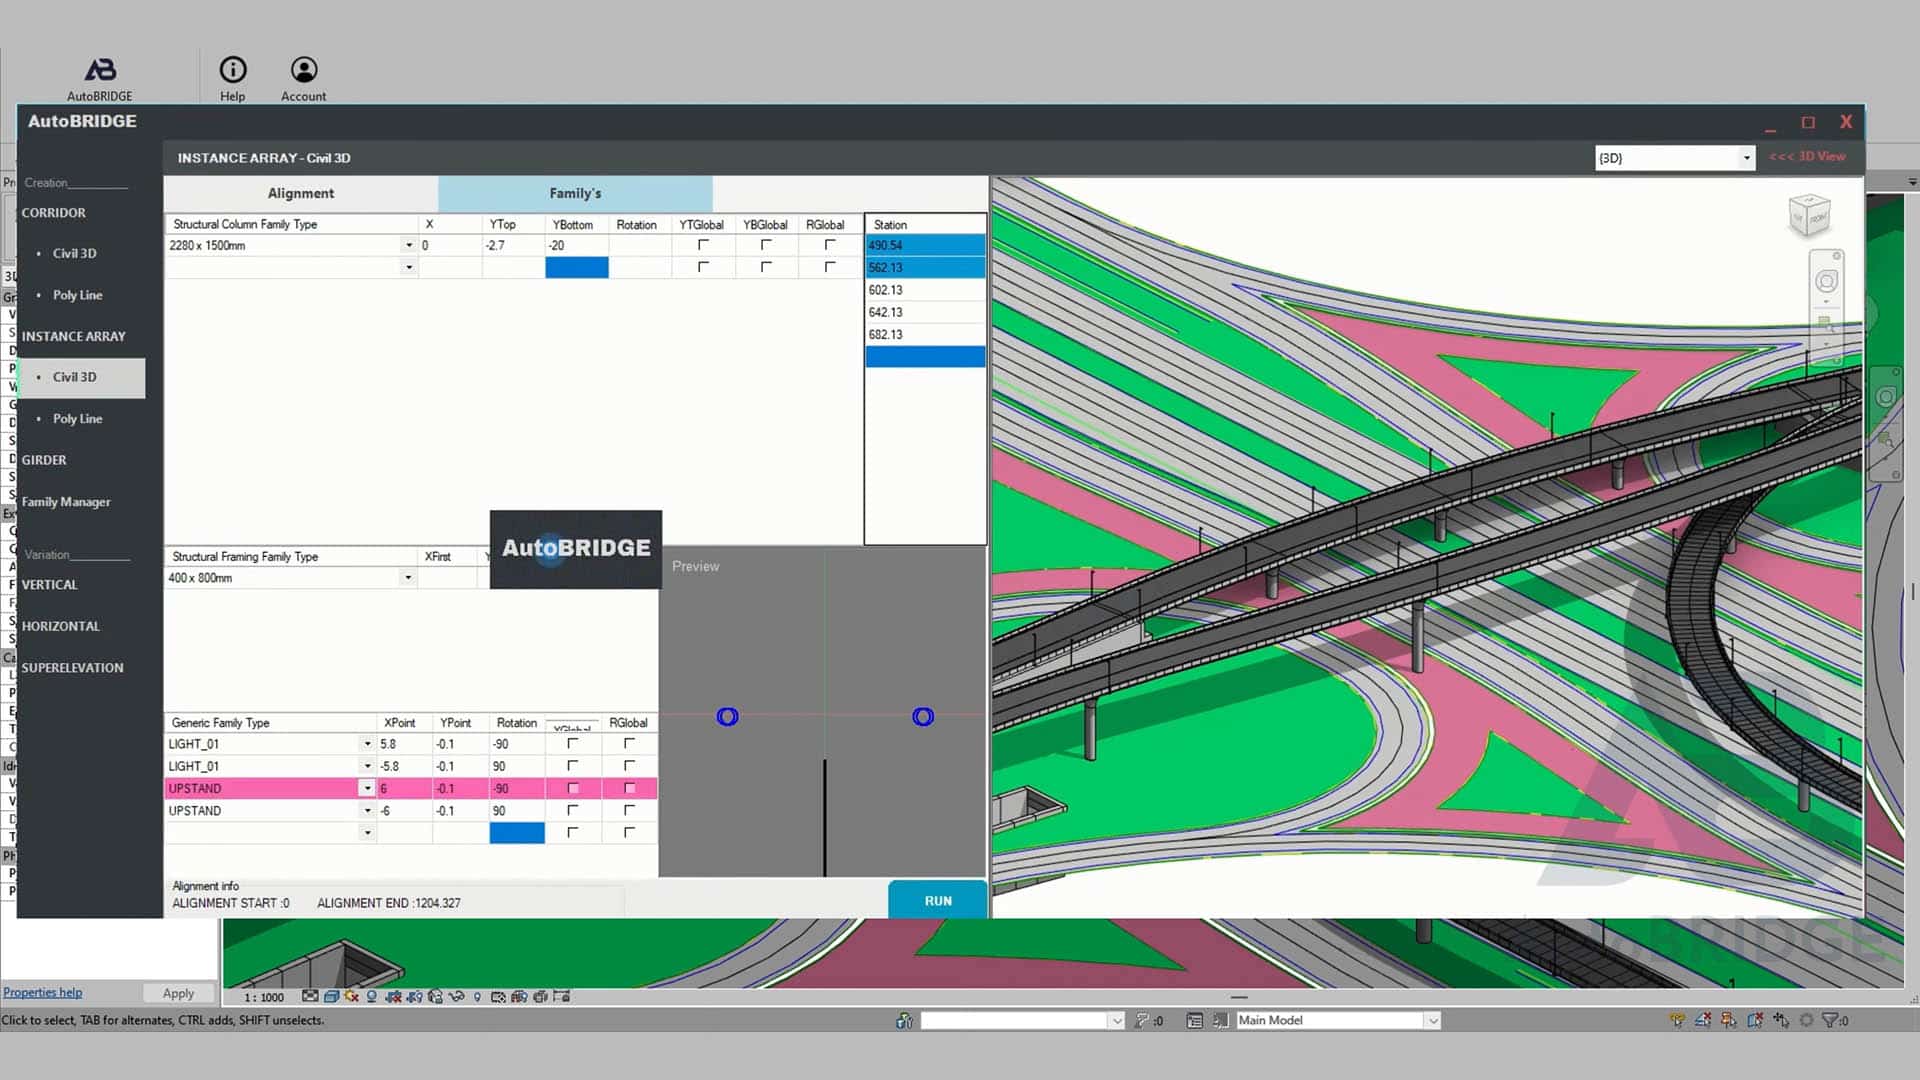
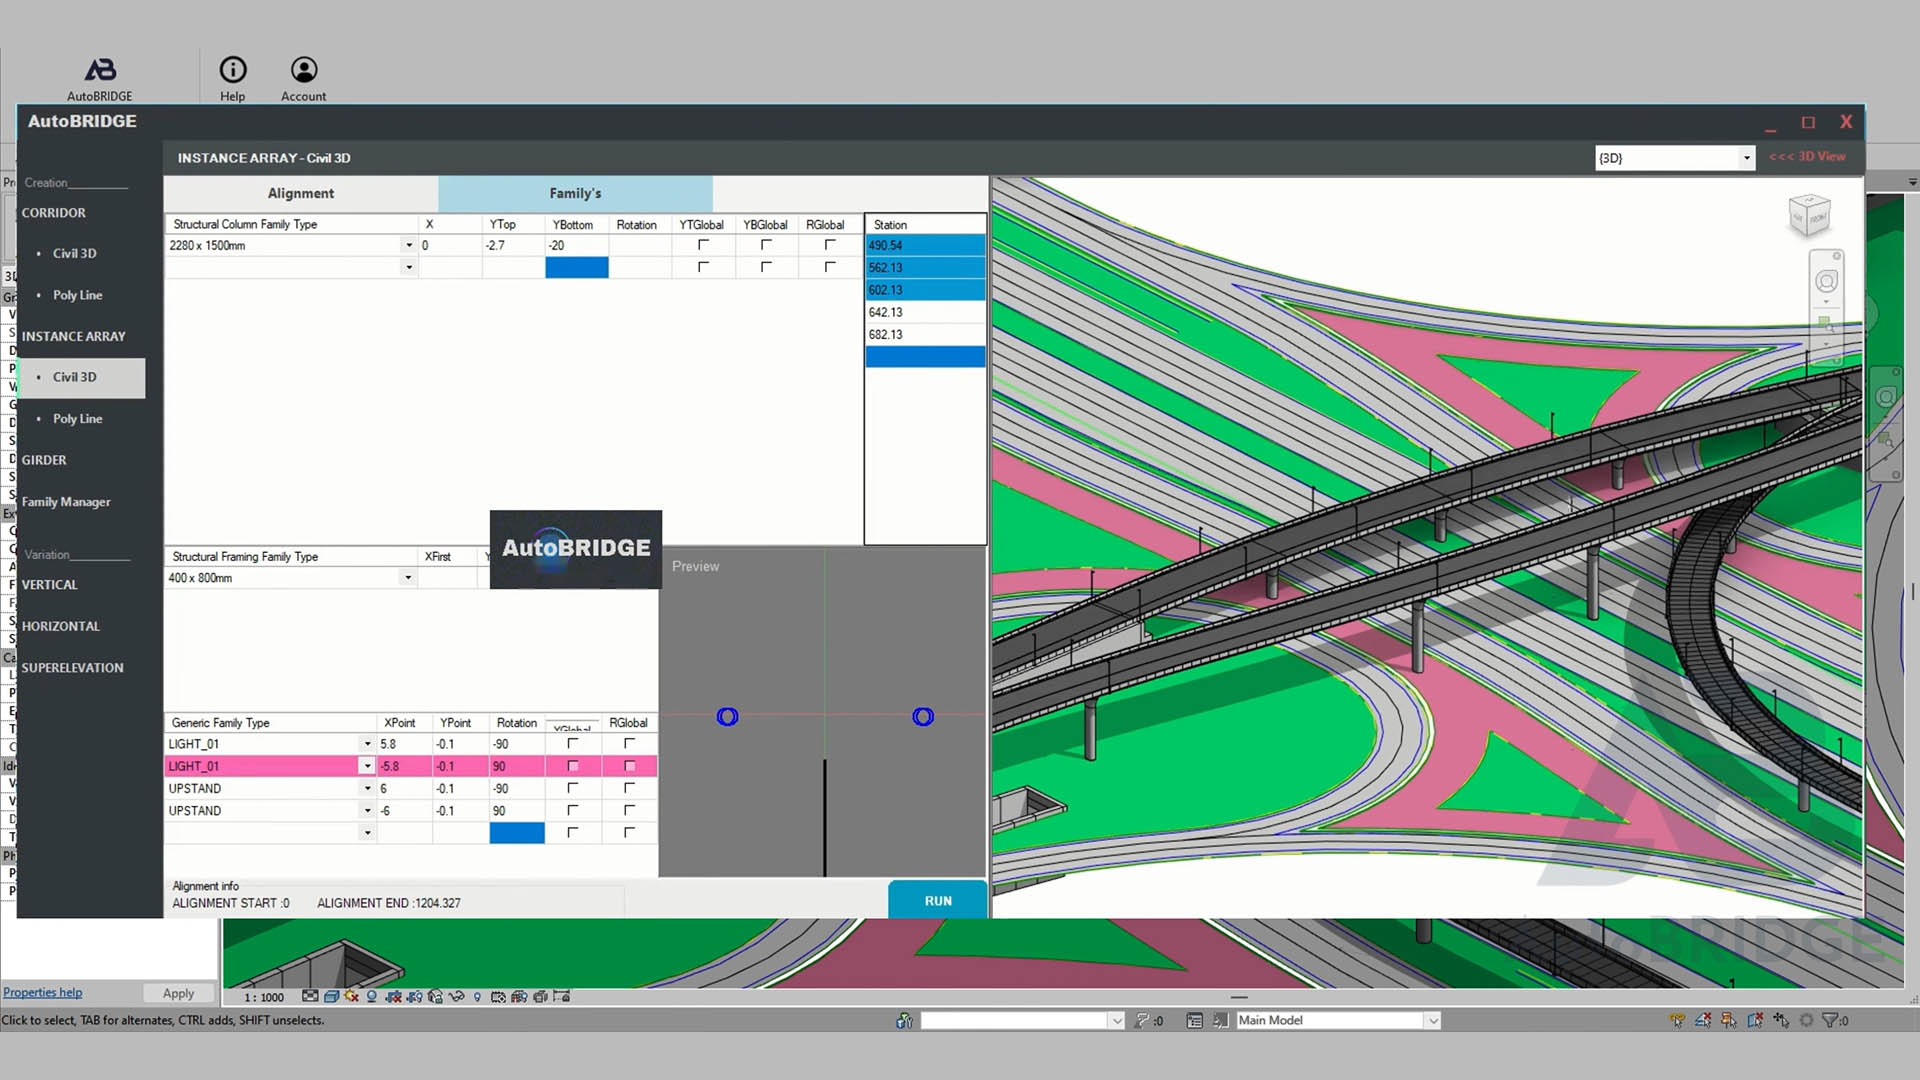
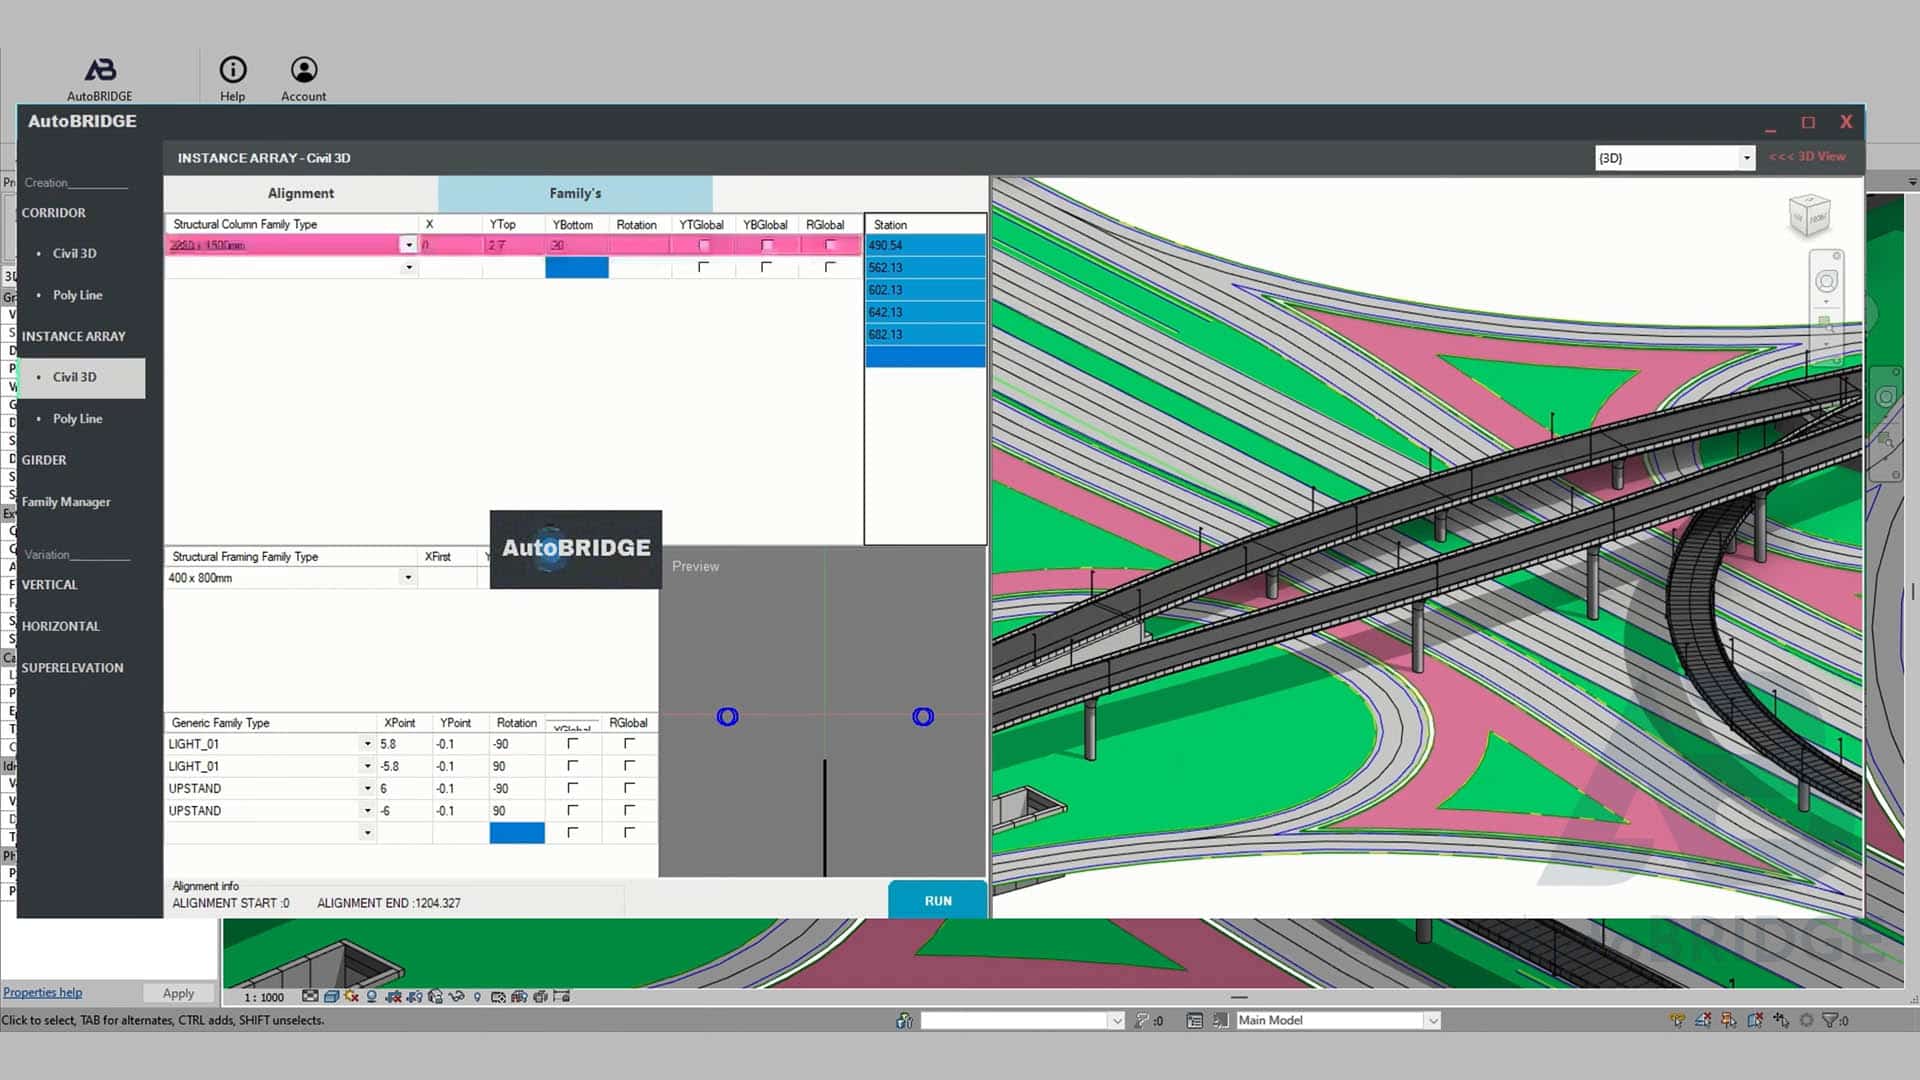
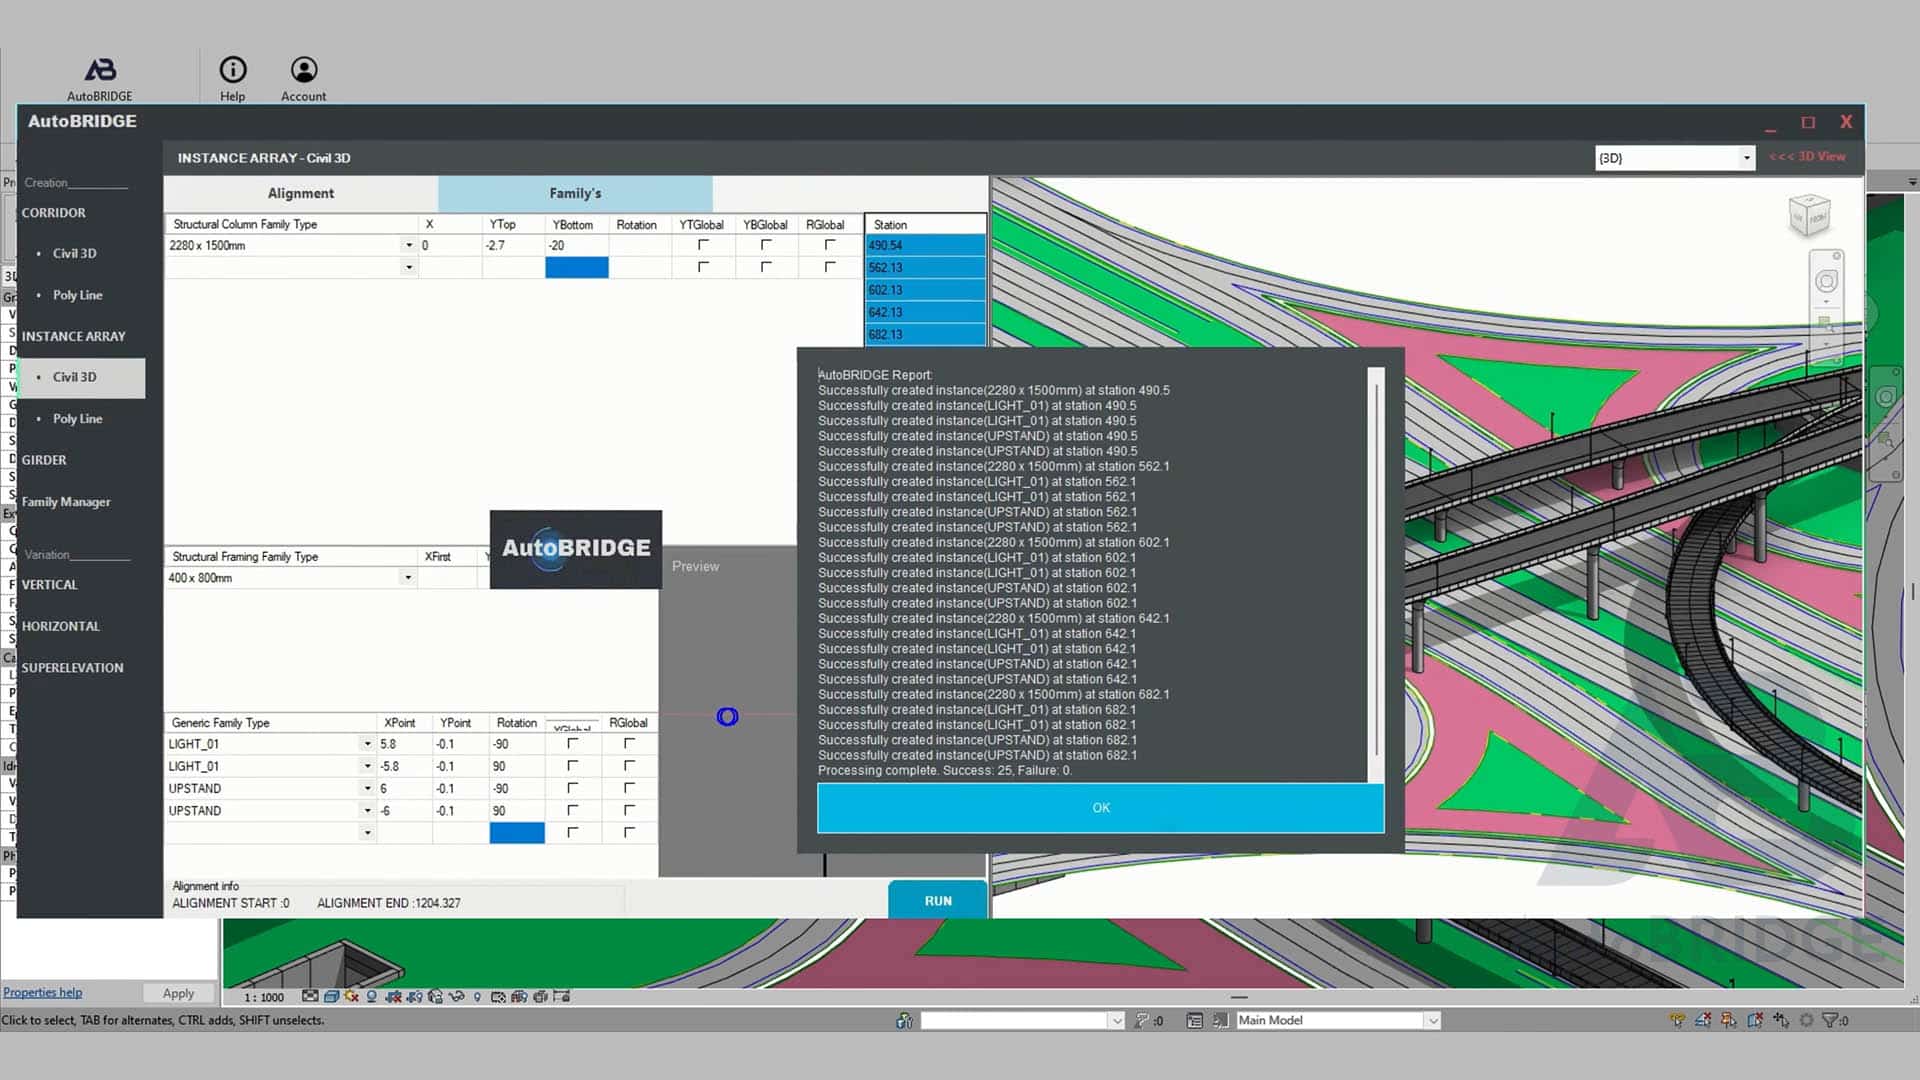
Instance Array Placement Along Alignments Using Civil 3D Alignment Data
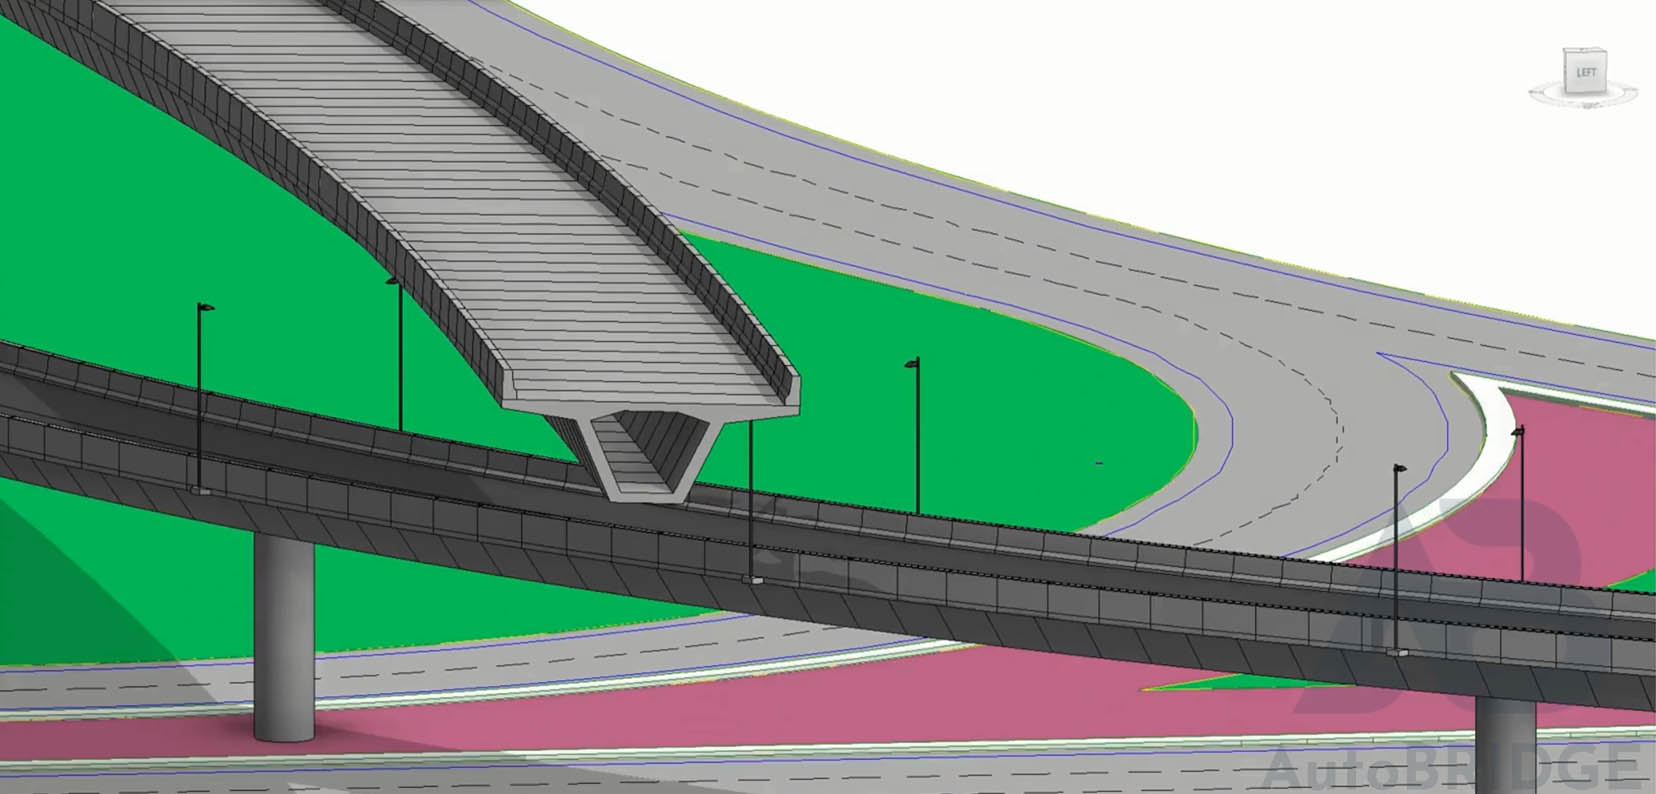
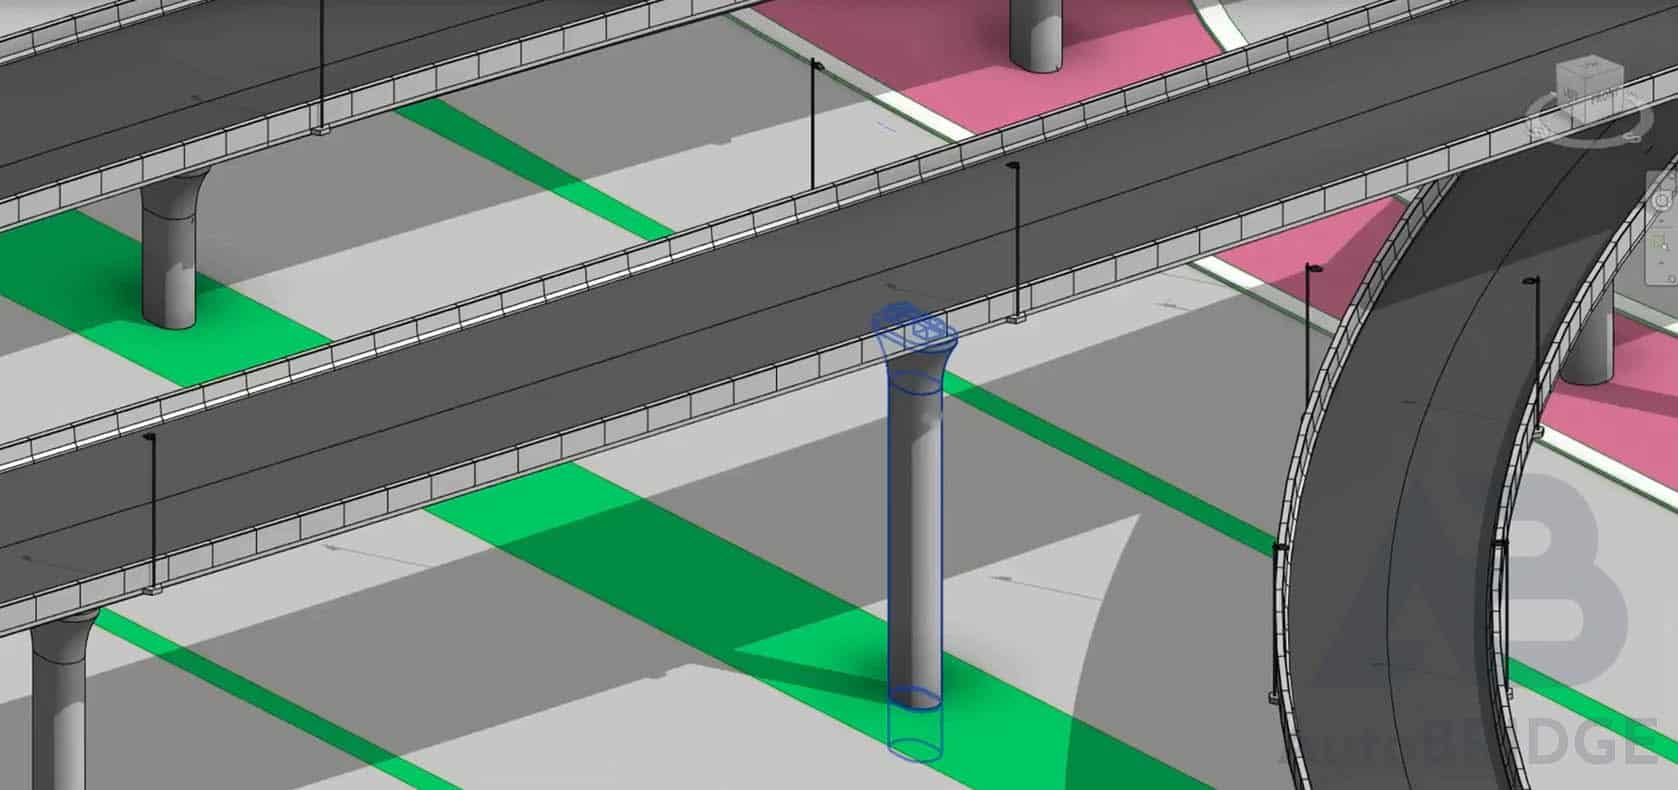
Effortlessly add instance arrays along Civil 3D alignments with AutoBRIDGE. This feature simplifies the creation of multiple instances of structural elements in Revit, such as piers, beams, girders, light columns, and handrail posts, utilizing precise Civil 3D alignment data.
Feature
Instance Array Placement Along Alignments Using 3D Polyline
Effortlessly add instance arrays along imported 3D polylines with AutoBRIDGE. This feature simplifies the creation of multiple instances of structural elements in Revit, such as piers, beams, girders, light columns, and handrail posts, leveraging precise imported 3D polyline data.
Feature
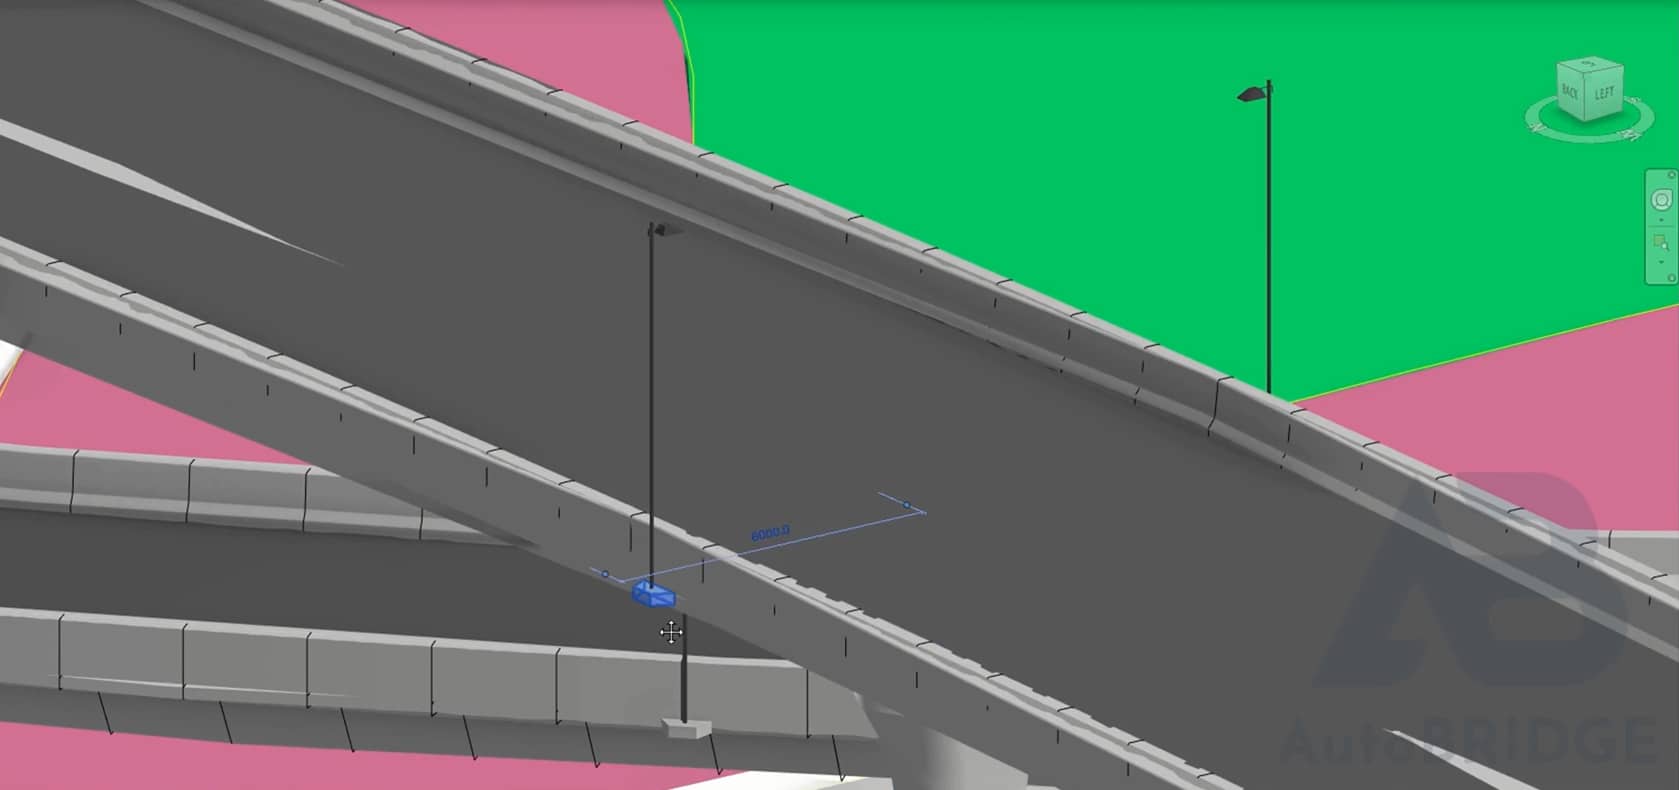
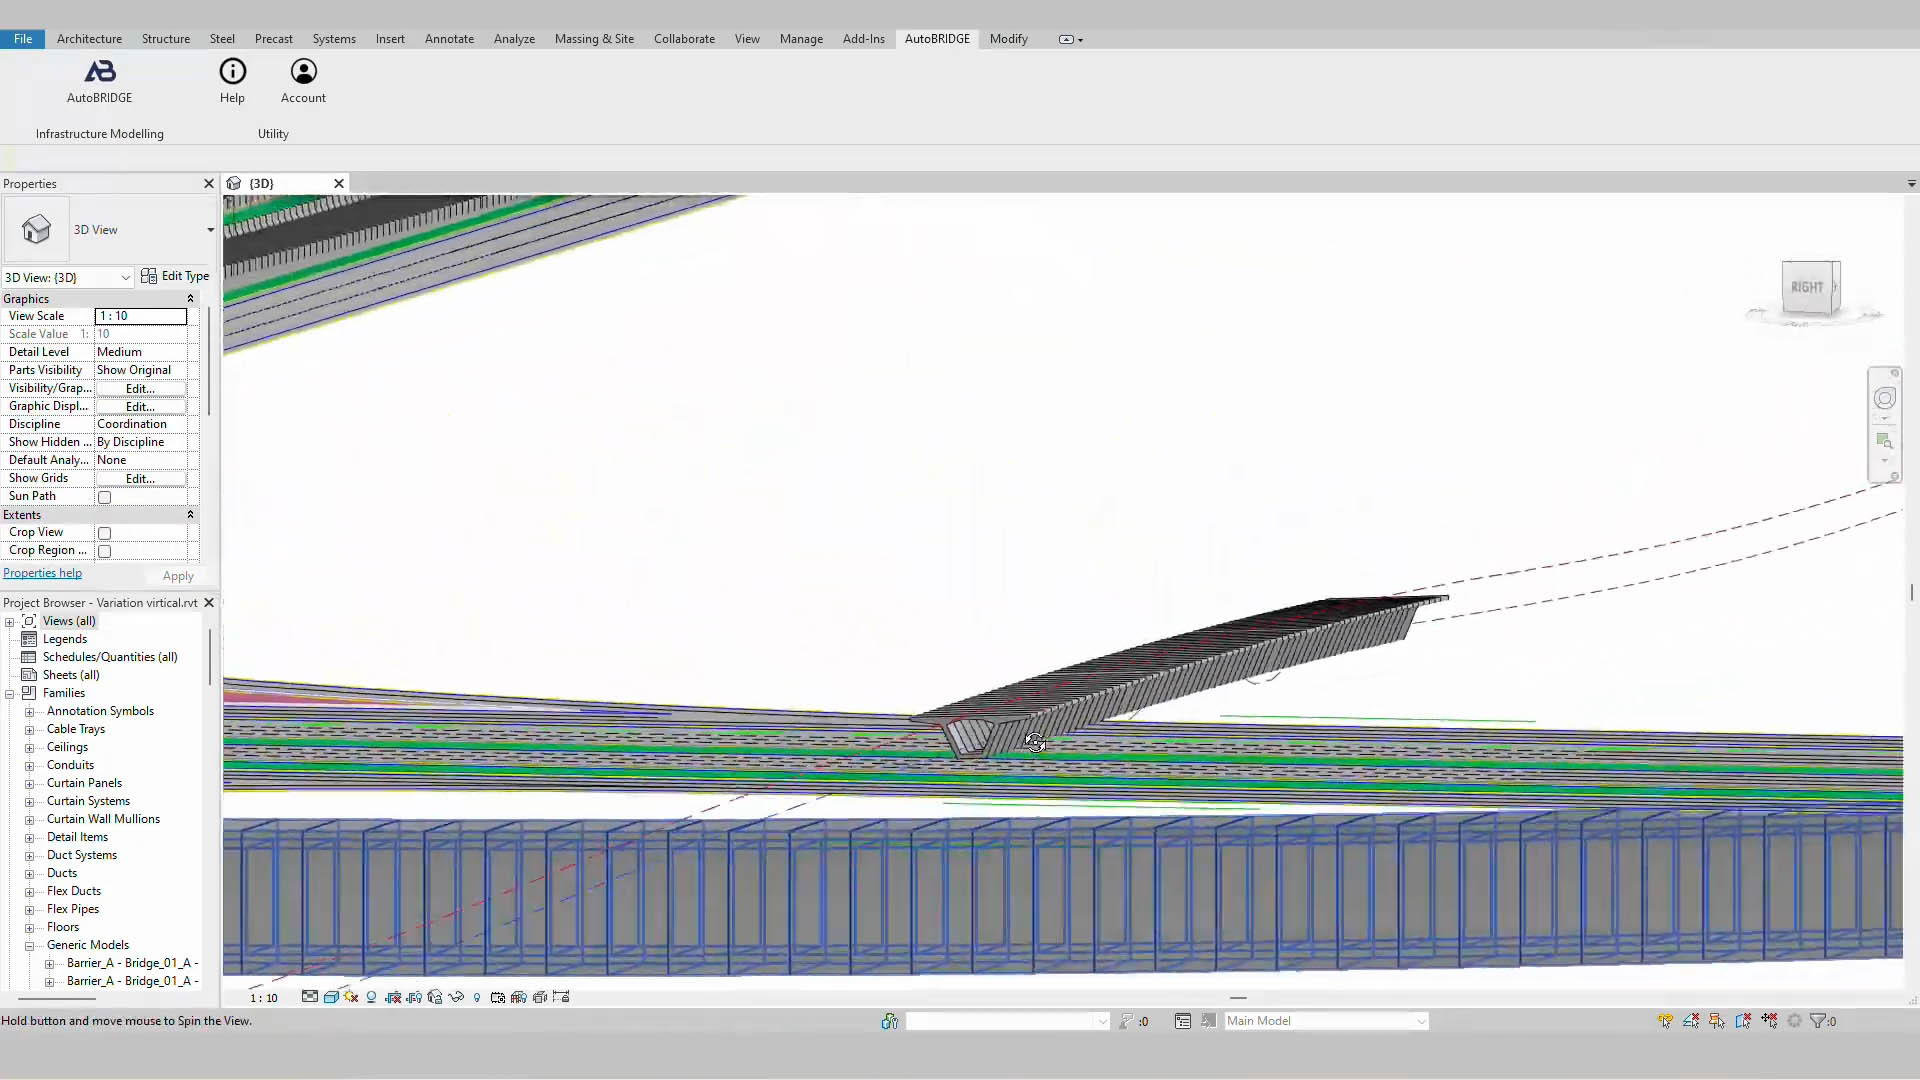
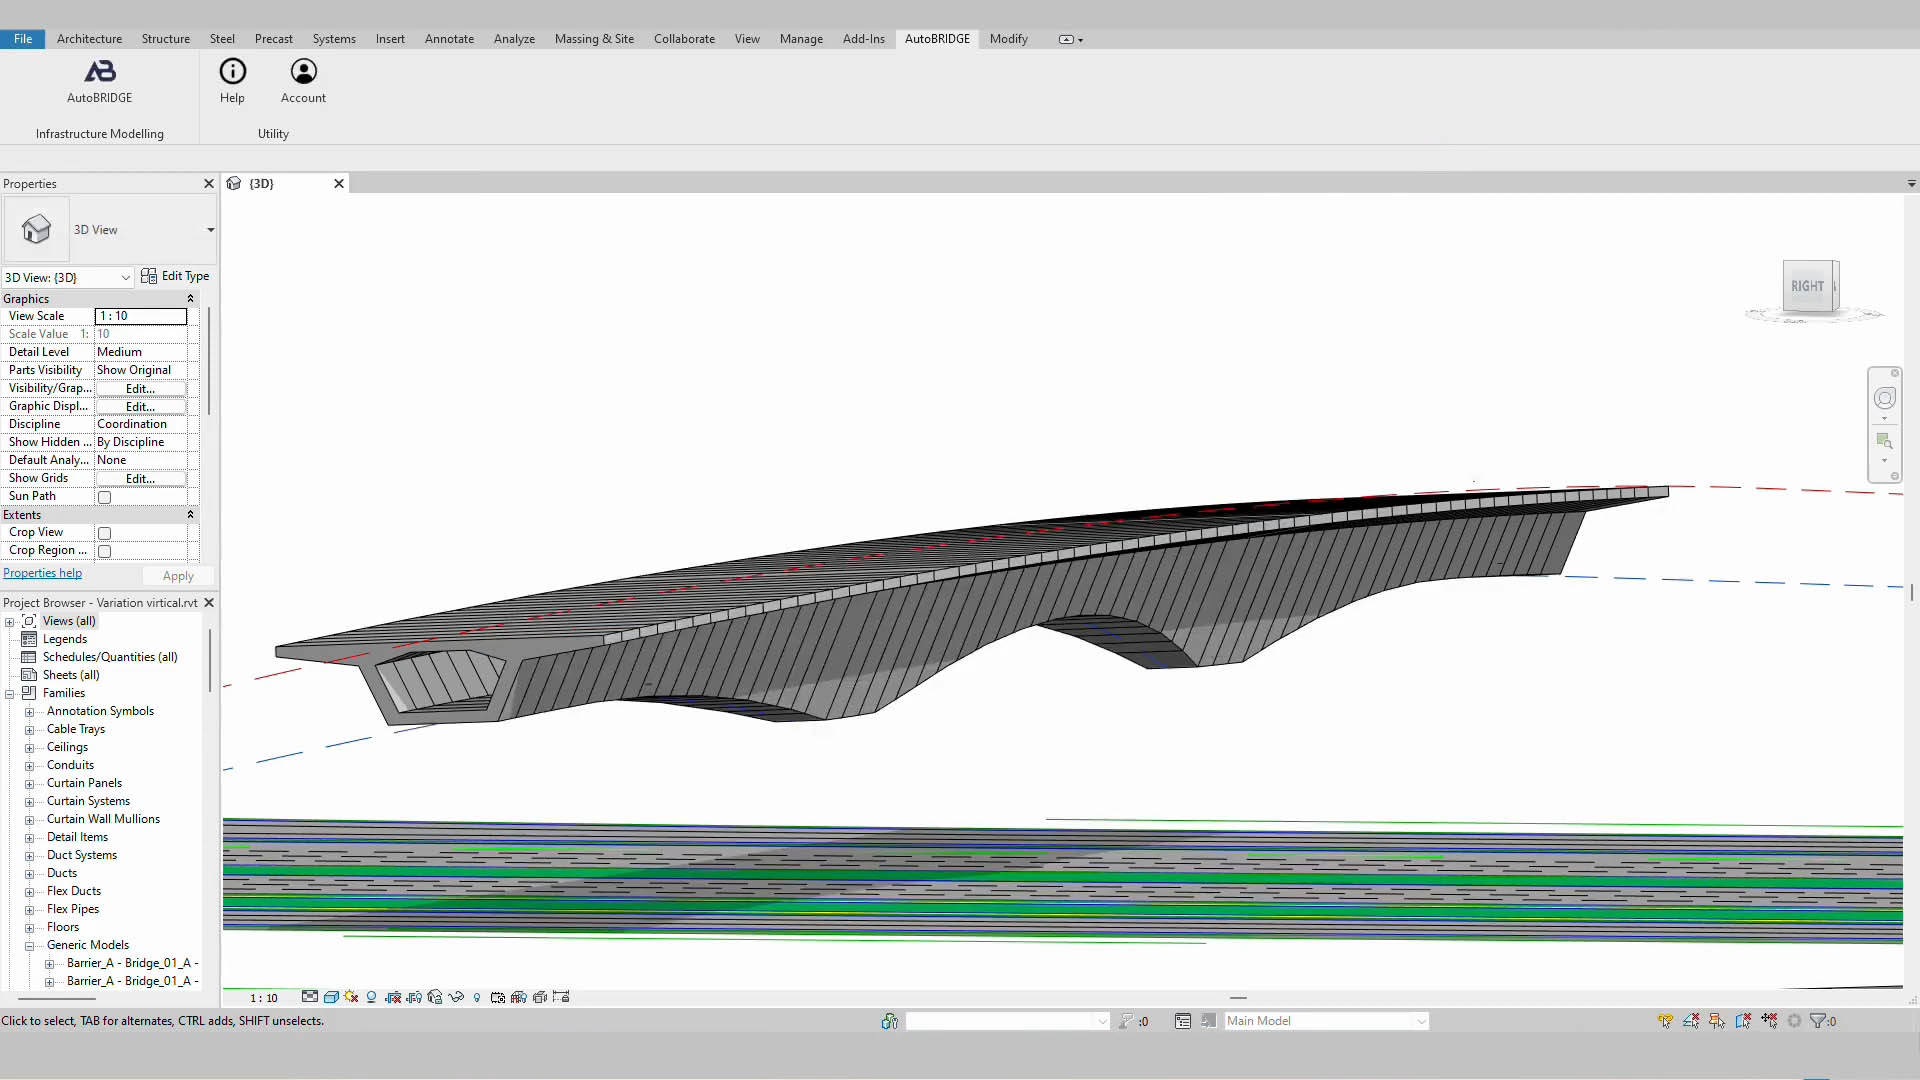
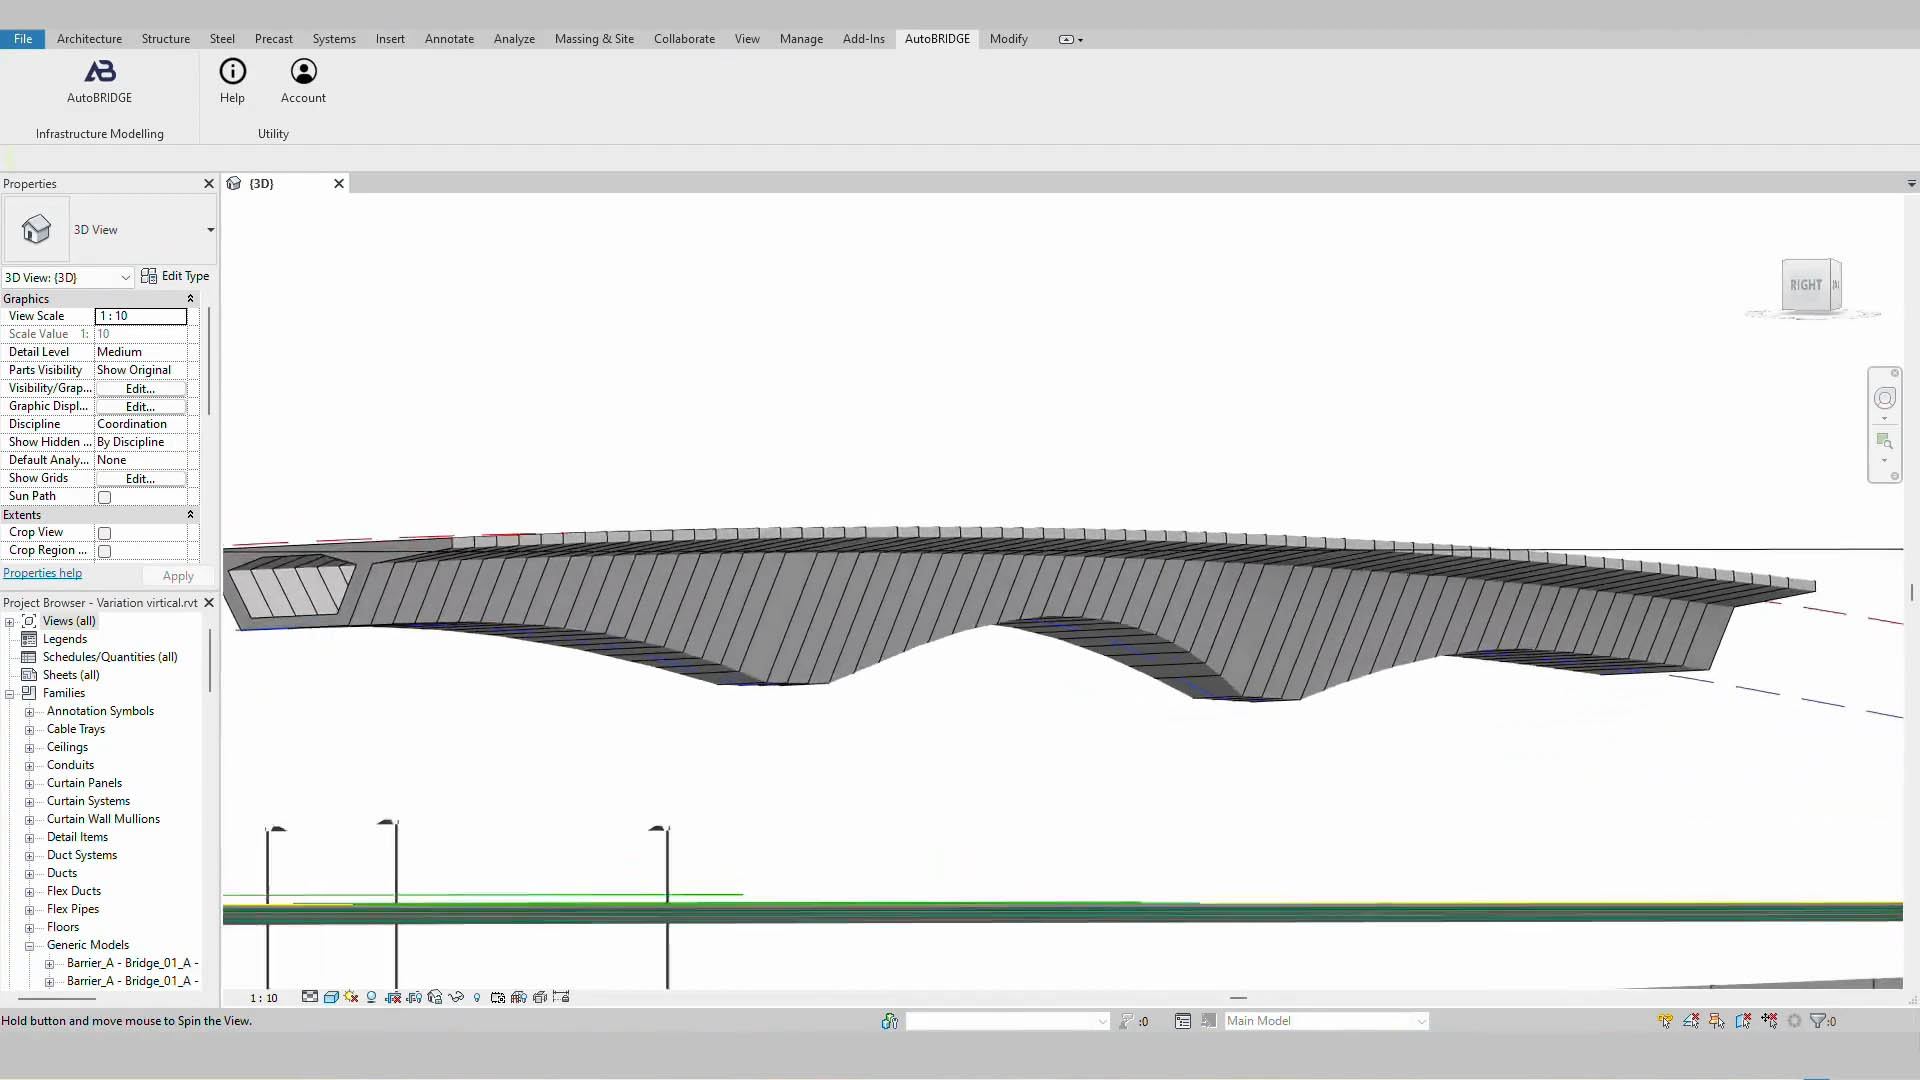
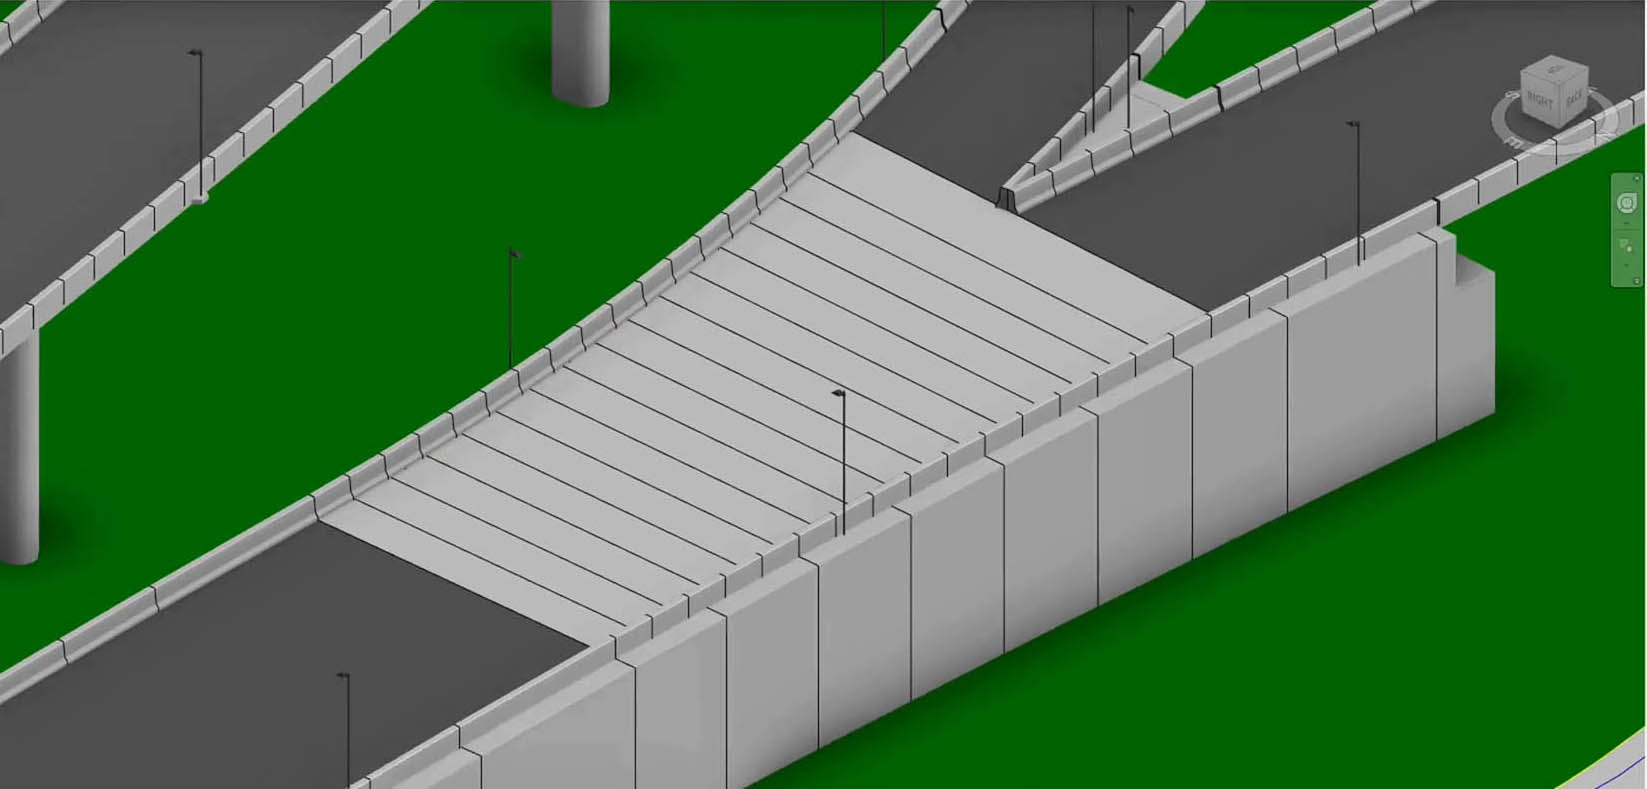
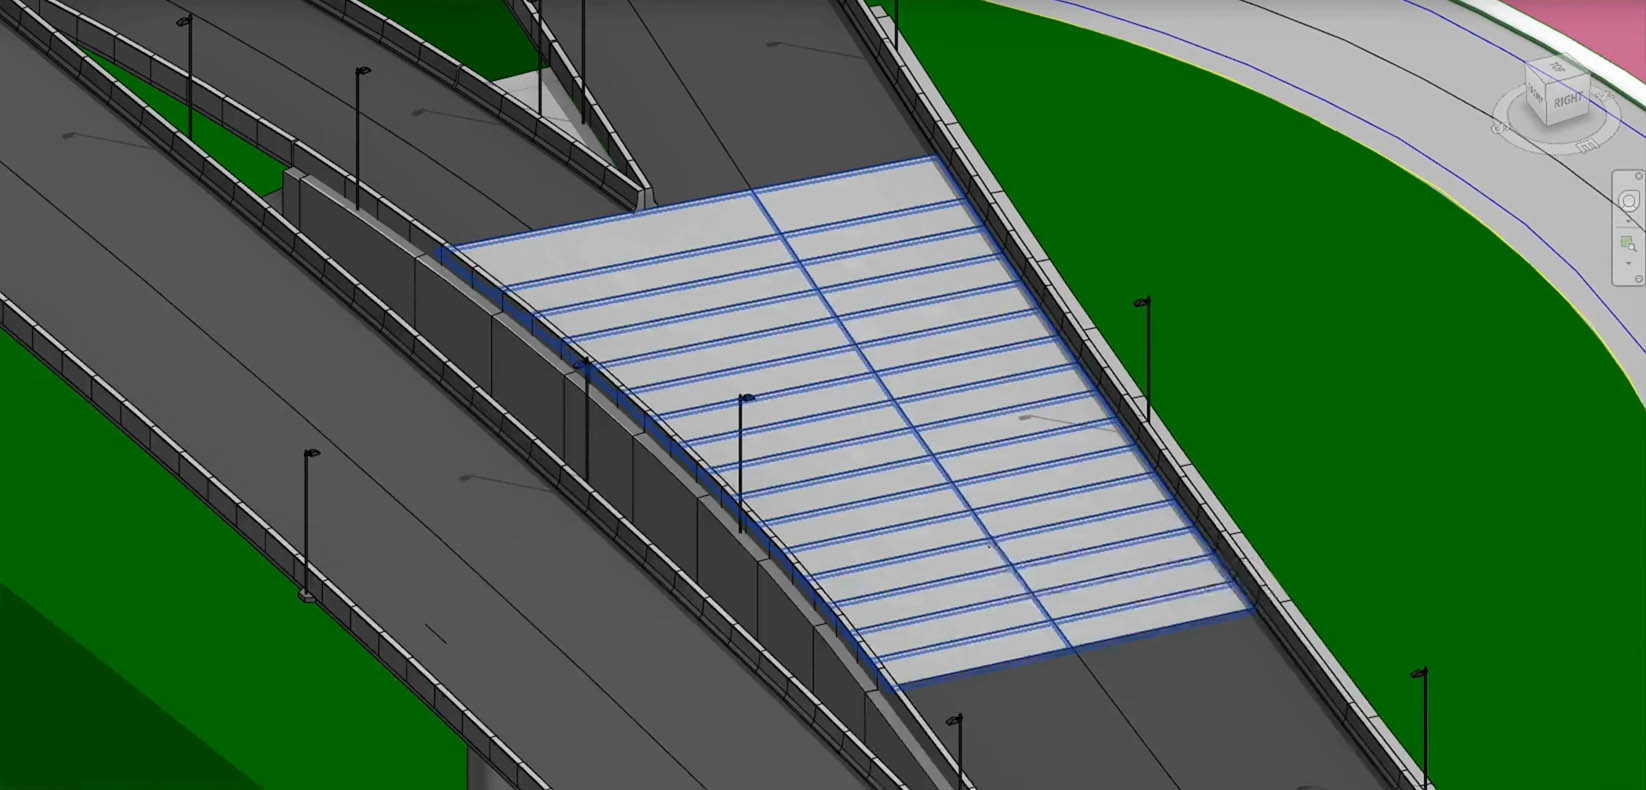
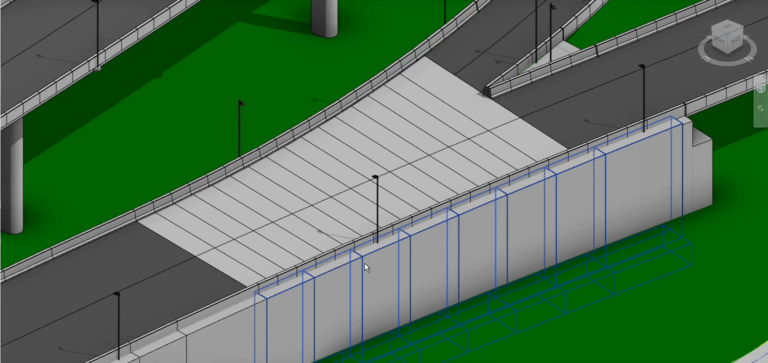
Bridge Girder Modeling
Bridge Girder Modeling: Elevate Your Structural Design Process with AutoBRIDGE. Simplify the creation of bridge girders and enhance structural framing efficiency within Autodesk Revit.
Master the Art of Girder Modeling: Explore our video tutorial for precise structural framing in AutoBRIDGE! Streamline your design process effortlessly
Feature
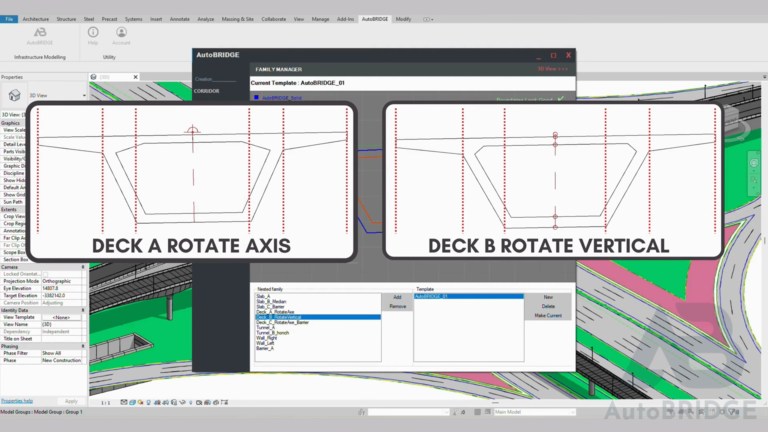
Family Manager
Family Manager: Simplify Nested Family Management for Diverse Corridor Types. Easily add and remove nested families from your project template, ensuring seamless integration in both current and future projects.
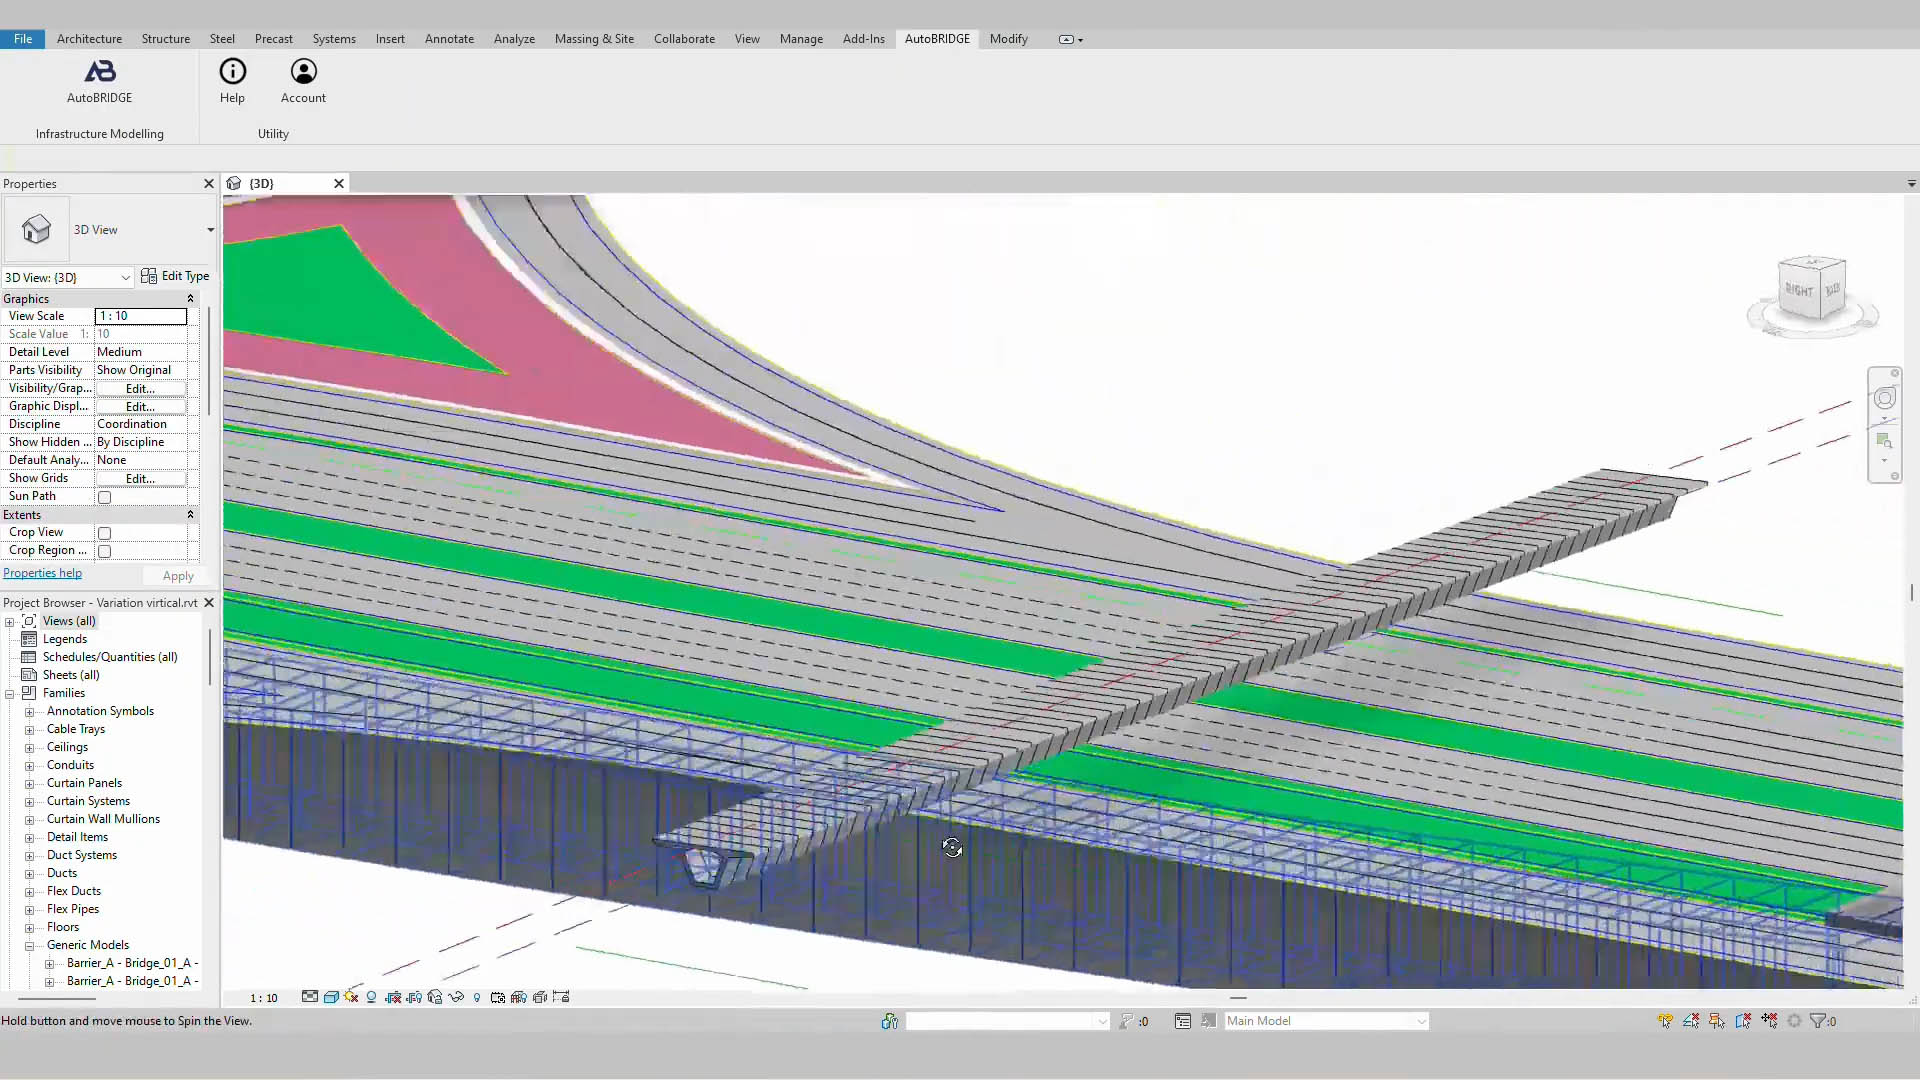
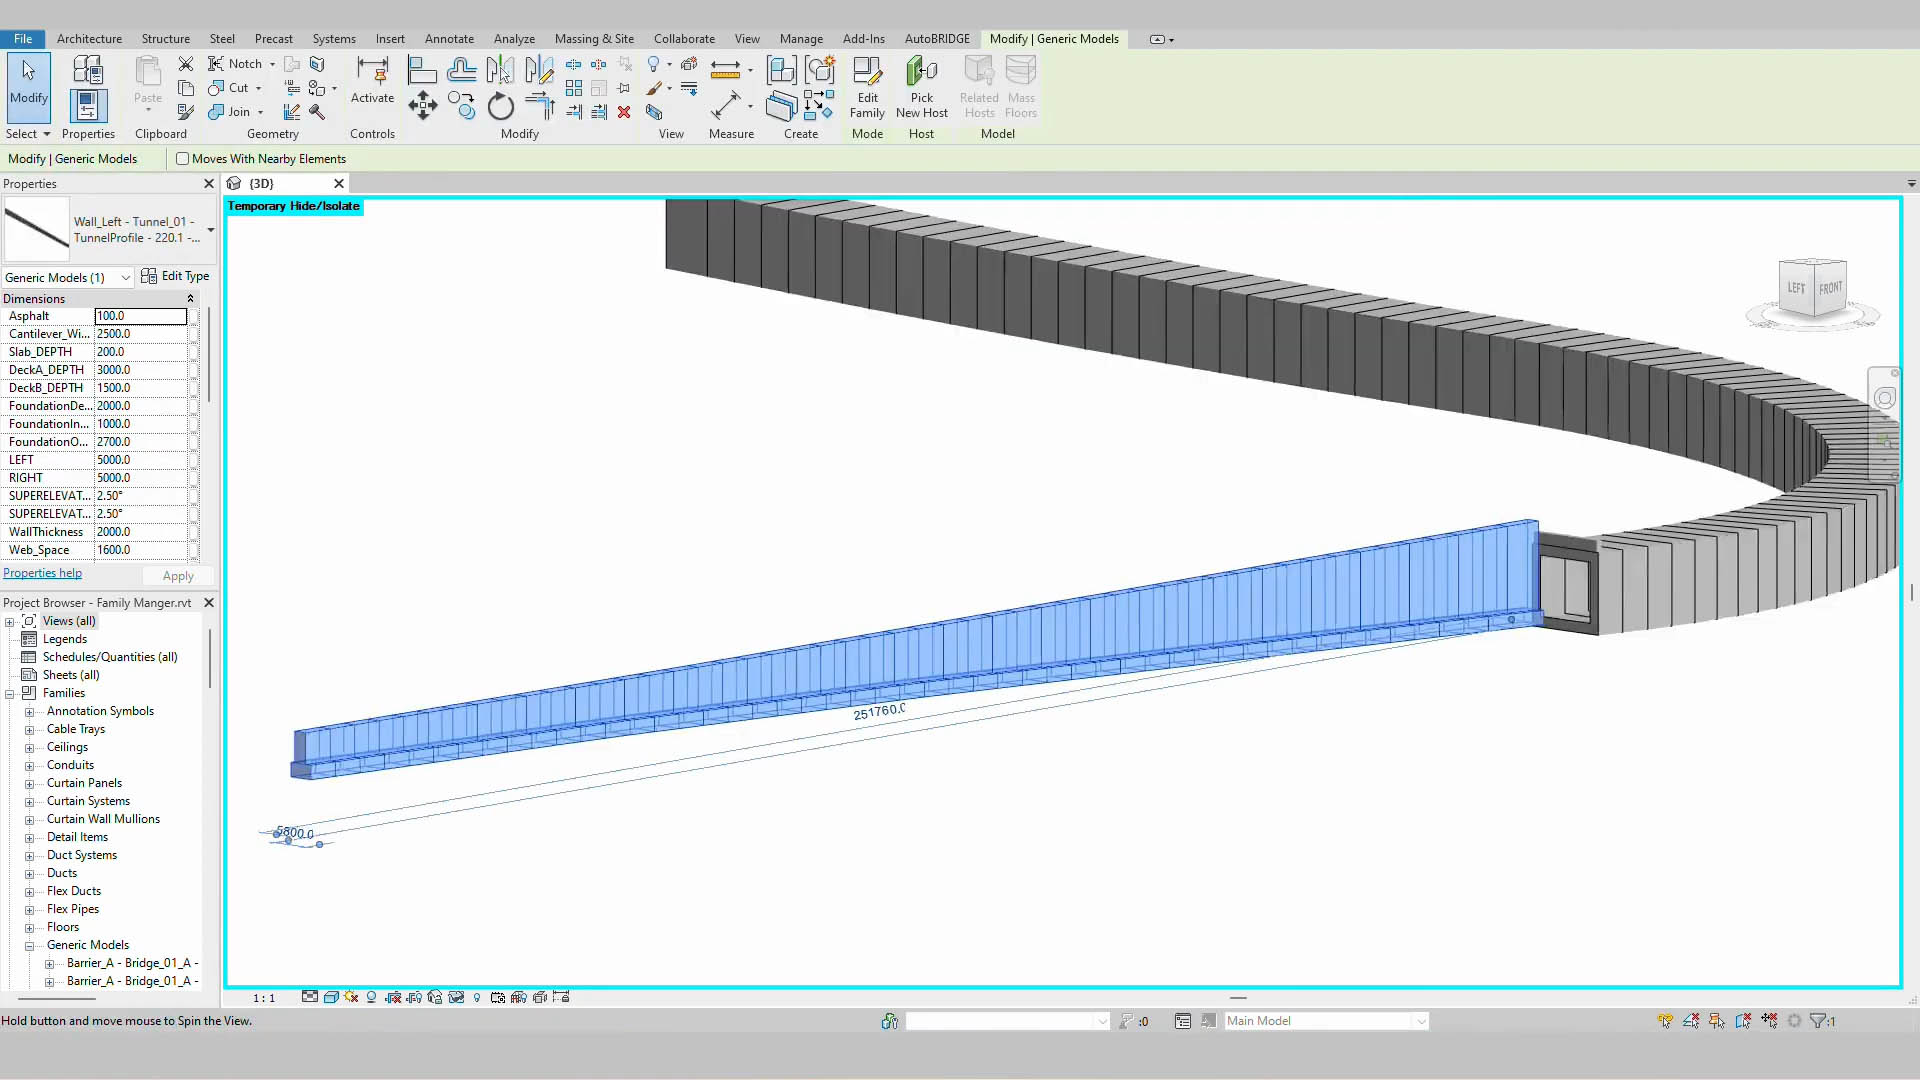
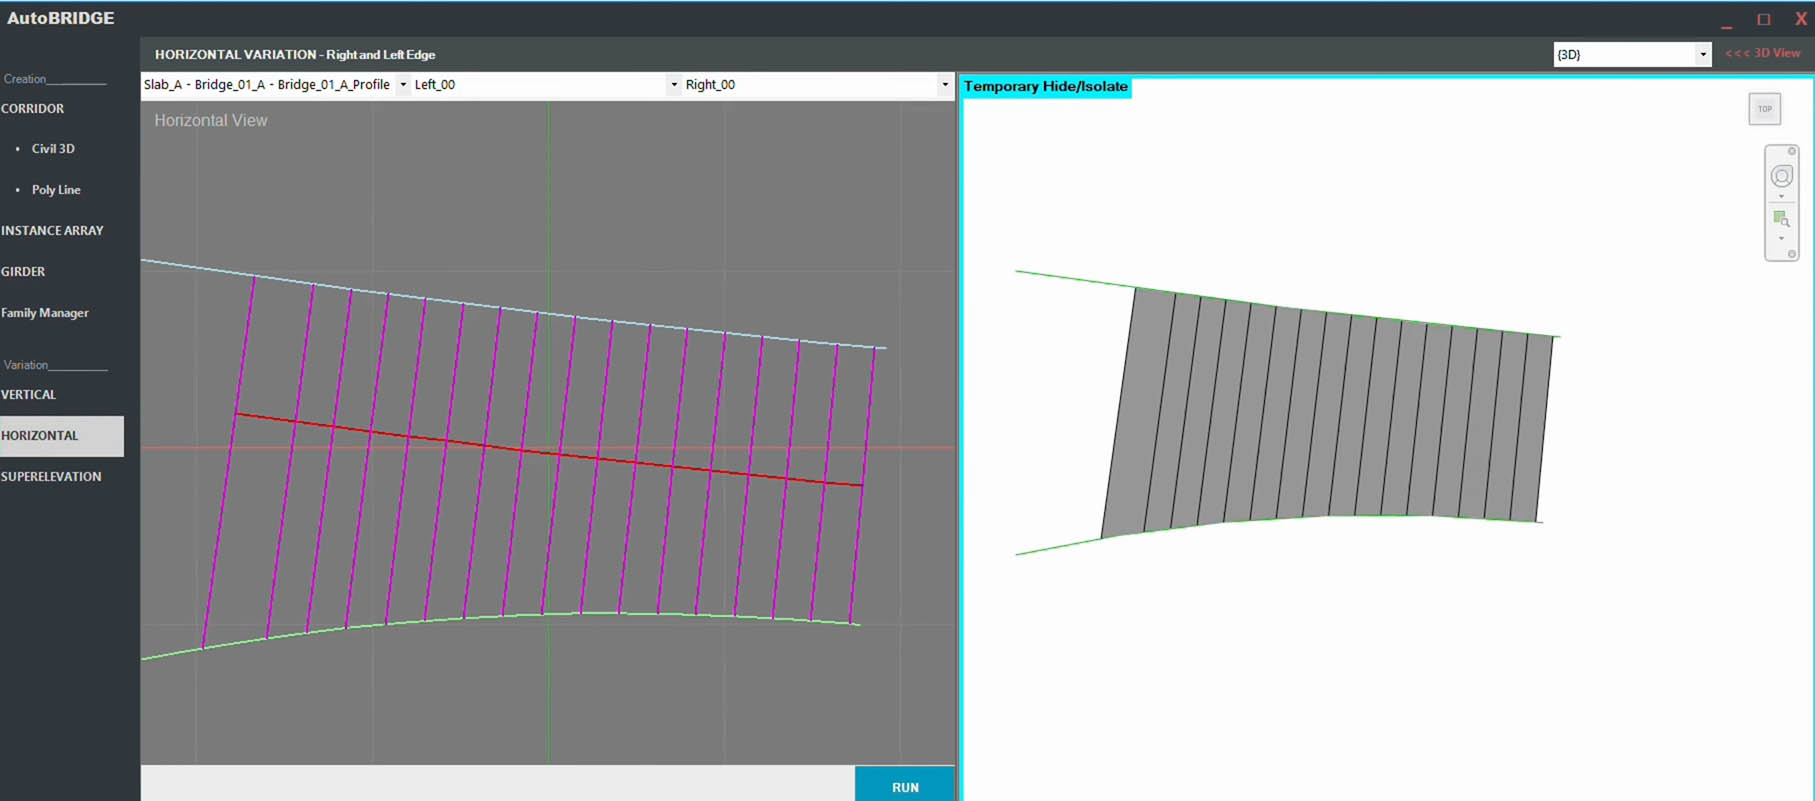
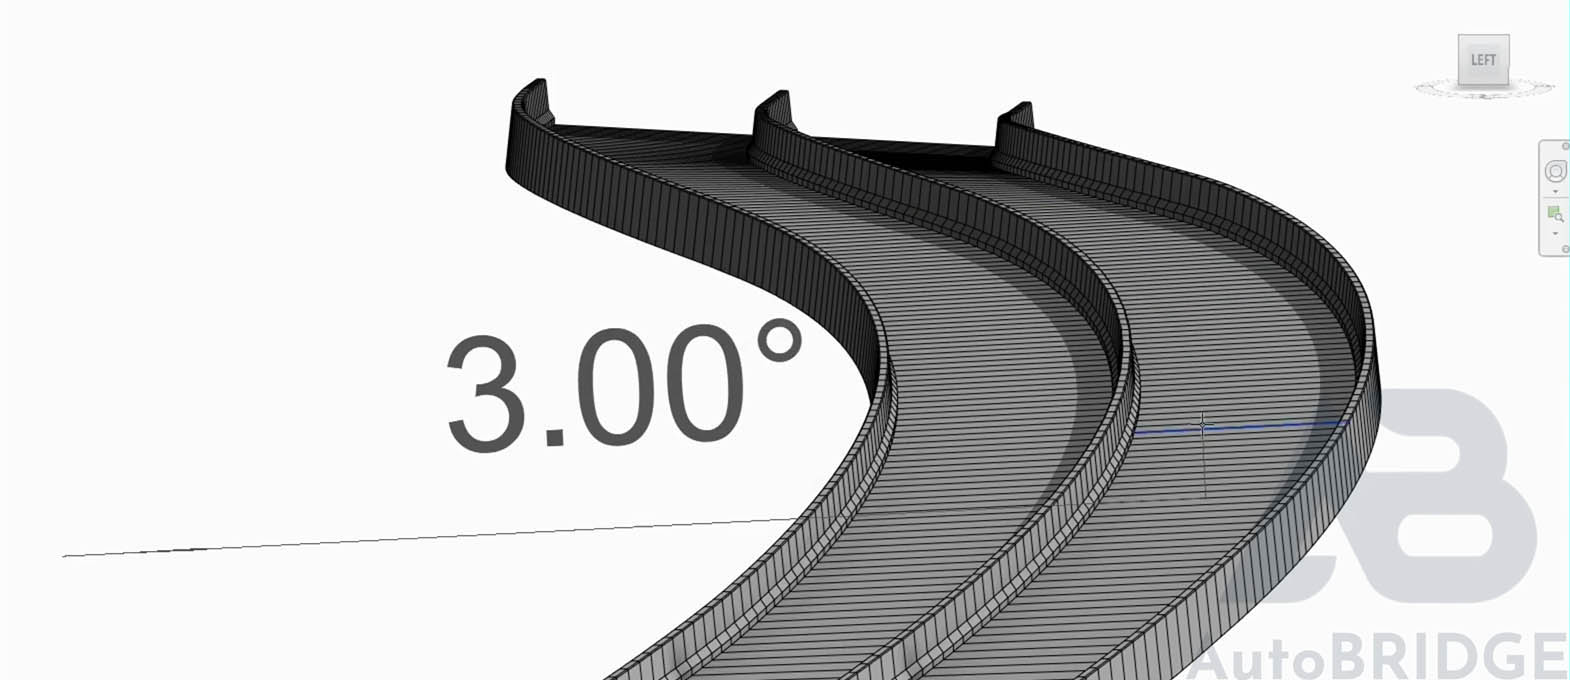
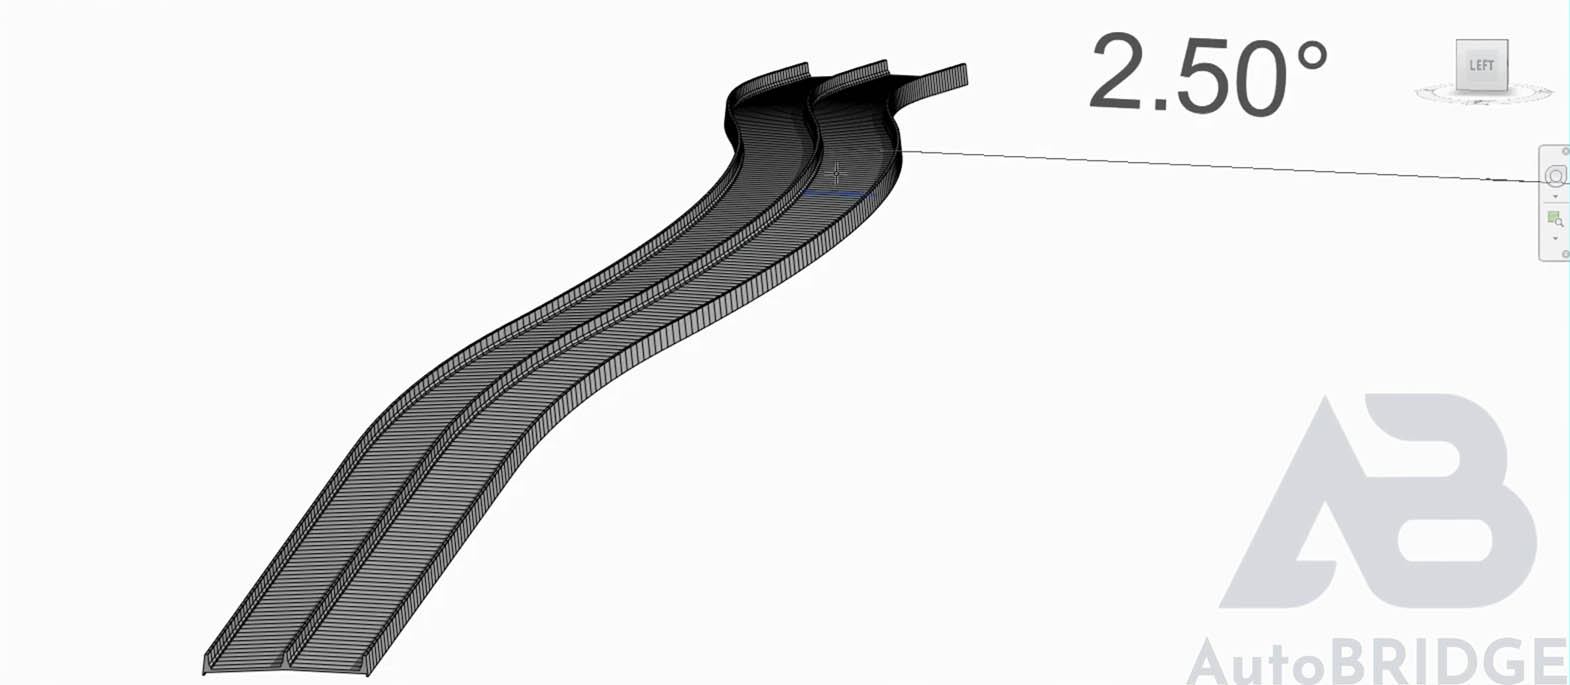
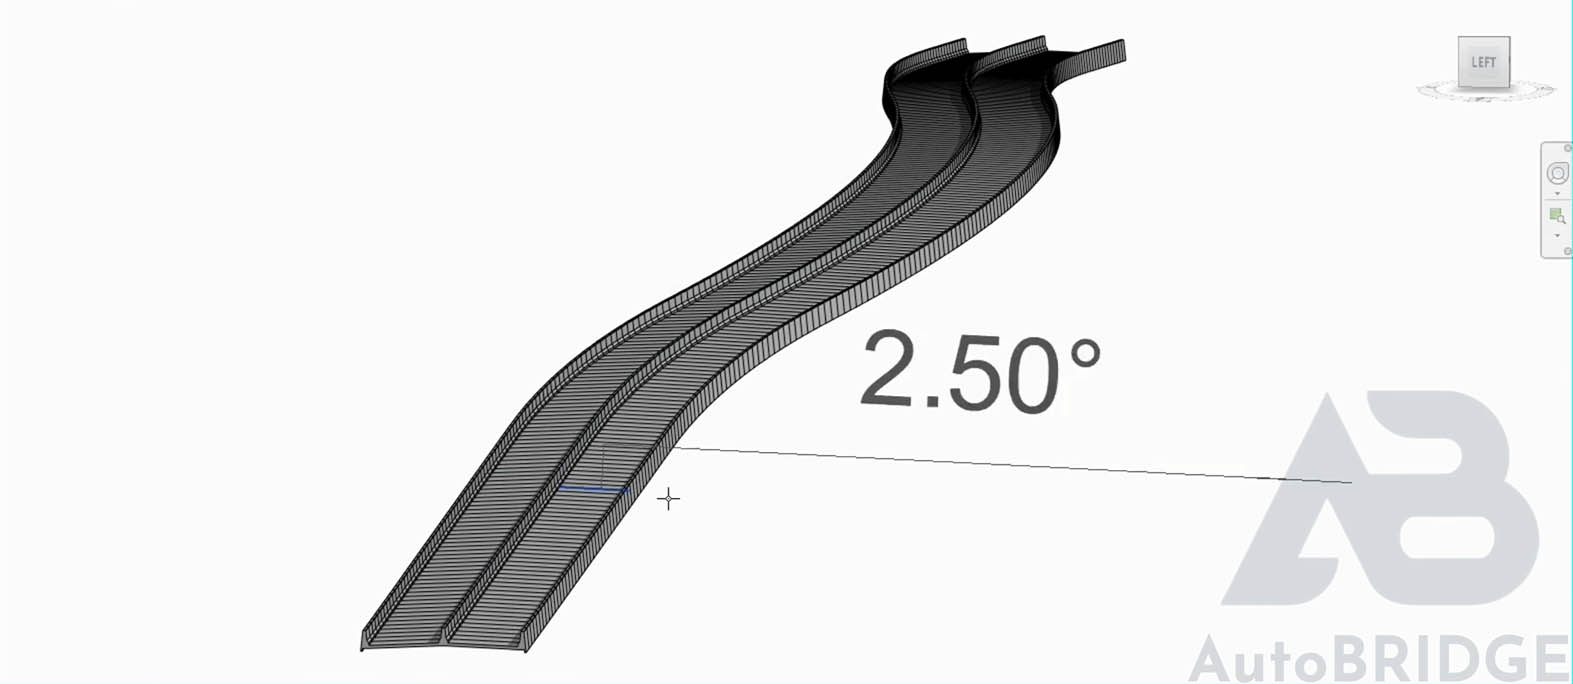
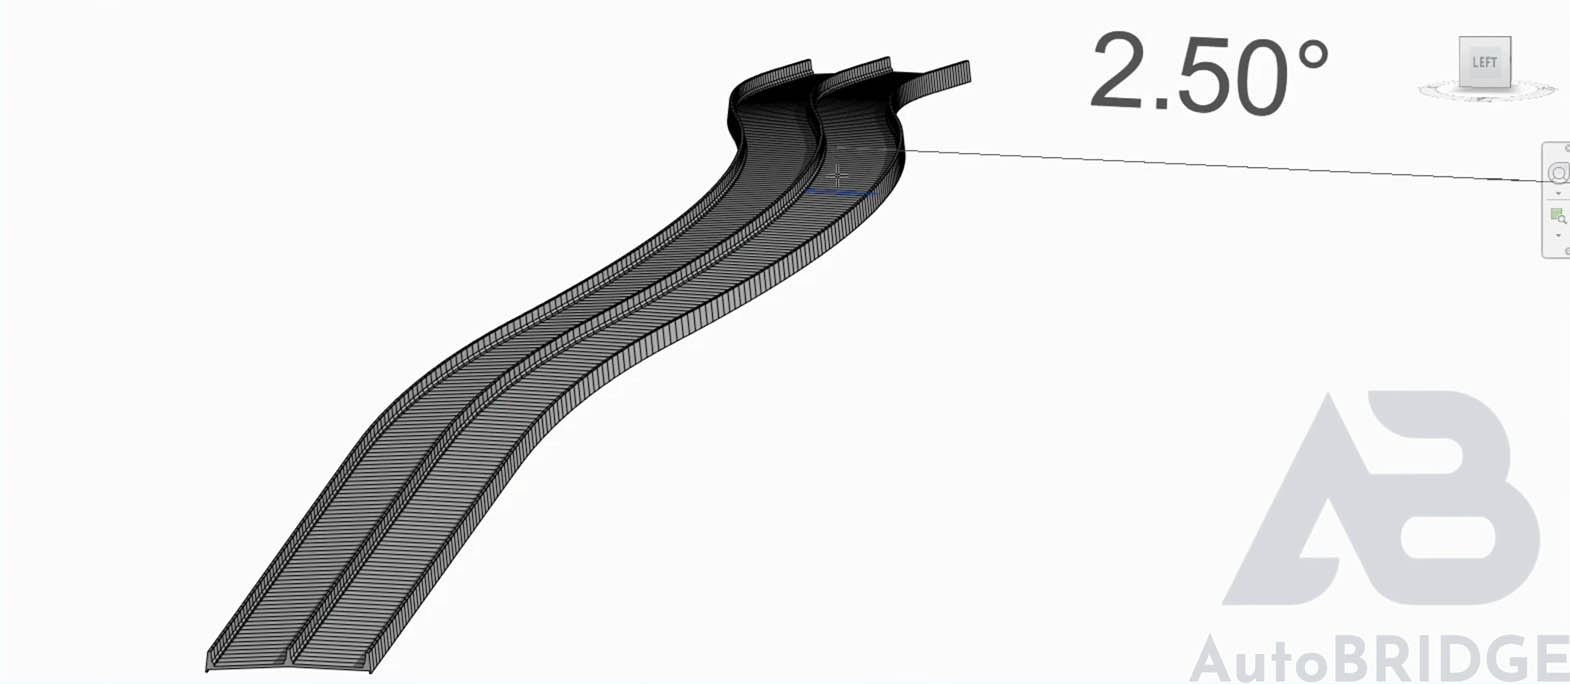
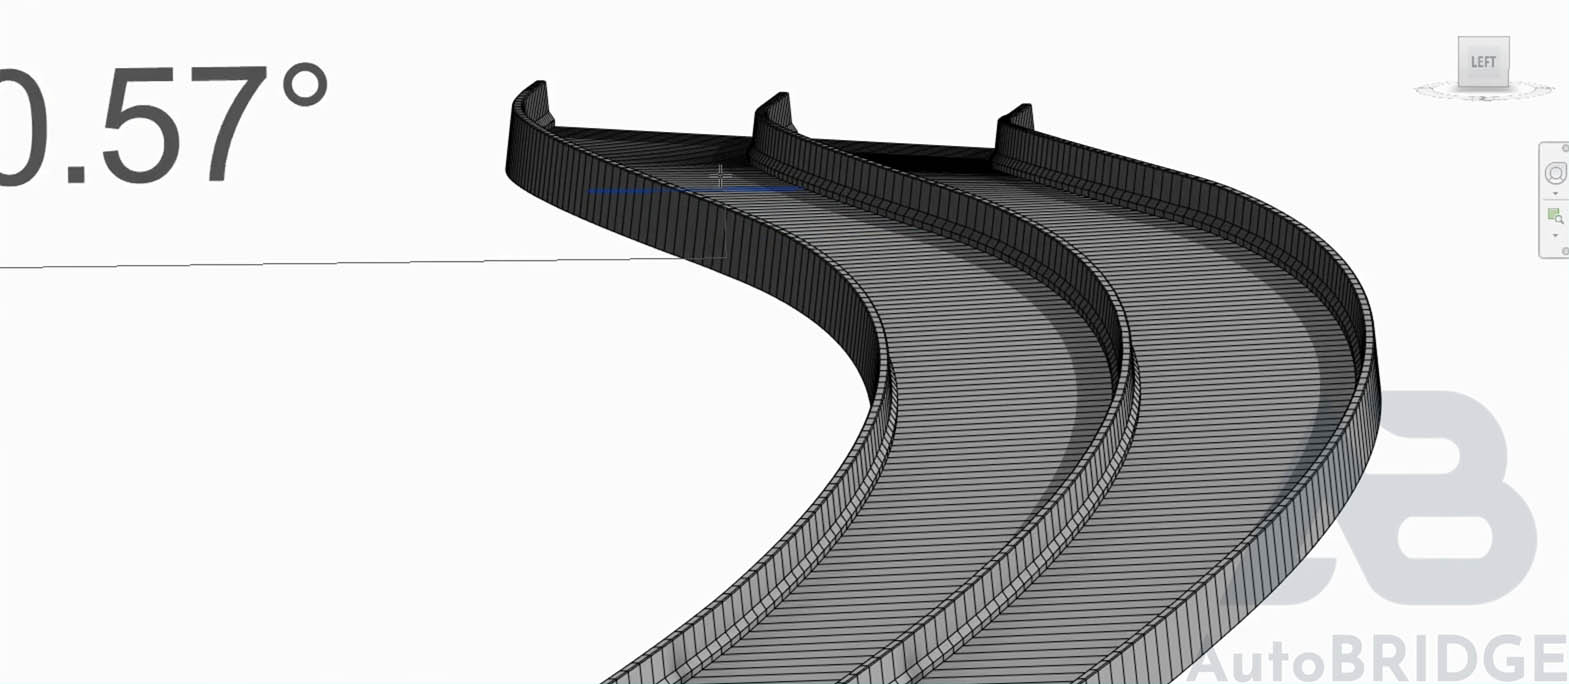
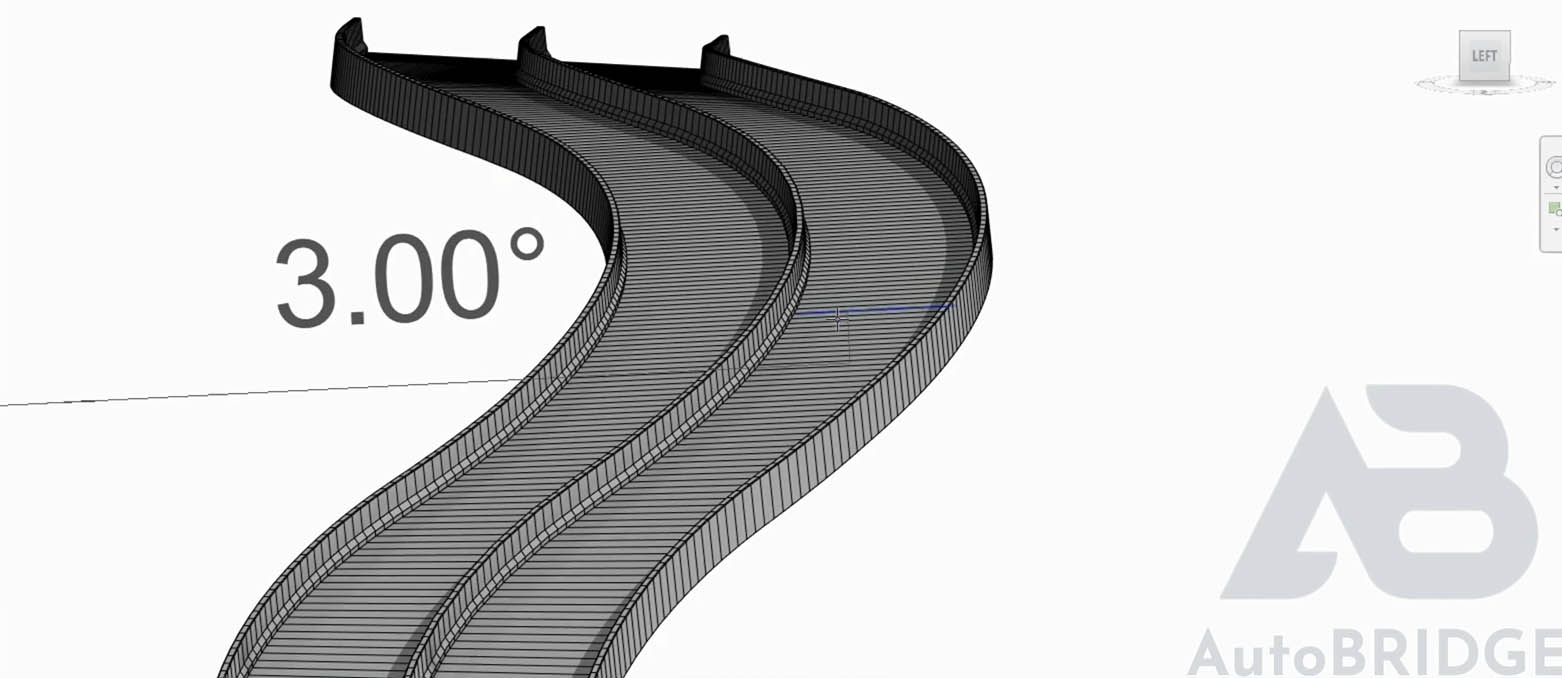
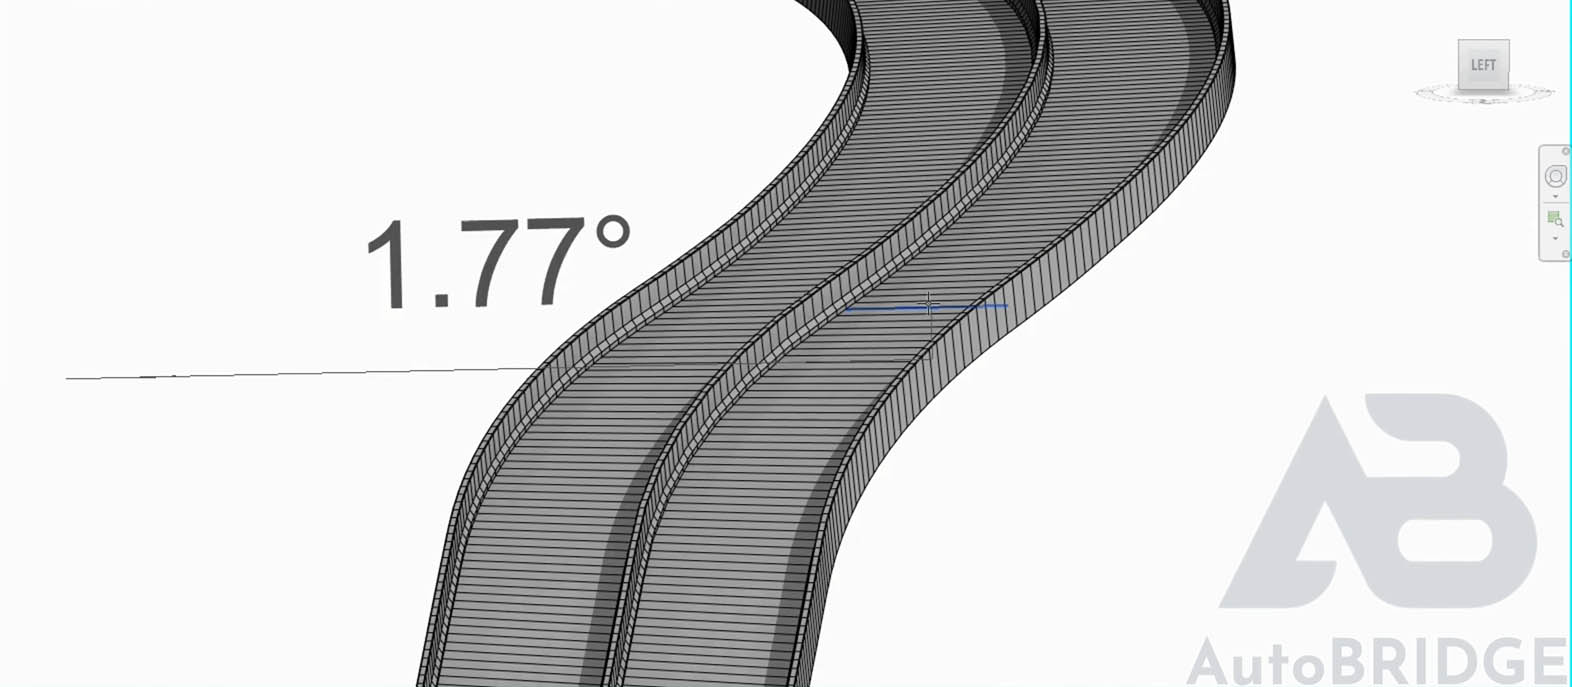
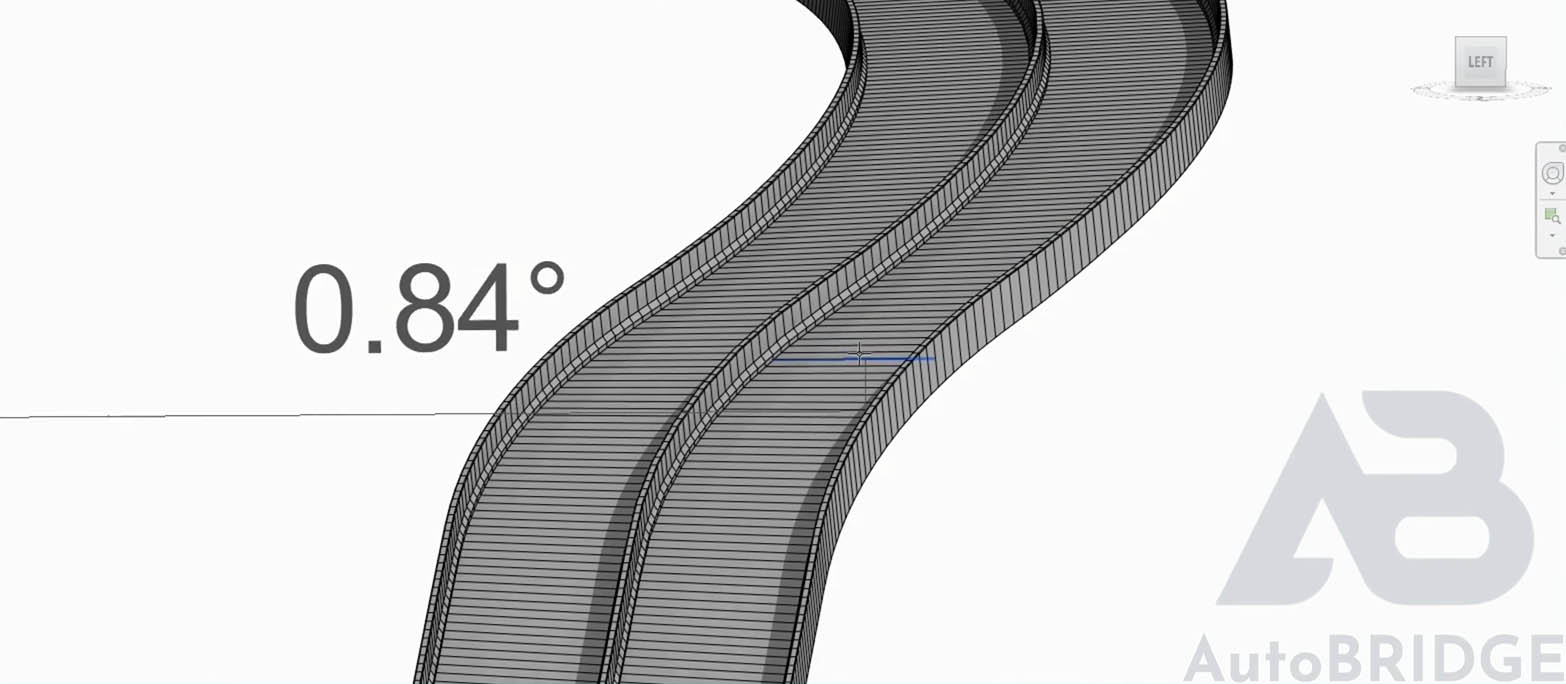
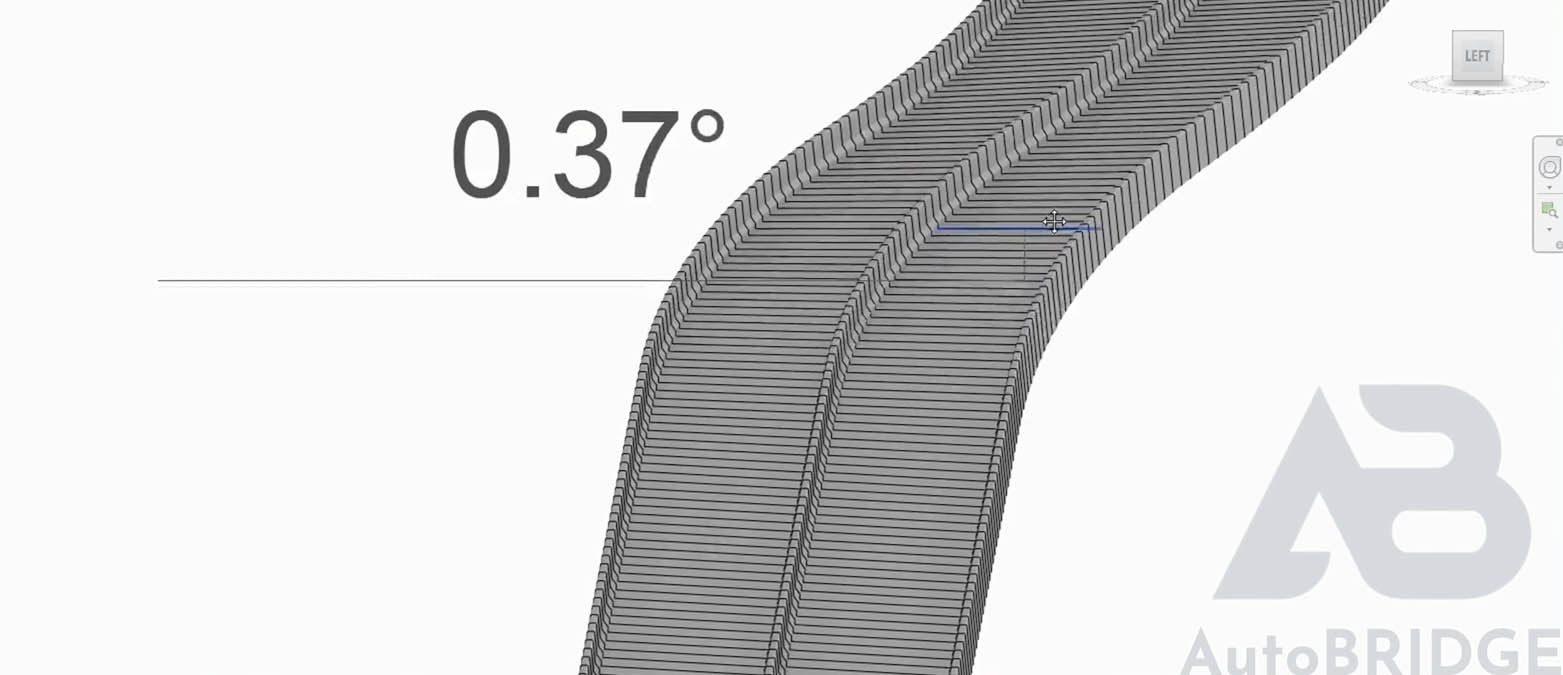
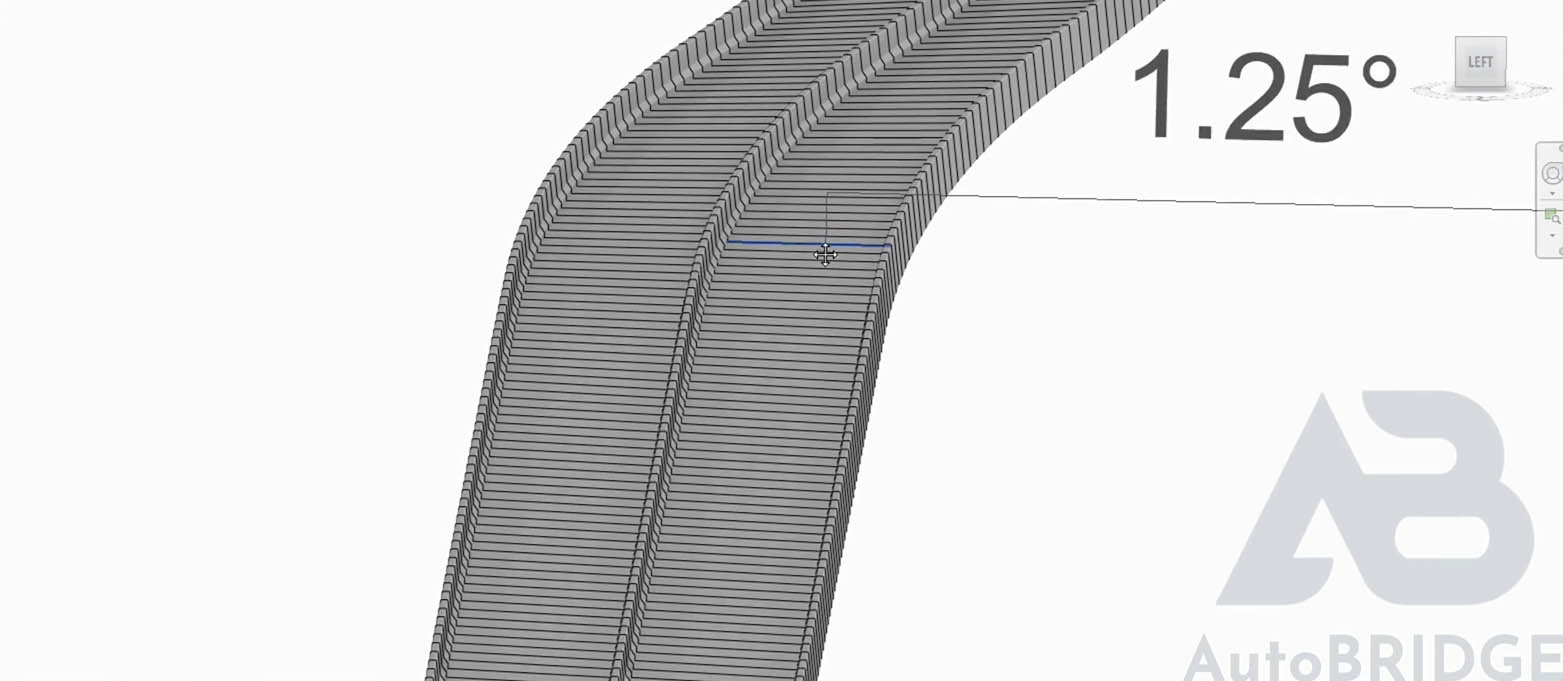
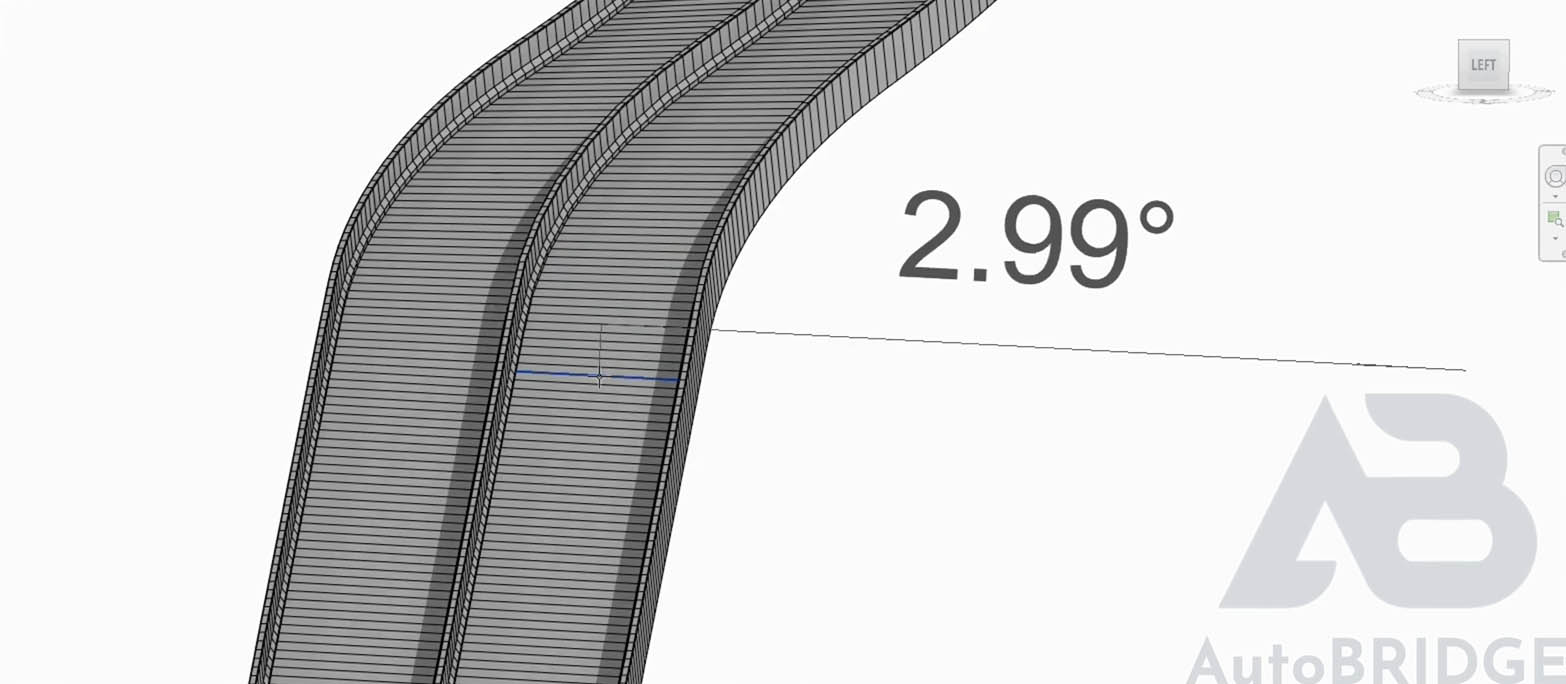
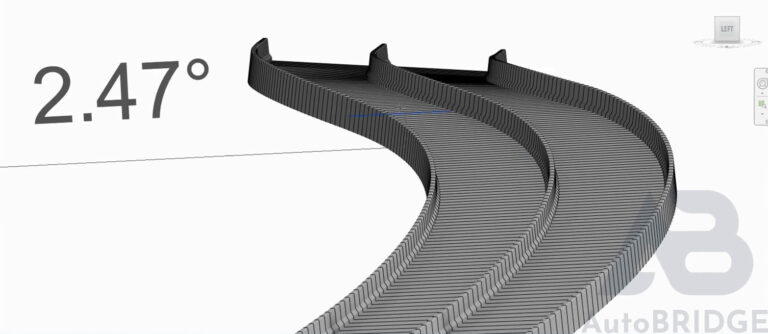
Advanced Variation Control
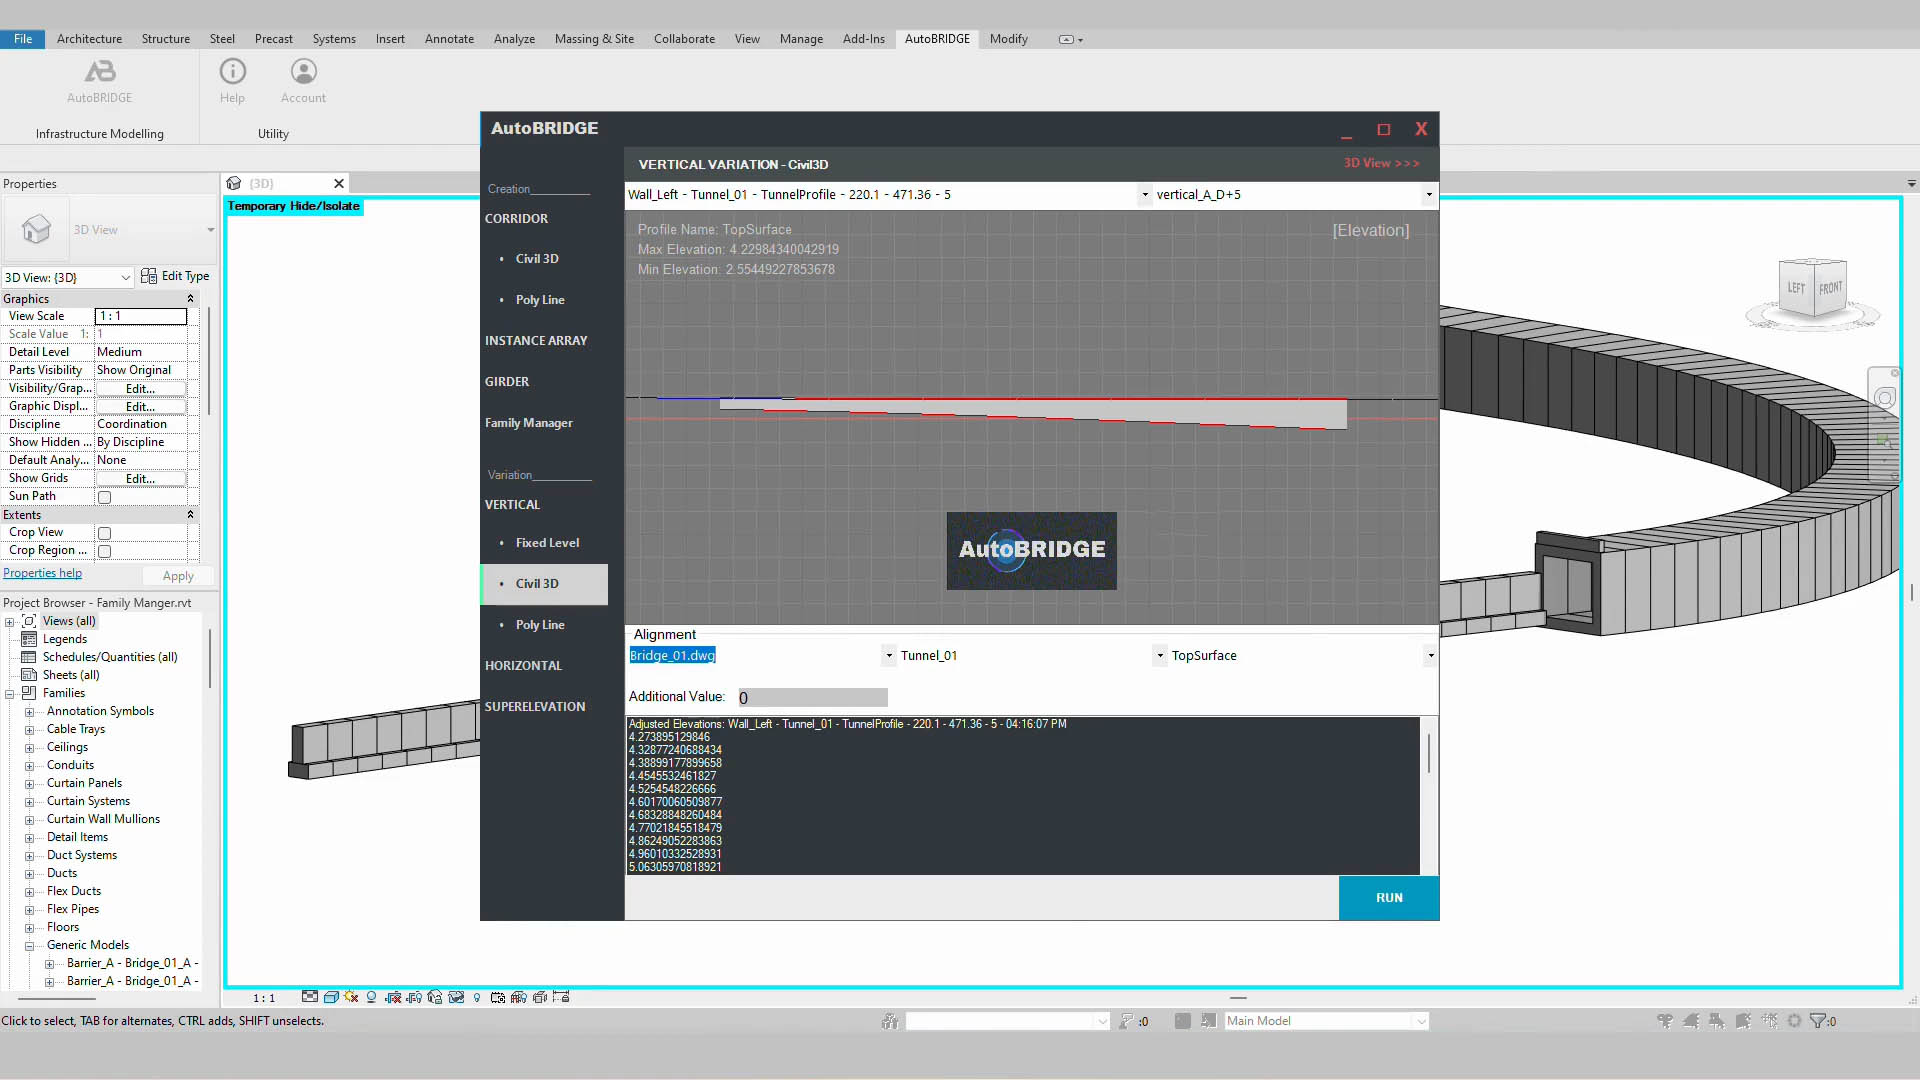
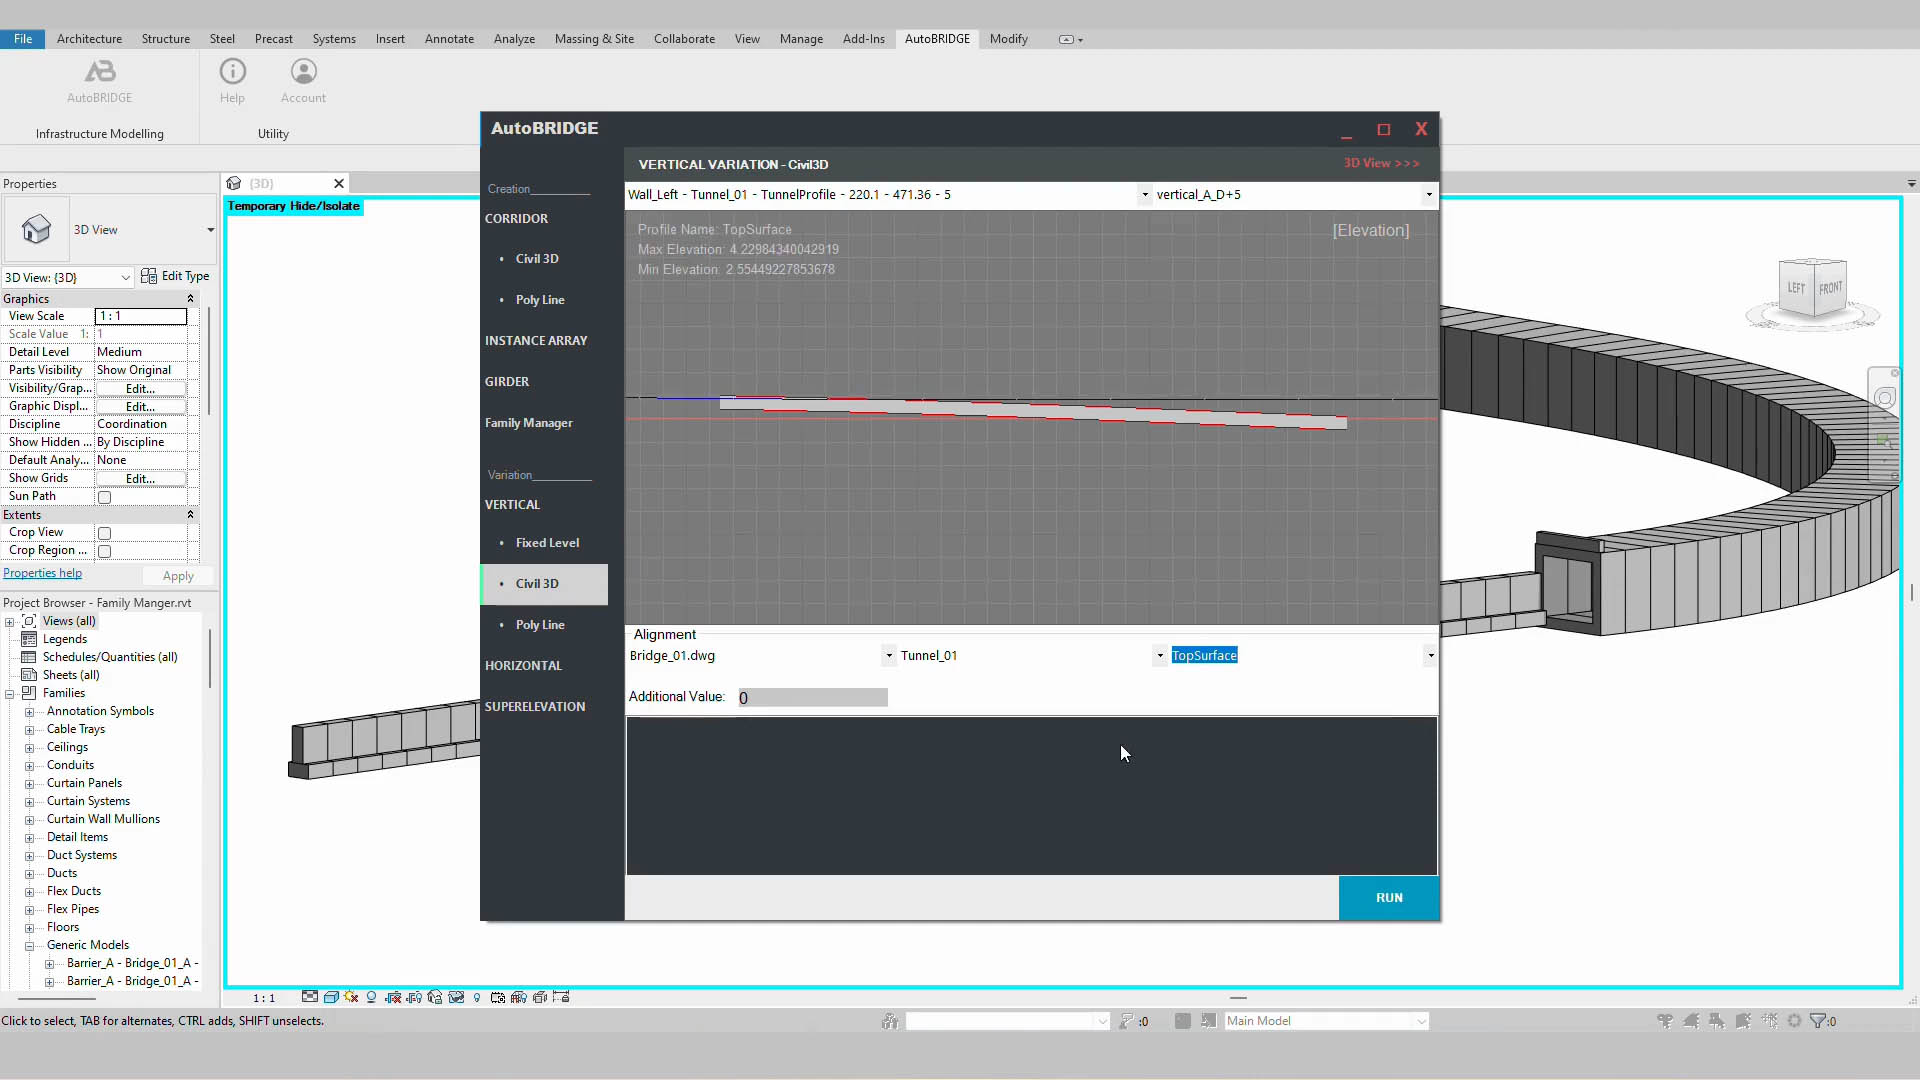
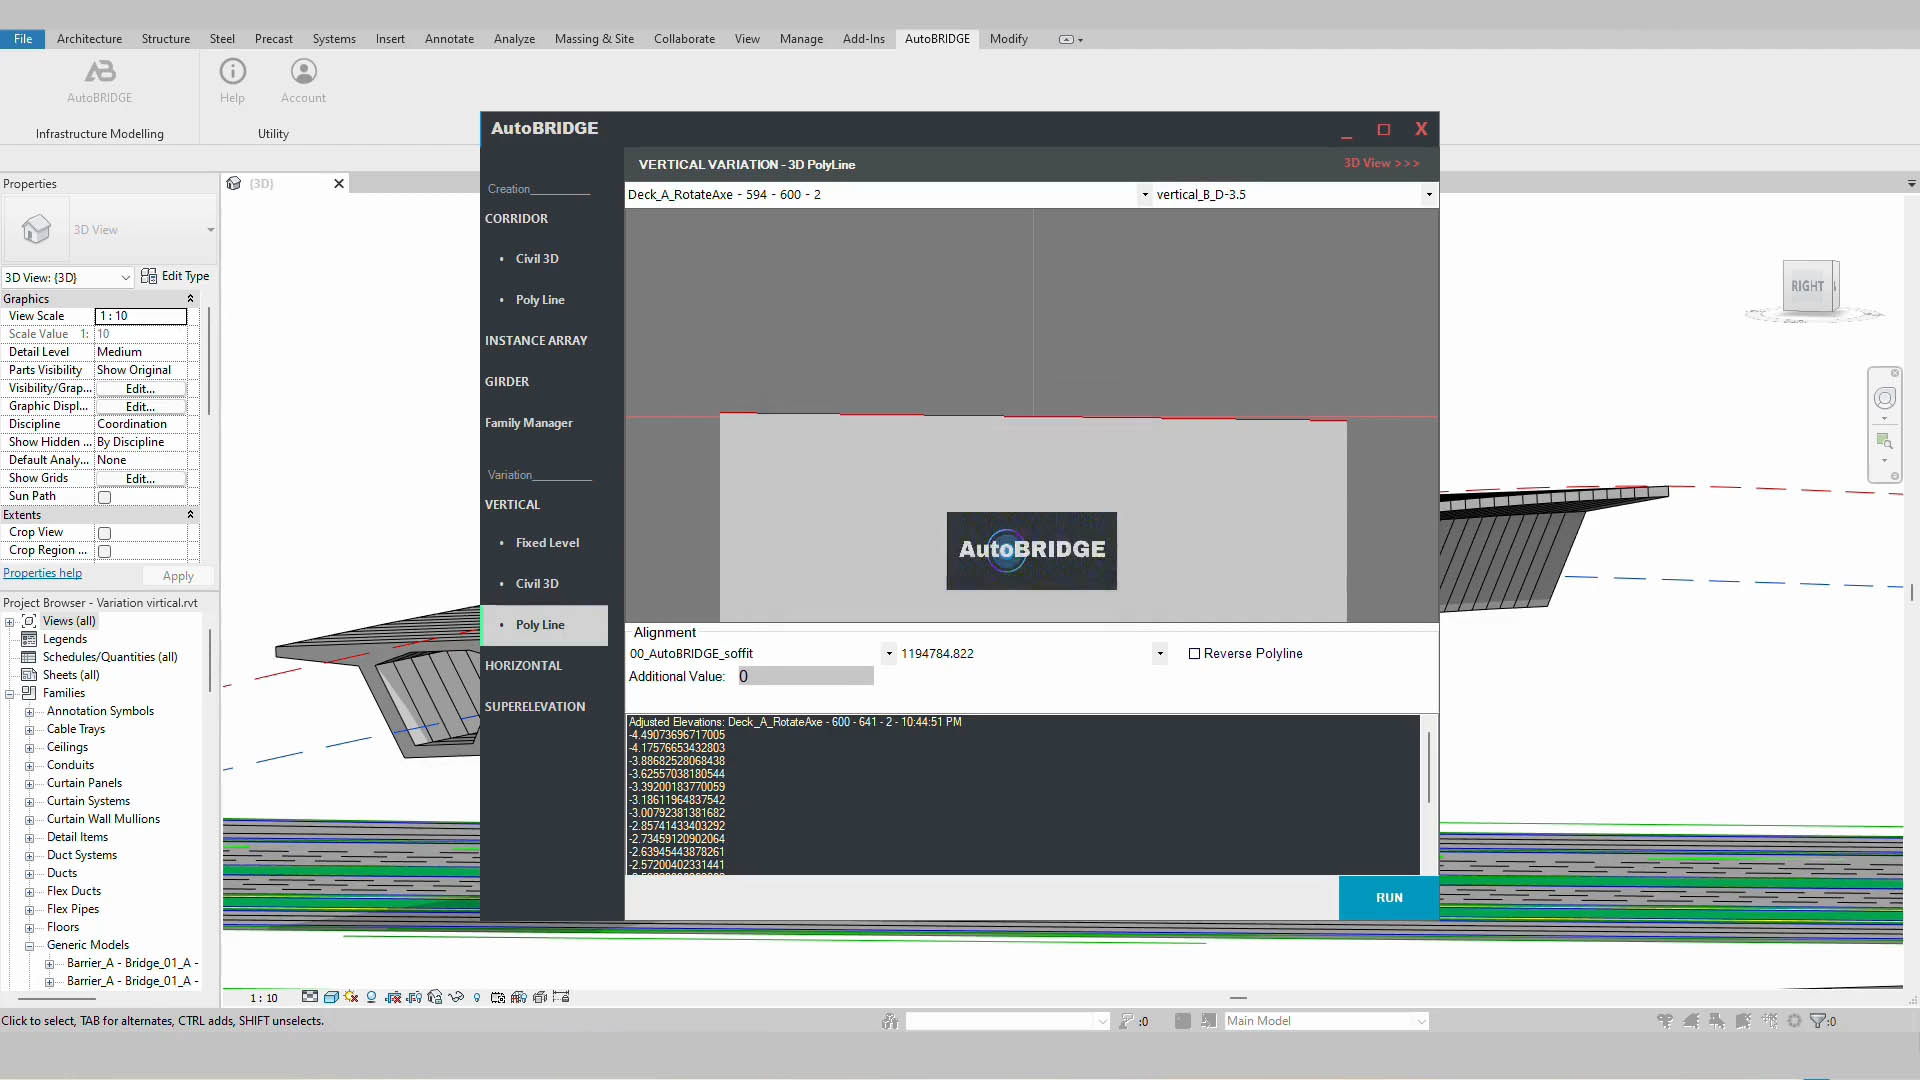
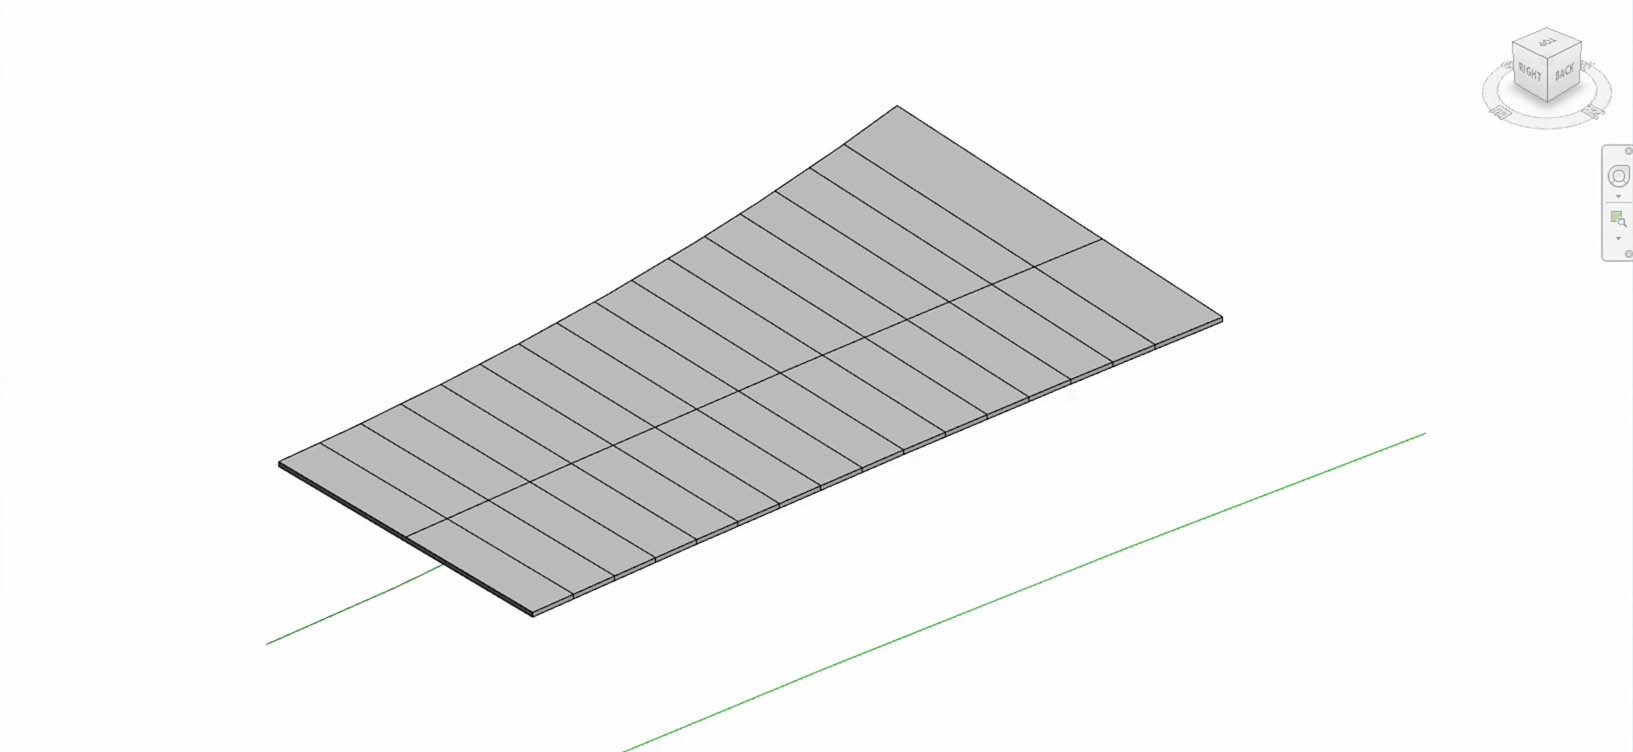
Vertical Variation
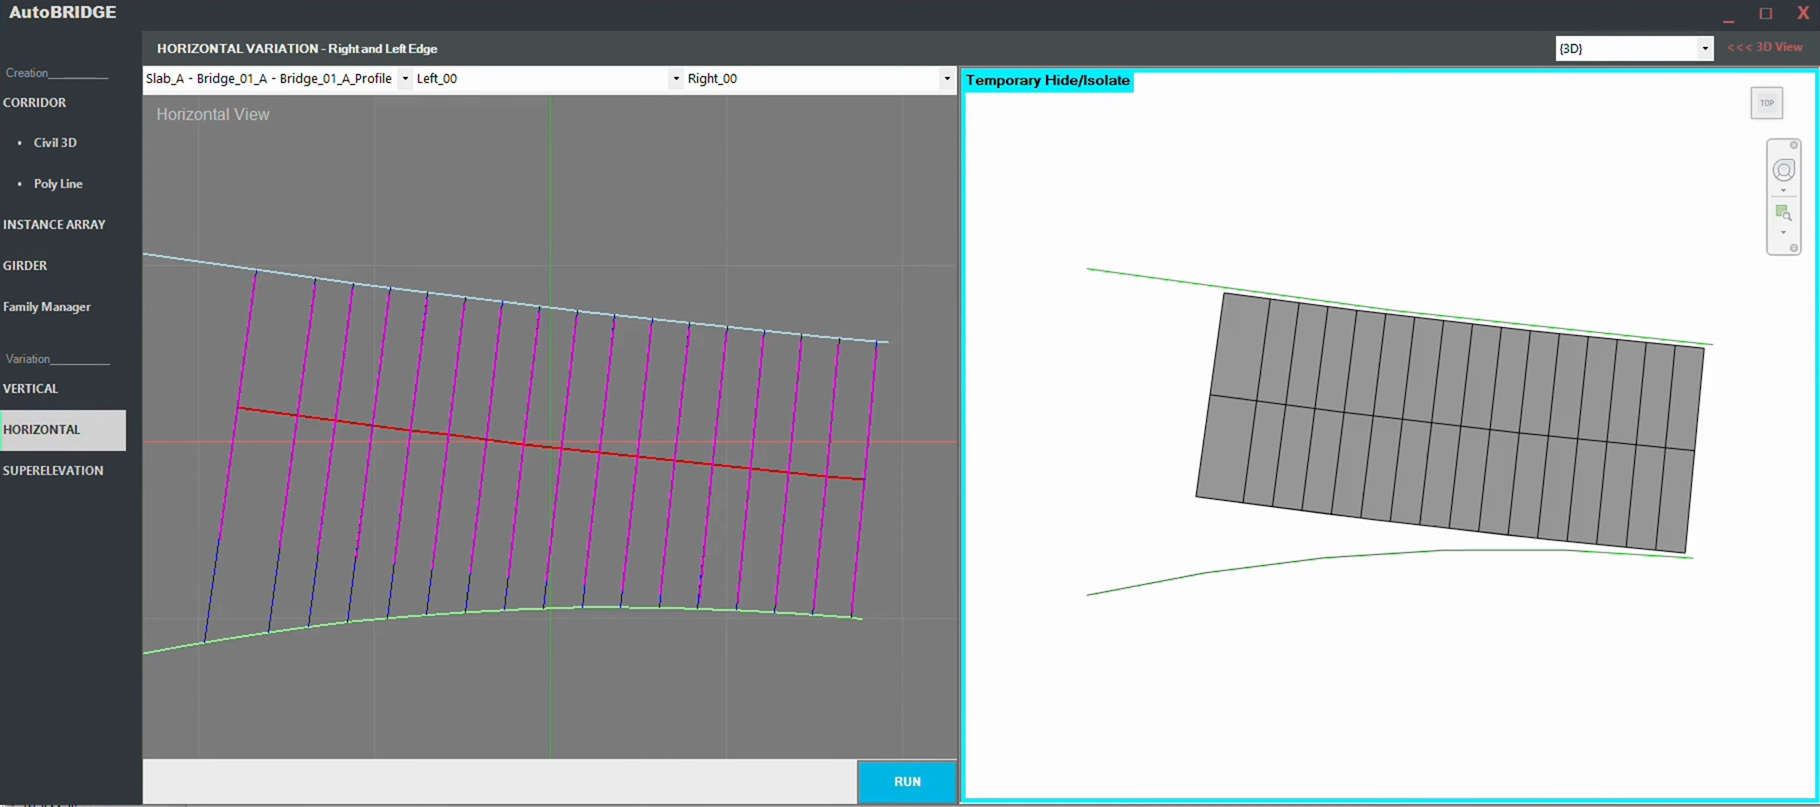
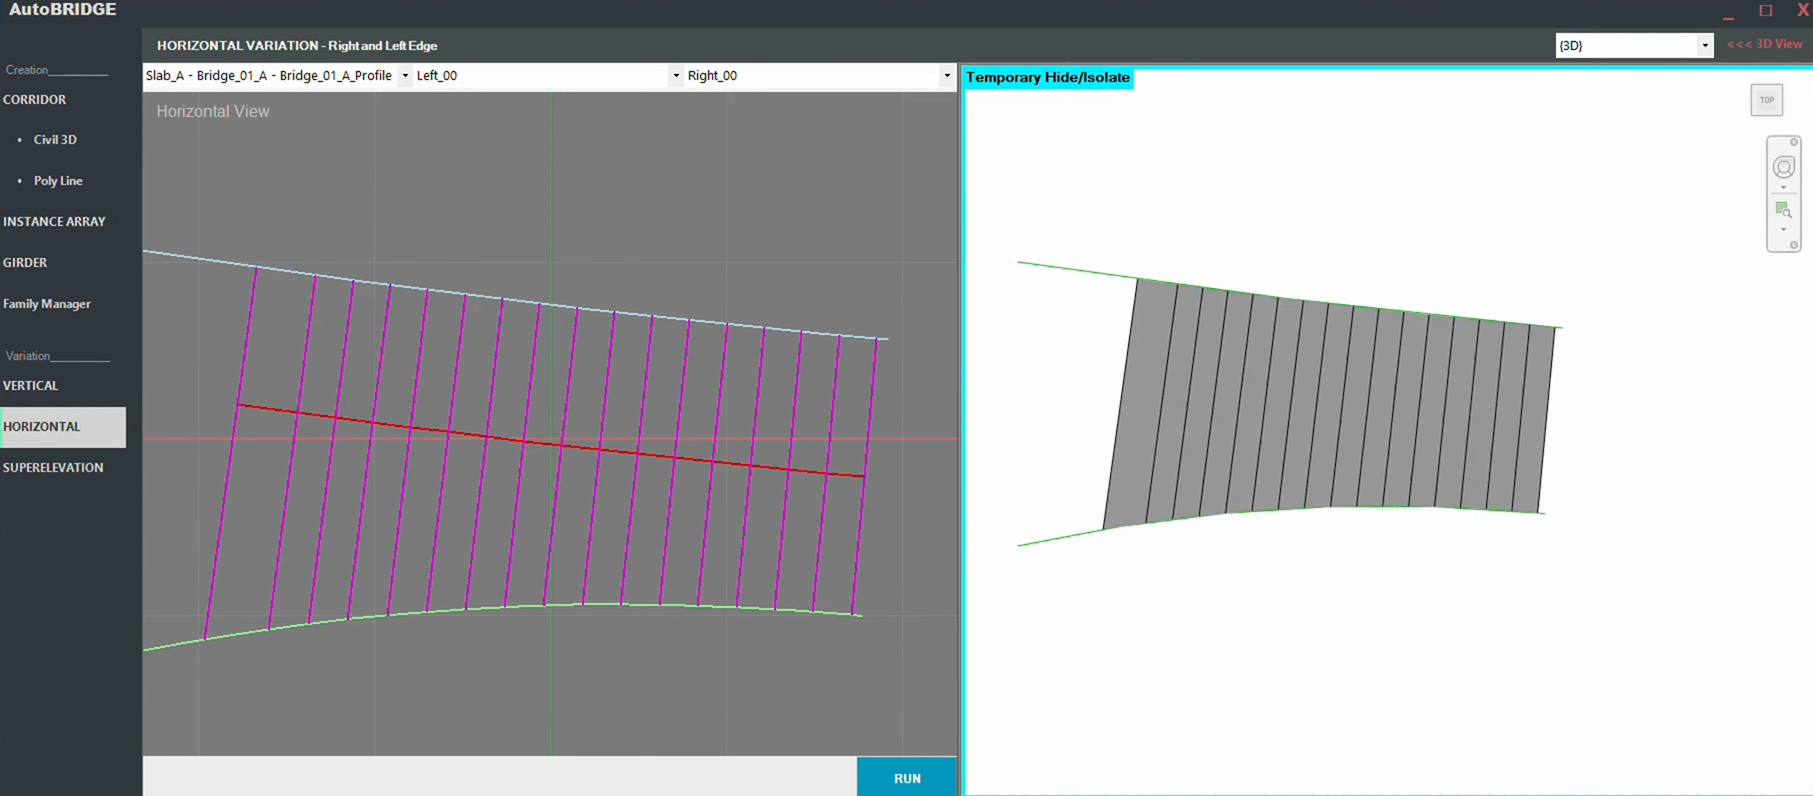
Horizontal Variation
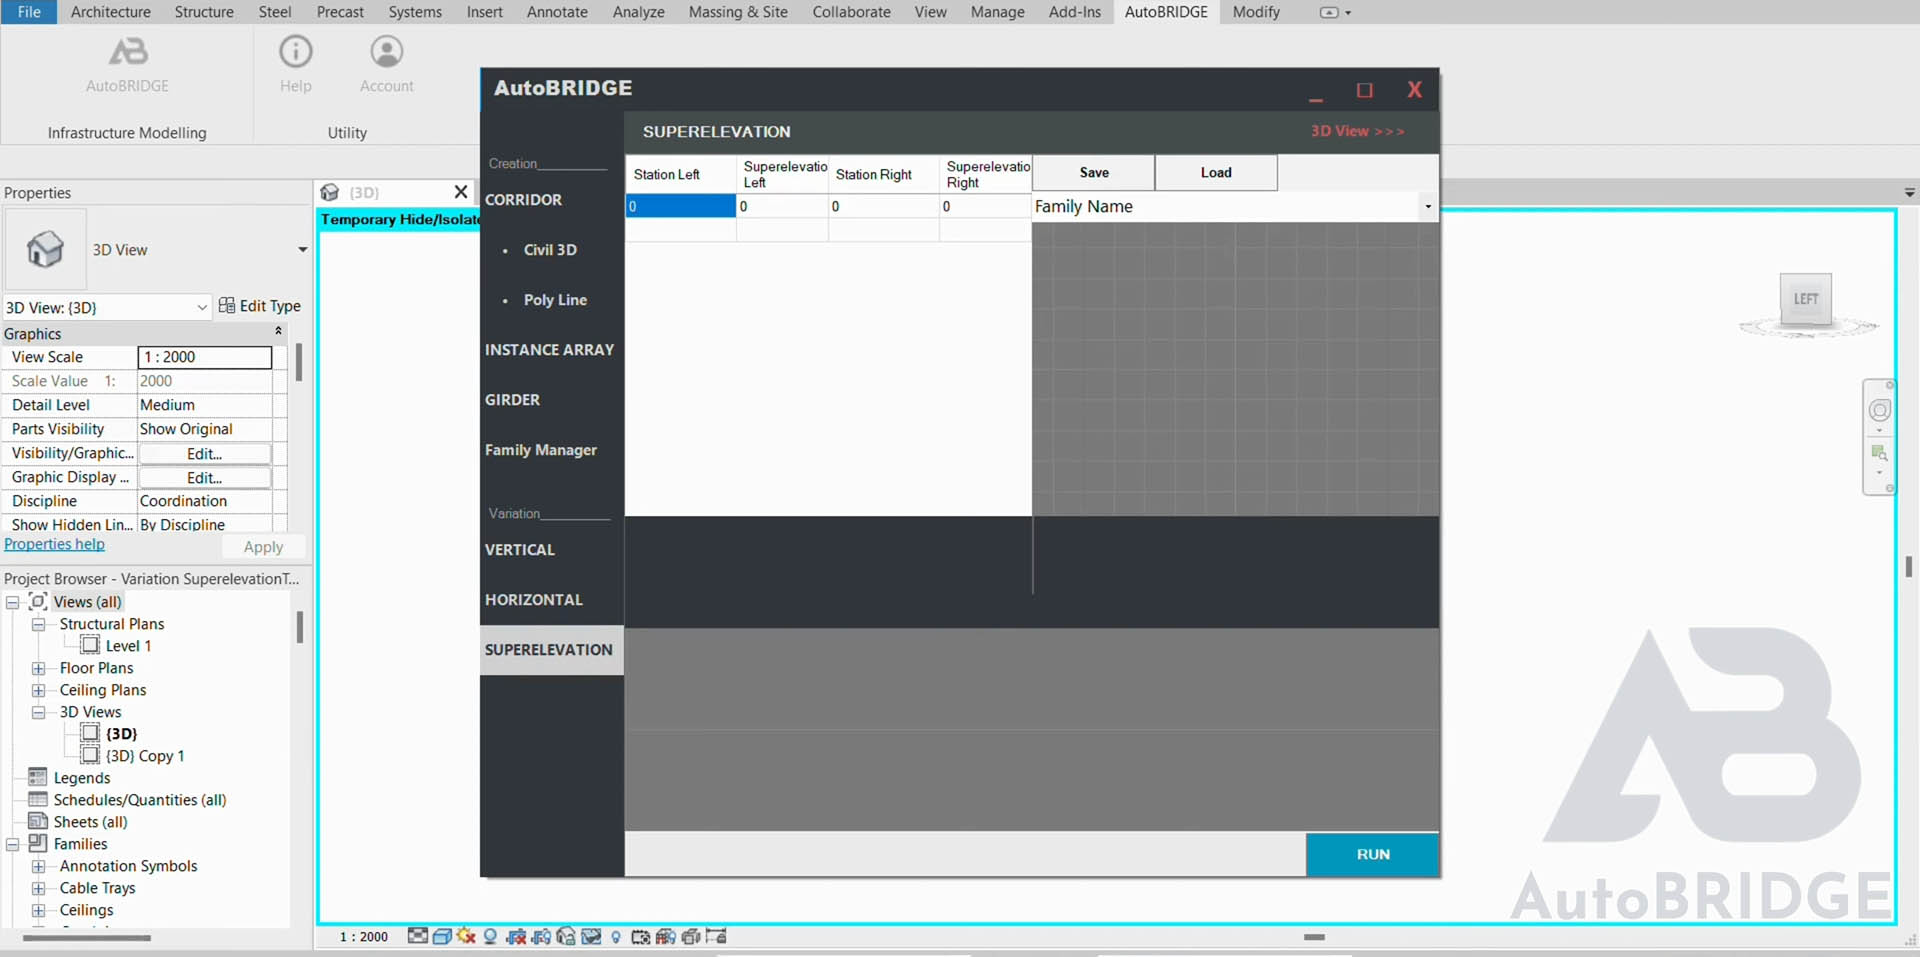
Superelevation Variation
The AutoBRIDGE User Manual
Explore the AutoBRIDGE User Manual
Embark on a journey of discovery with our comprehensive AutoBRIDGE User Manual. This guide is your key to unlocking the full potential of our Autodesk Revit add-ons. Whether you’re just getting started or looking to delve deeper into the features, our user manual has got you covered.
Learn how to set up AutoBRIDGE and access it directly from Revit. Understand the ins and outs of our system features, including Corridor Creation, Instance Array, Girder Modeling, Family Manager, and Variation Parameters Control. Each feature is explained in detail, providing you with the knowledge to utilize them effectively.
Encounter an issue? Our troubleshooting and support section provides solutions to common problems and information on how to reach out to our dedicated support team for further assistance. Stay updated with the latest system enhancements in our System Updates and Maintenance section.
For additional insights and tips, explore our online help center, watch our video tutorials, and read our blog. Start your learning journey with AutoBRIDGE today!”
Frequently
Asked Questions
- Visit the Download Page: Navigate to the AutoBridge free trial downlaod page.
- Customize Your Preferences:
- Select the appropriate Revit version (e.g., 2023, 2024) that you’re using.
- Select the appropriate Civil 3D version (e.g., 2022, 2023, 2024).
- Download the Free Trial: Click the provided download free trial button to start the download process.
AutoBridge will be ready for you to explore and evaluate!
If you need further assistance, don’t hesitate to ask our chatbot or contact us!
- Run the installer and follow the prompts.
- Accept the license agreement and confirm installation.
- Ensure the AutoBRIDGE add-in files are correctly placed in the Revit add-ins folder (usually located at %ProgramData%\Autodesk\Revit\Addins\2024\).
- After installation, restart Revit to load the AutoBRIDGE tab in the Revit toolbar.
- If the AutoBRIDGE tab doesn’t appear in Revit:
- Restart Revit to ensure the add-in loads.
- Check that the AutoBRIDGE files are in the correct add-ins folder.
- Confirm you’re using Revit 2024, as AutoBRIDGE 2024 is only compatible with this version.
AutoBridge is a powerful add-in for Autodesk Revit, designed to streamline and automate the infrastructure modeling process. It provides a comprehensive set of tools to enhance the efficiency and accuracy of designing 3D structures. Here are the key purposes and features of AutoBridge:
1. Corridor Creation:
Facilitates the creation of corridors by integrating with Civil 3D alignment data, allowing users to define alignments, select Revit nested families, and set solid and void parameters for precise corridor execution.
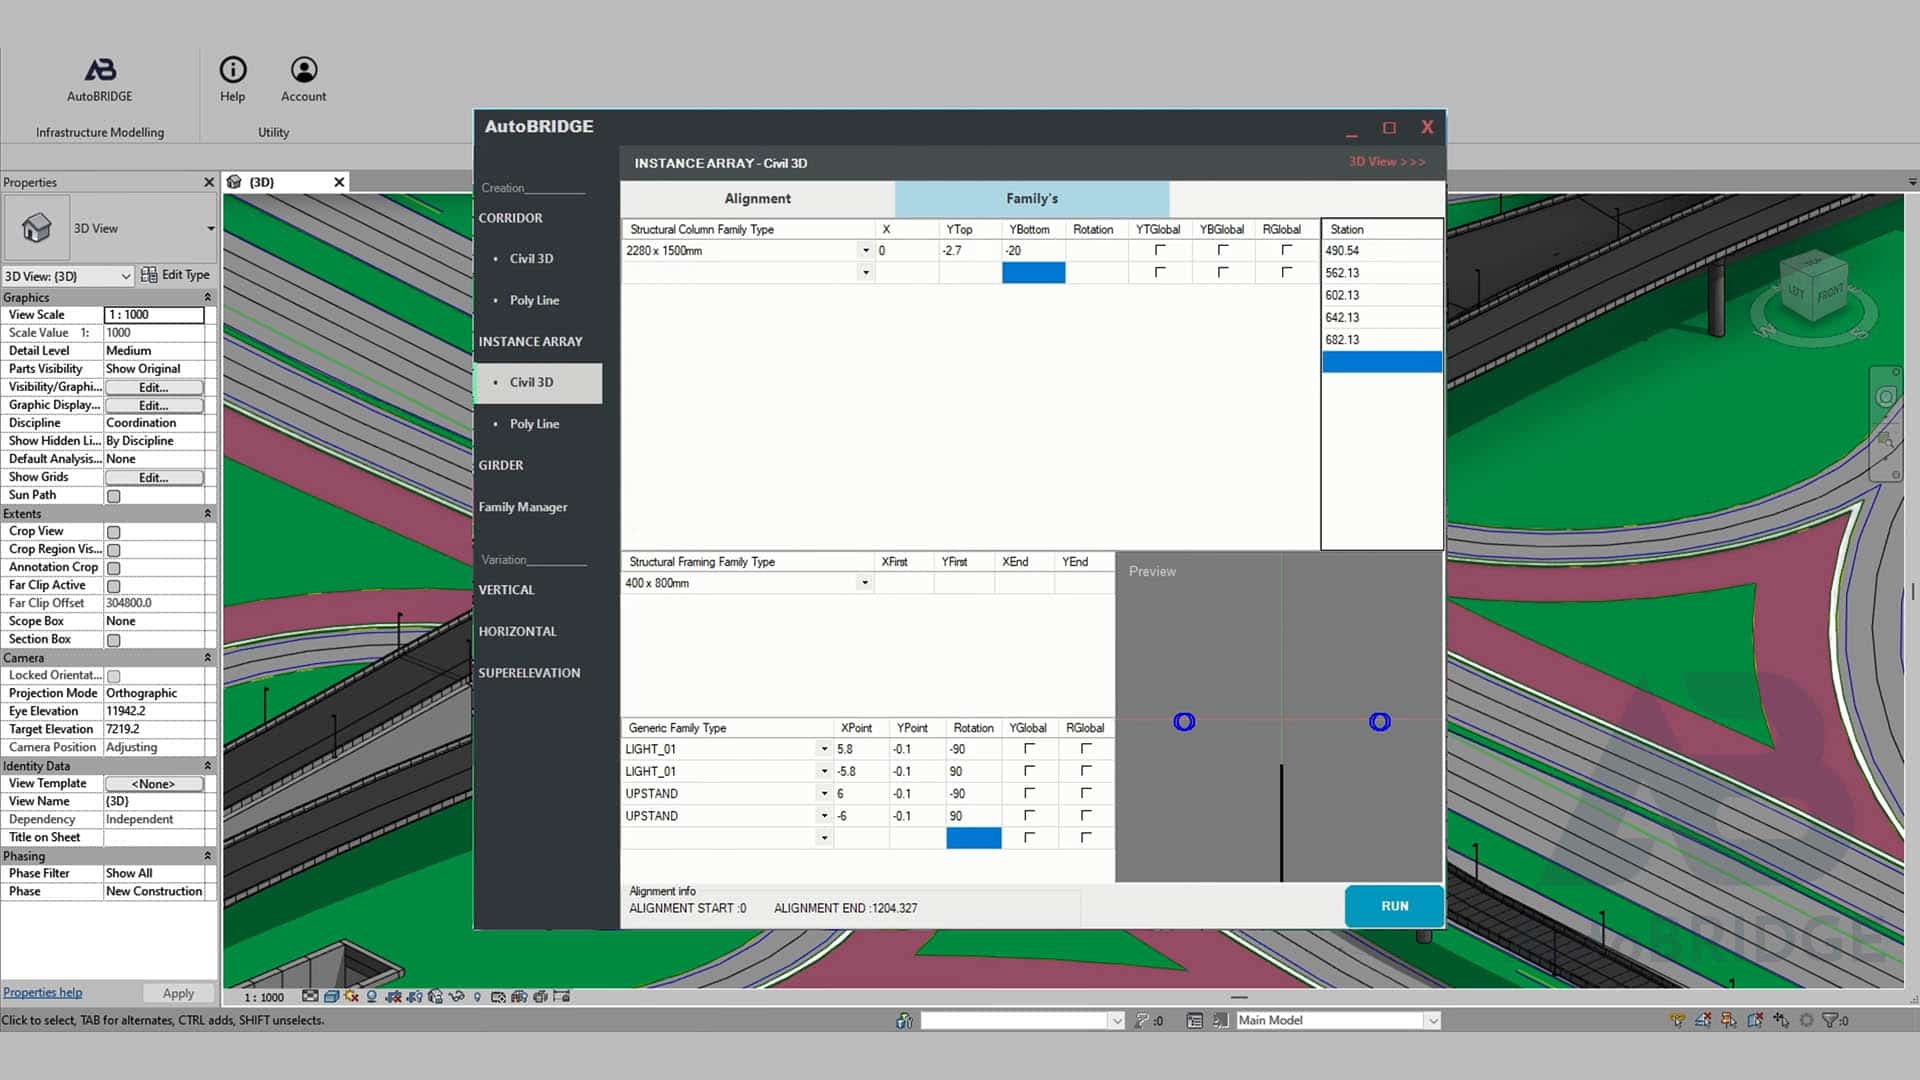
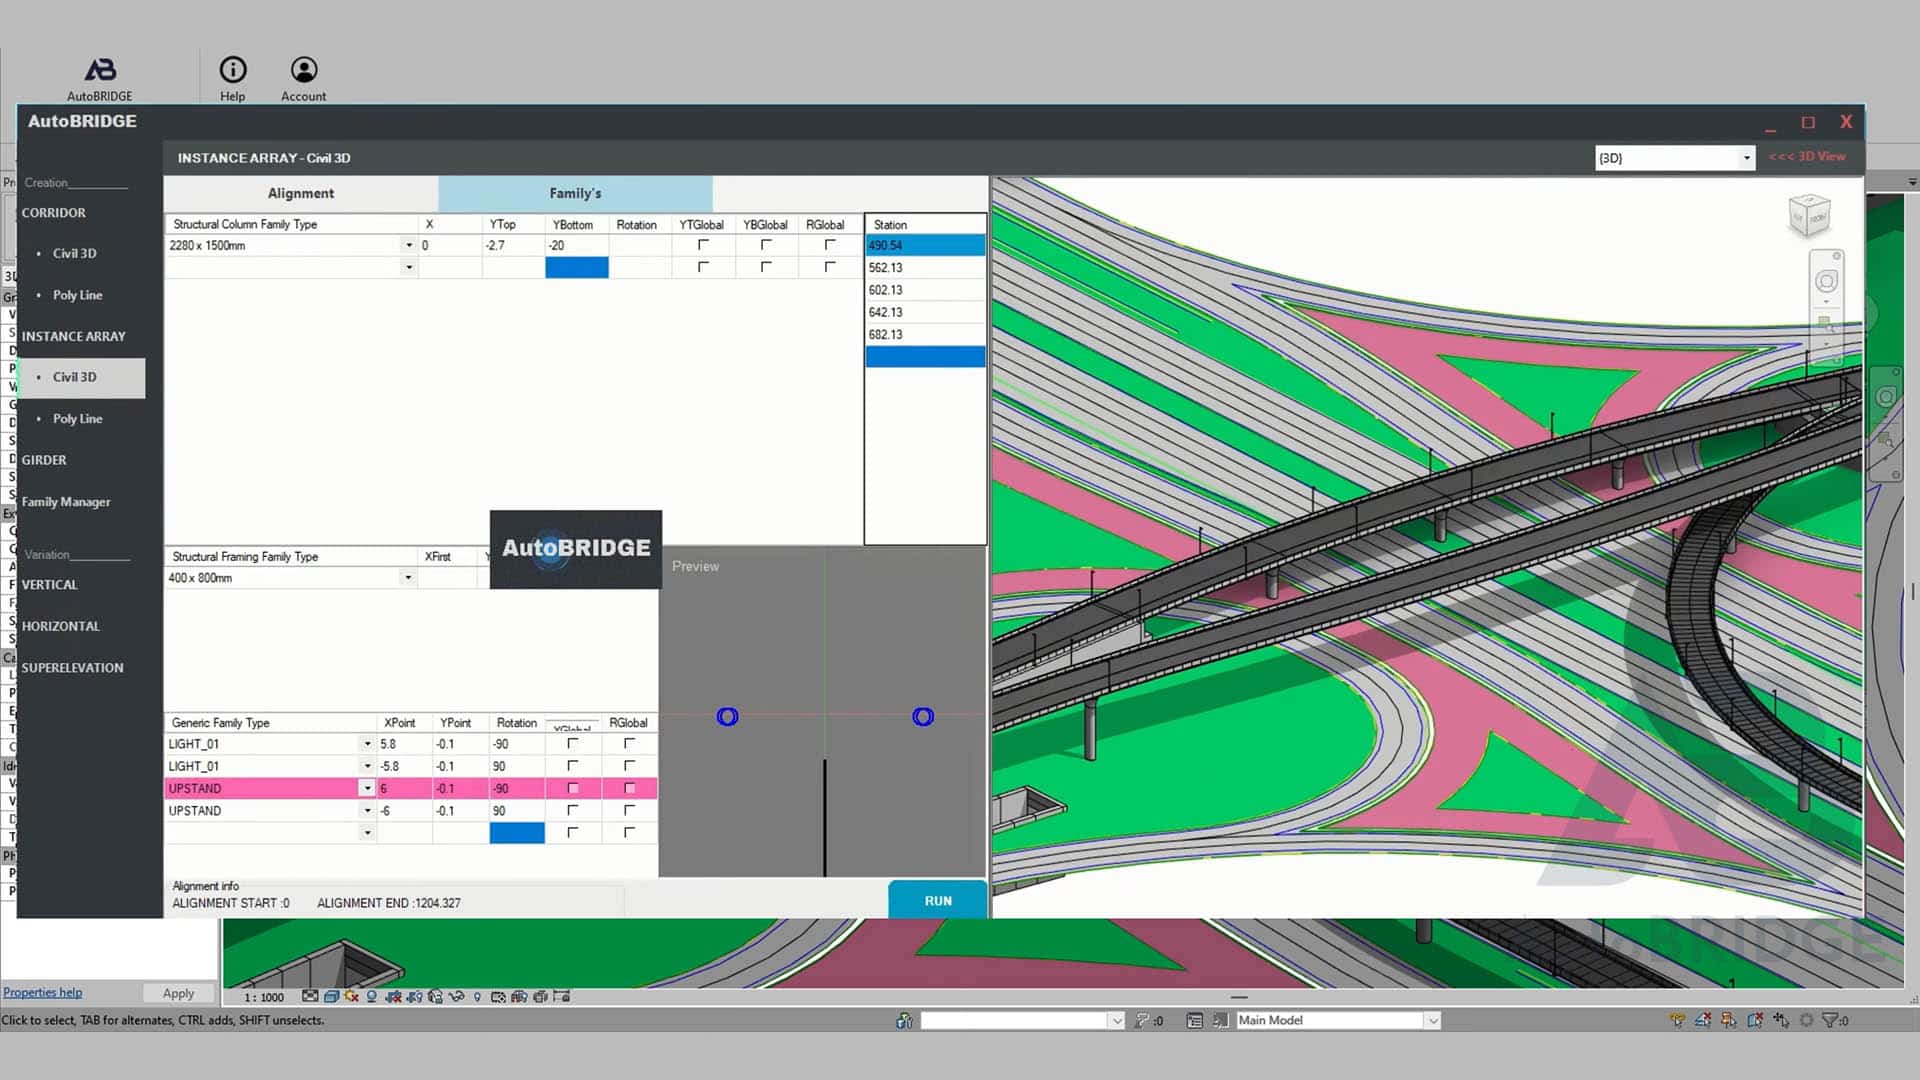
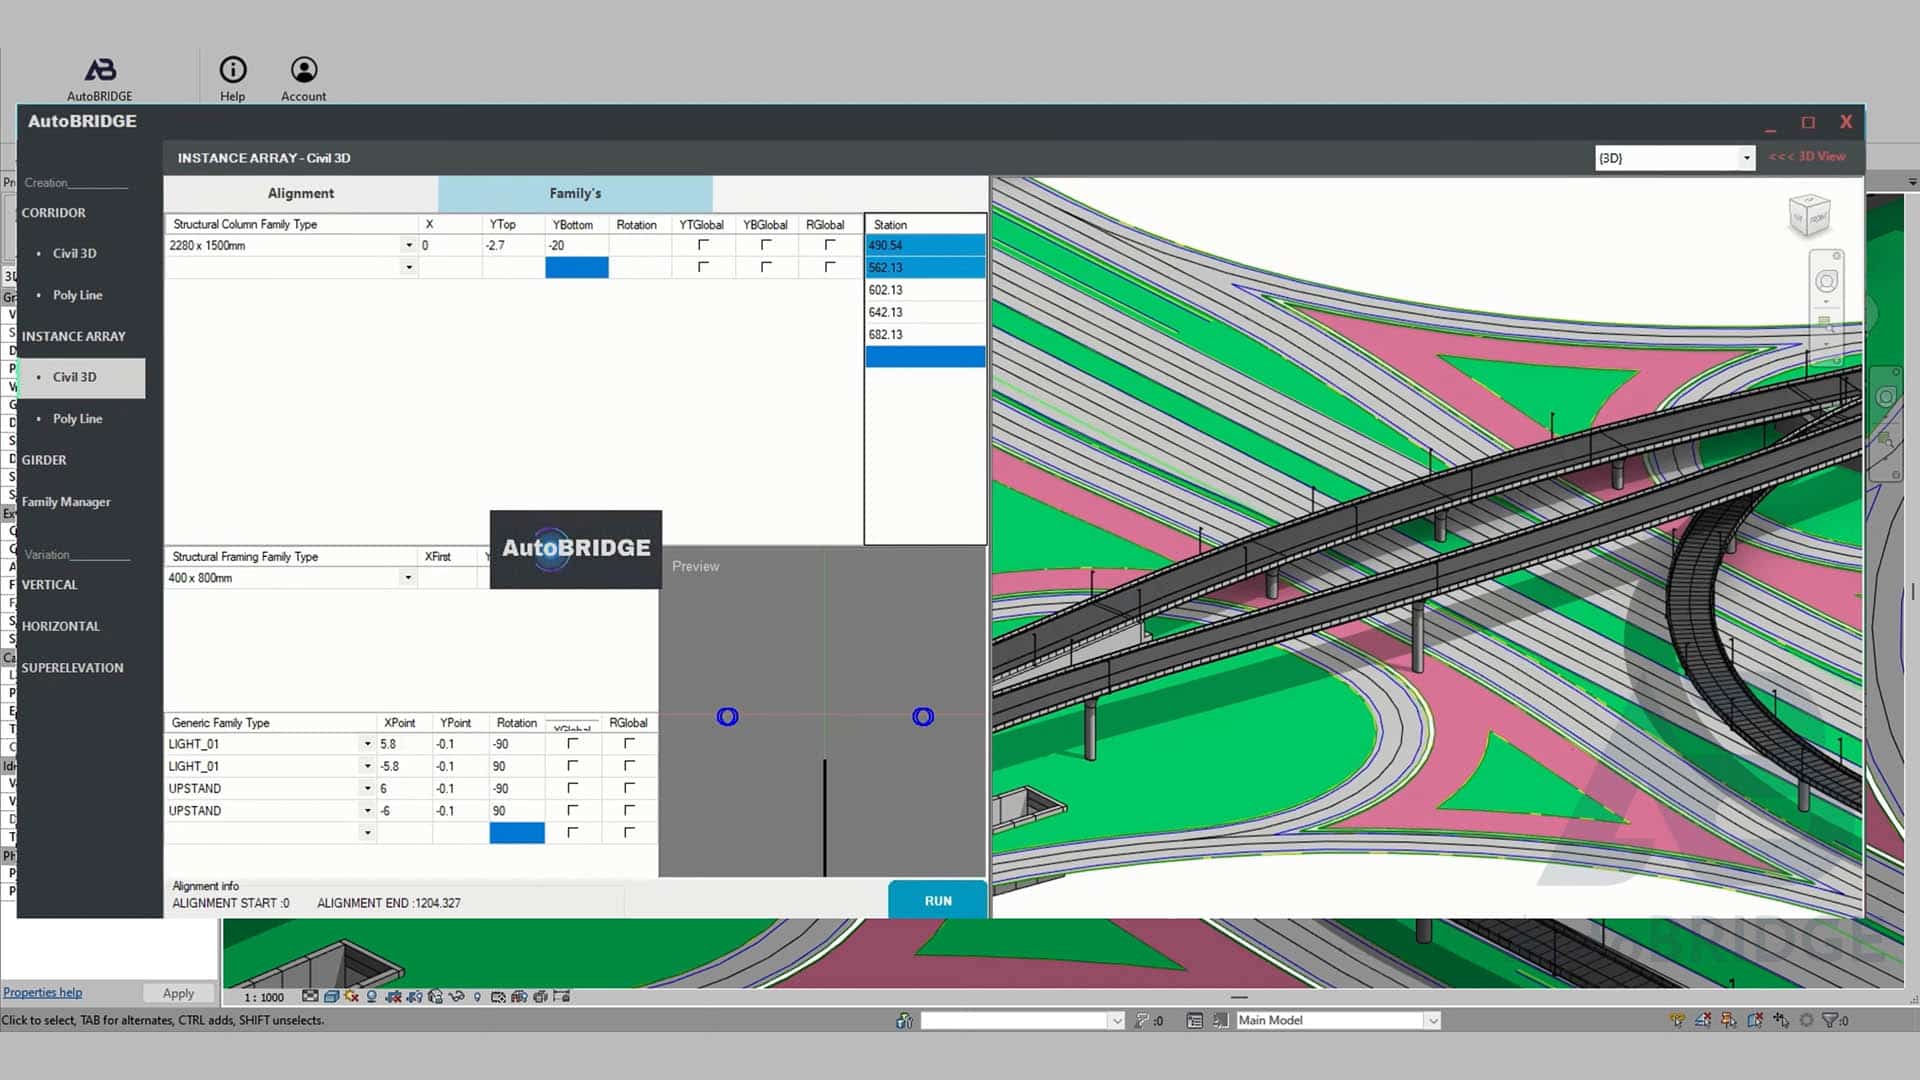
2. Instance Array:
Enables the efficient generation of arrays of instance elements within Revit, supporting various family types such as Structural Column, Structural Framing, and Generic. This feature ensures precise placement of elements by leveraging Civil 3D alignment data.
3. Girder Modeling:
Simplifies the creation of structural framing elements, specifically bridge girders, by using model lines and bridge decks. This ensures straightforward attachment of girders to the deck's bottom.
4. Family Manager:
Enhances productivity by allowing users to create, manage, and reuse bridge templates and nested families across multiple projects. This reduces repetitive work and ensures consistency in bridge design elements.
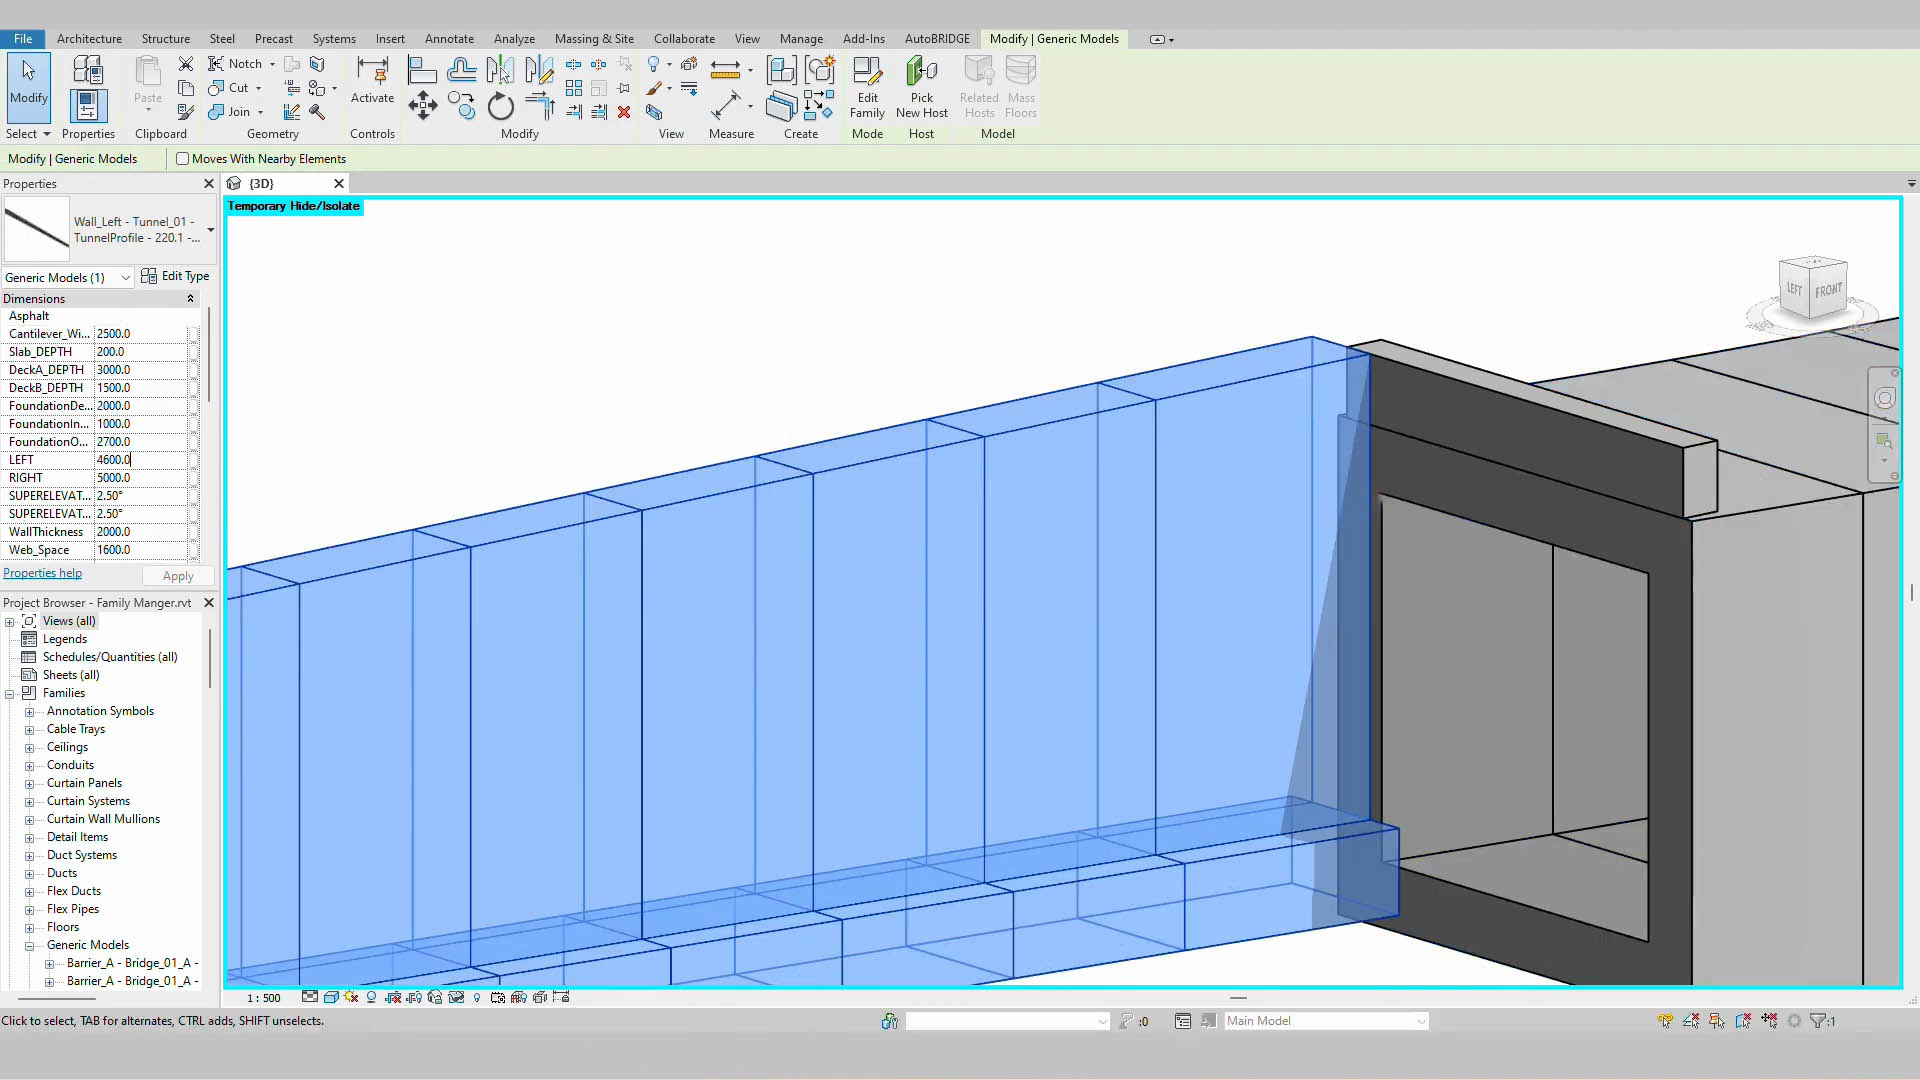
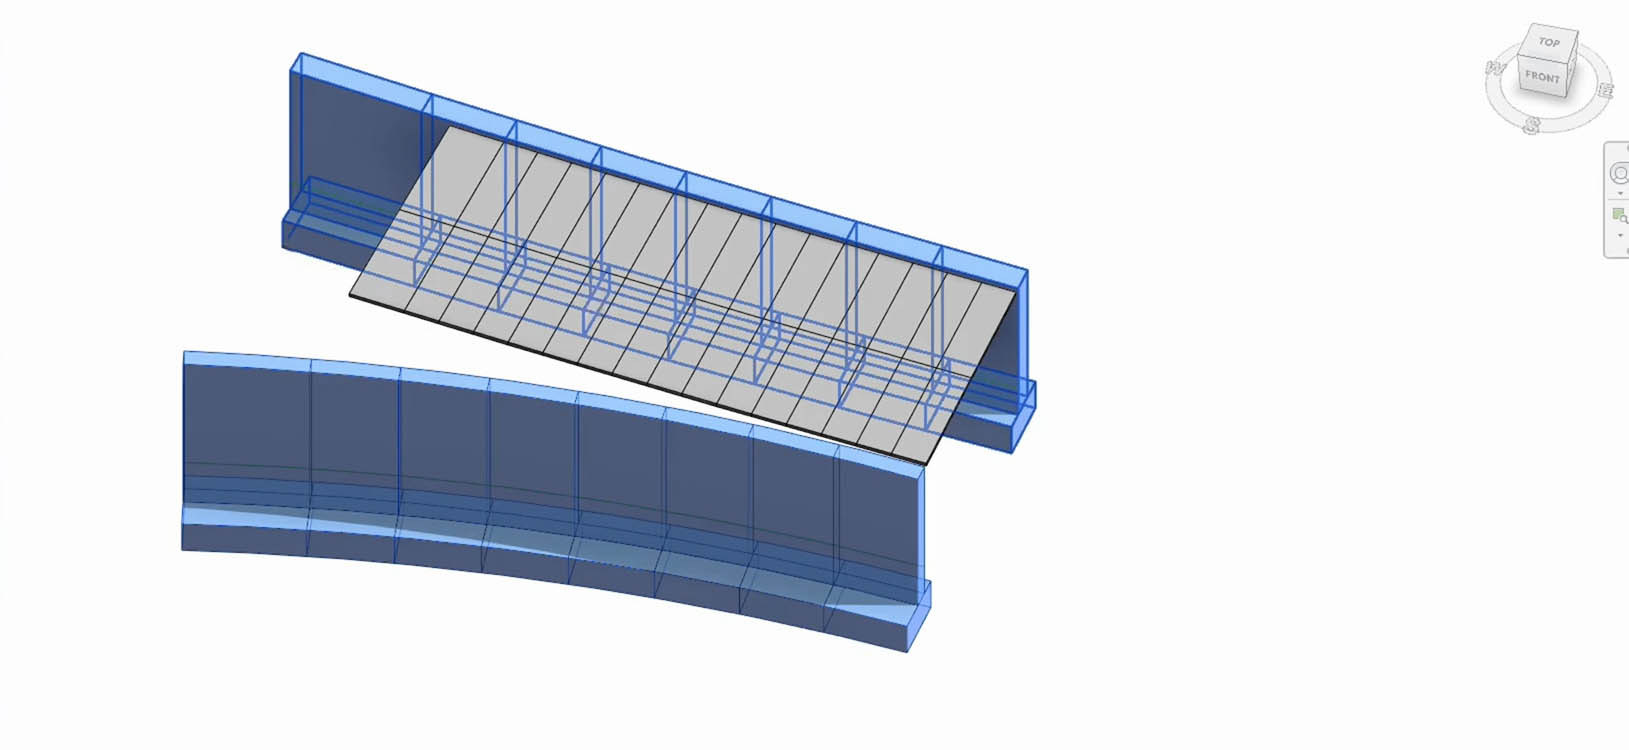
5. Variation Parameters Control:
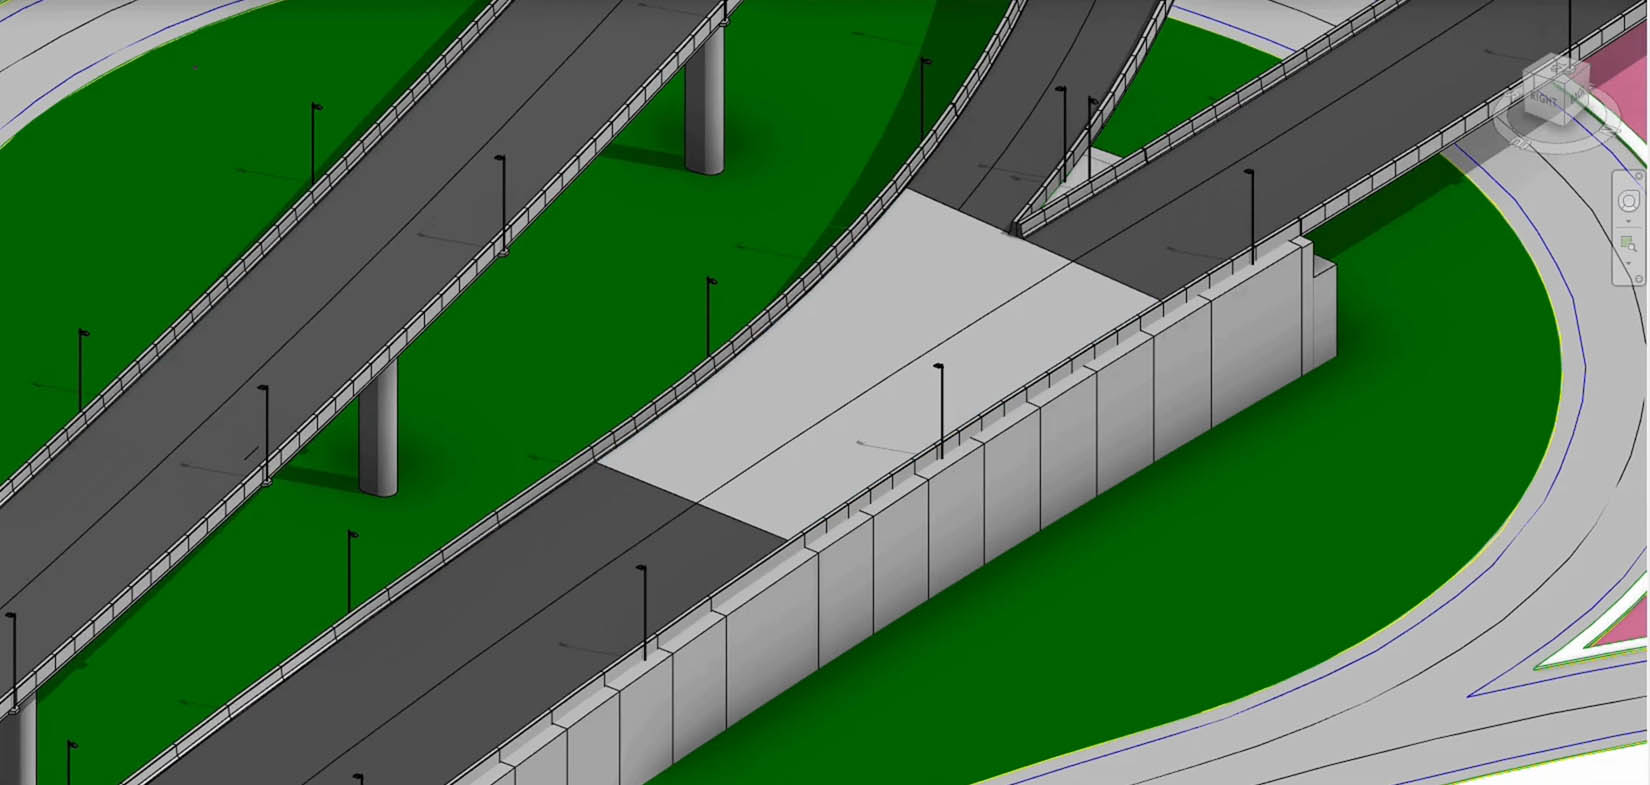
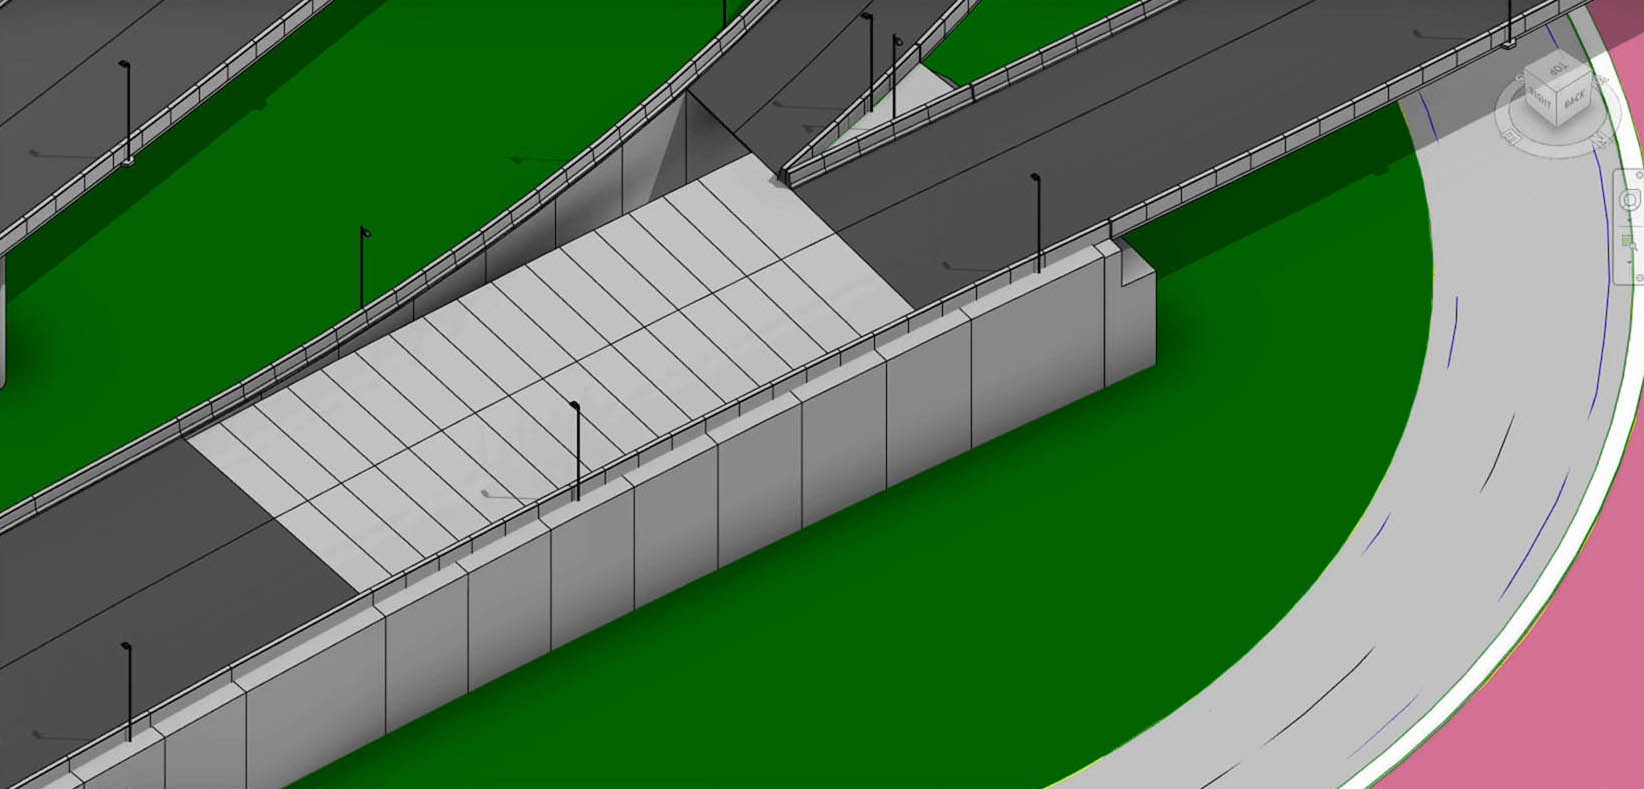
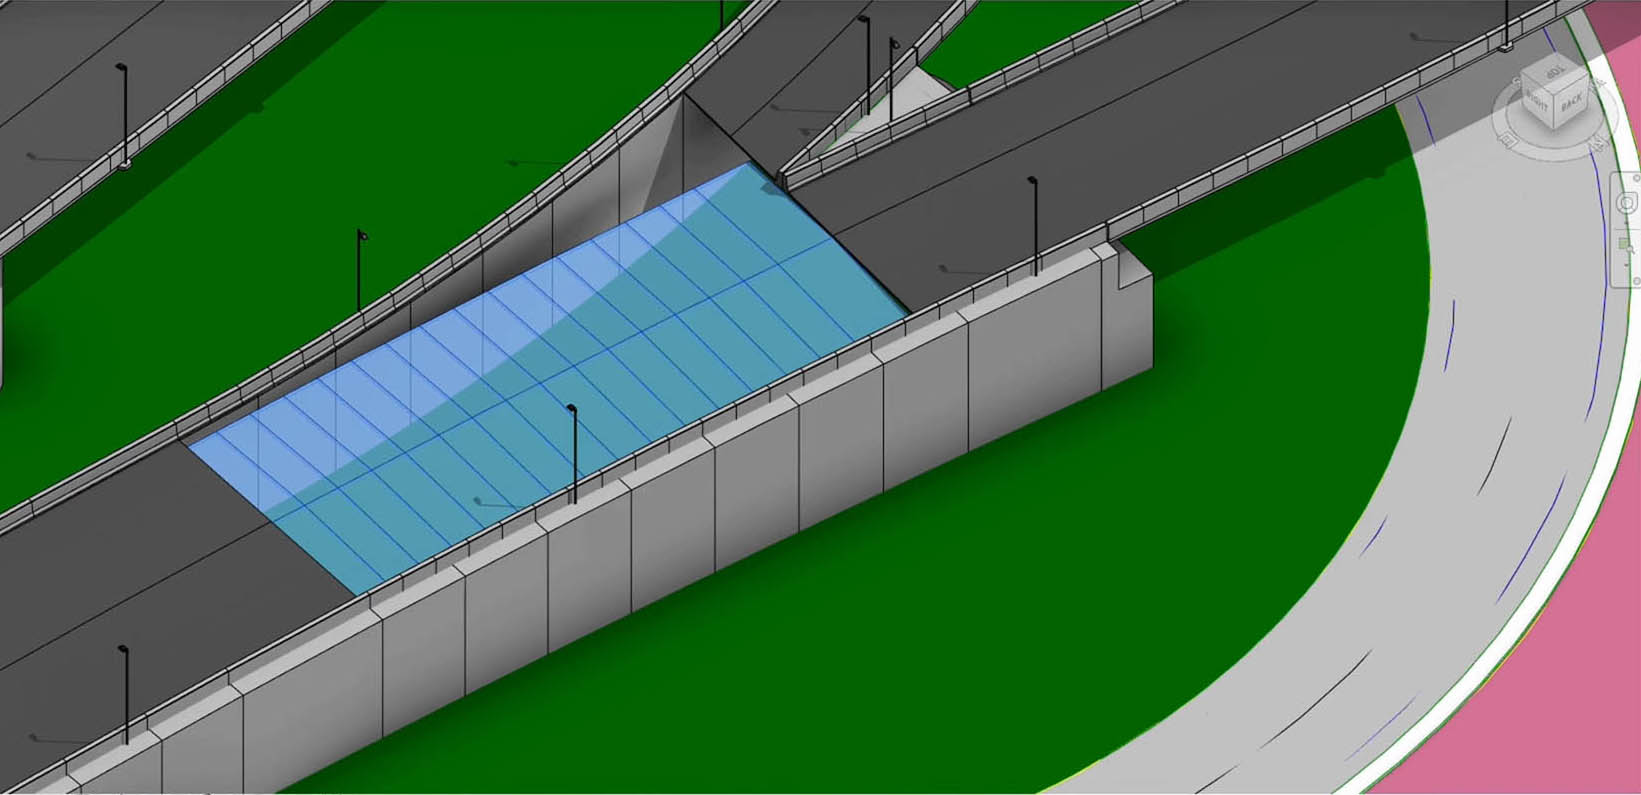
Provides precise control over vertical and horizontal variation parameters, facilitating the management of intricate design elements such as retaining walls and bridge deck soffits using fixed levels, Civil 3D alignment profiles, and 3D polylines.
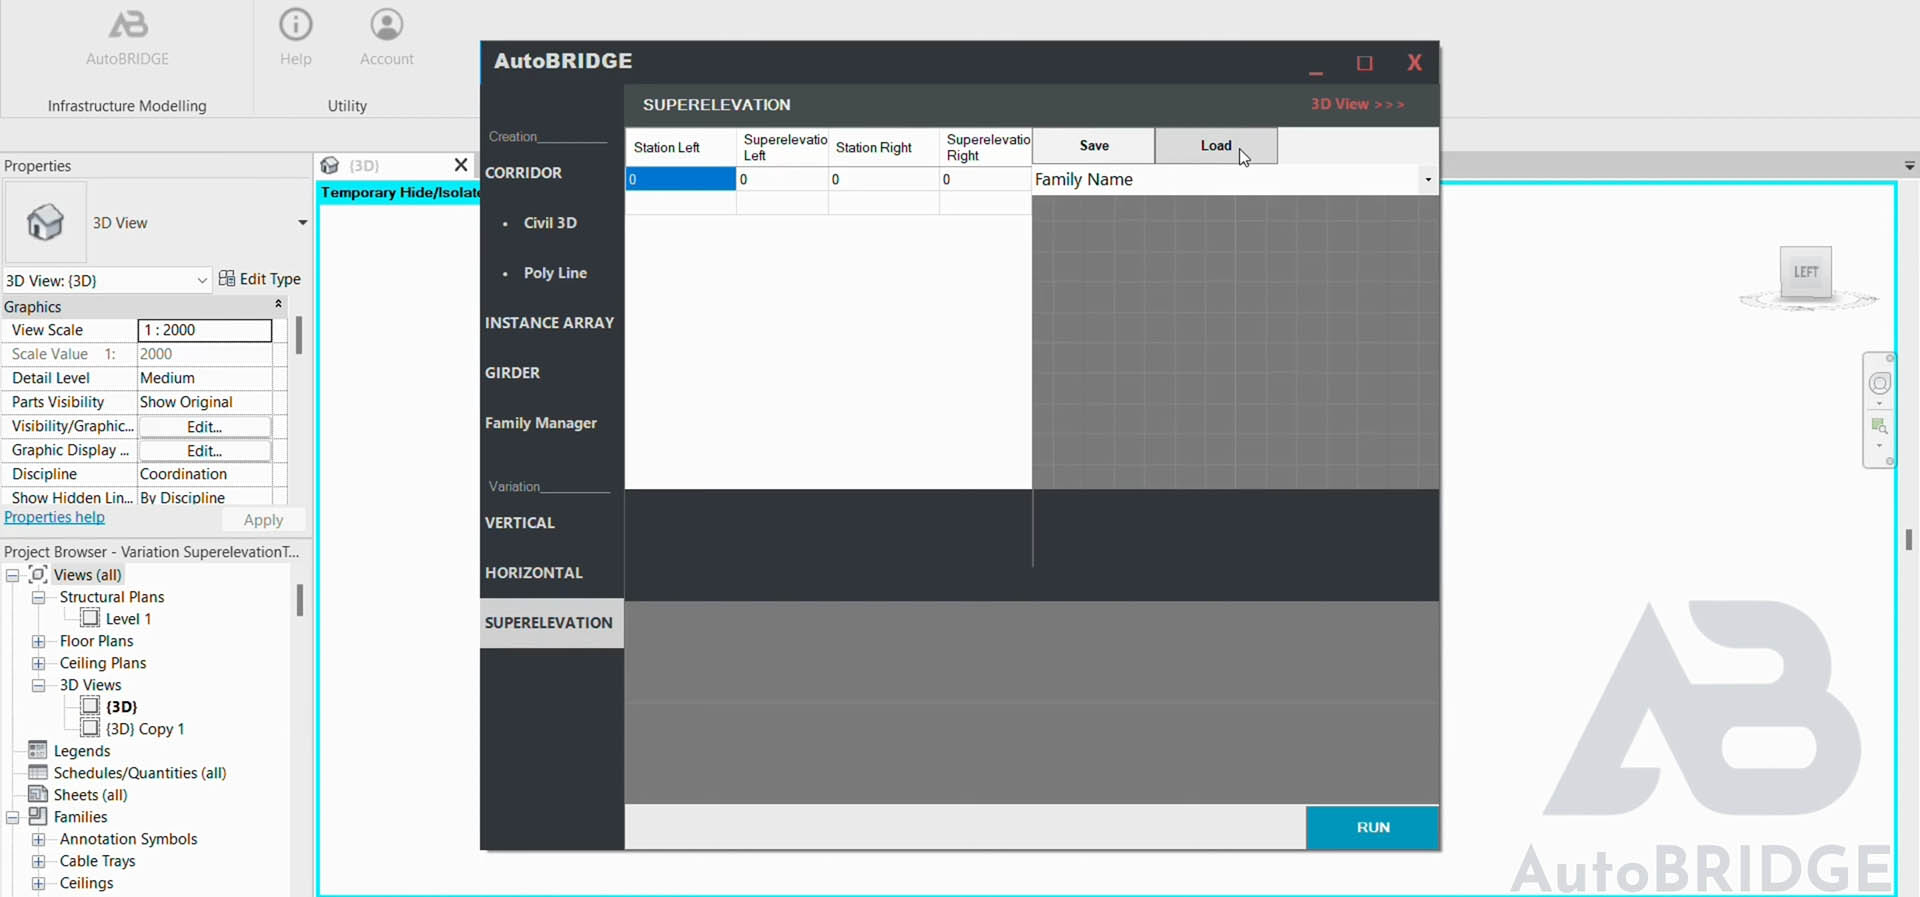
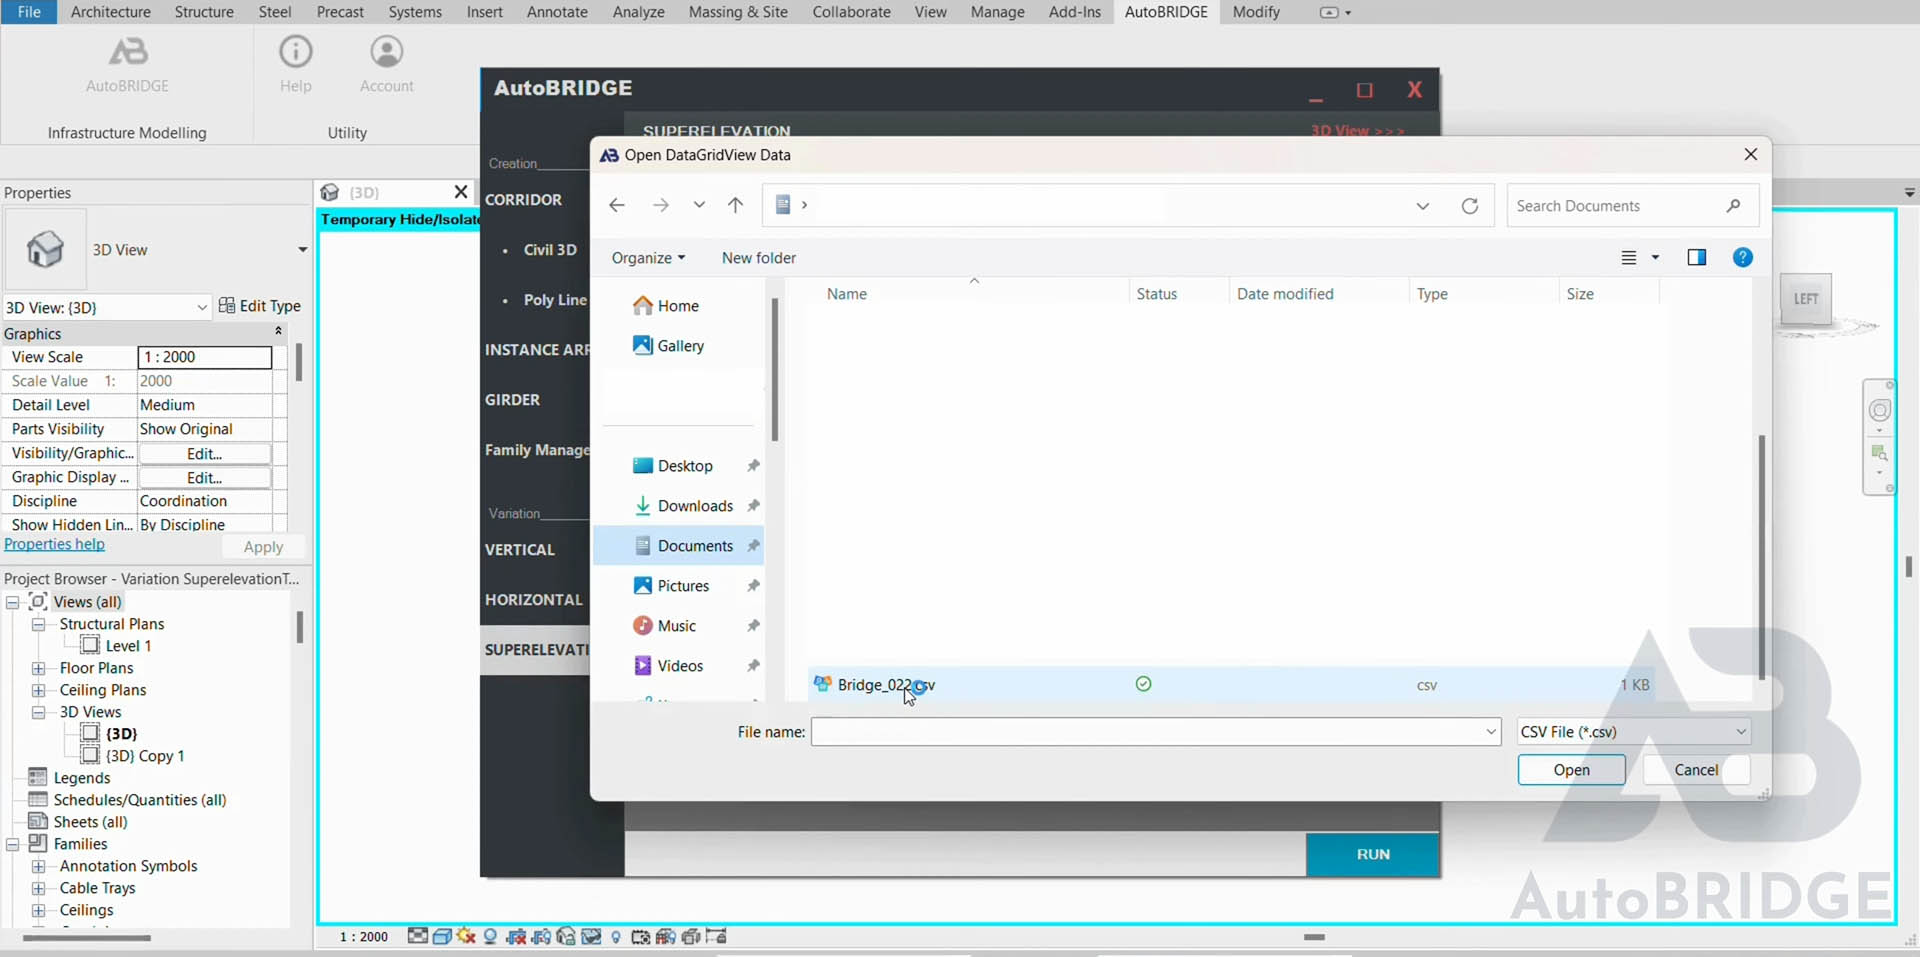
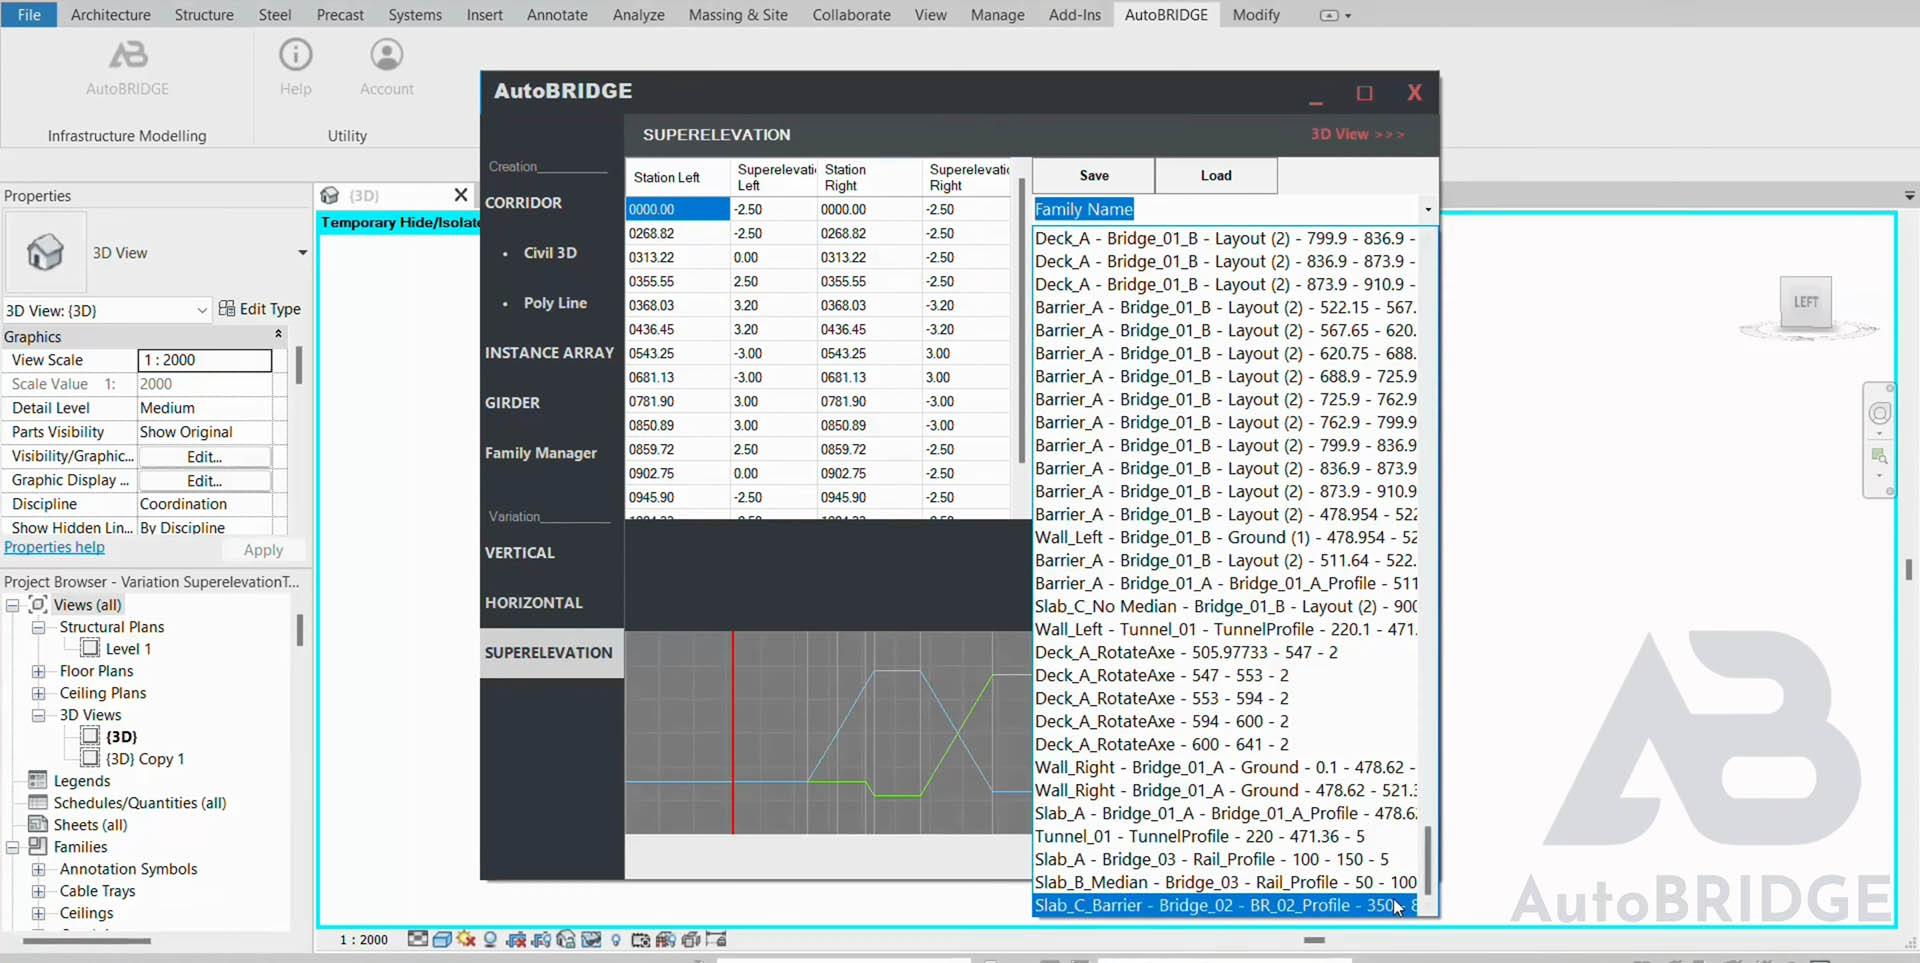
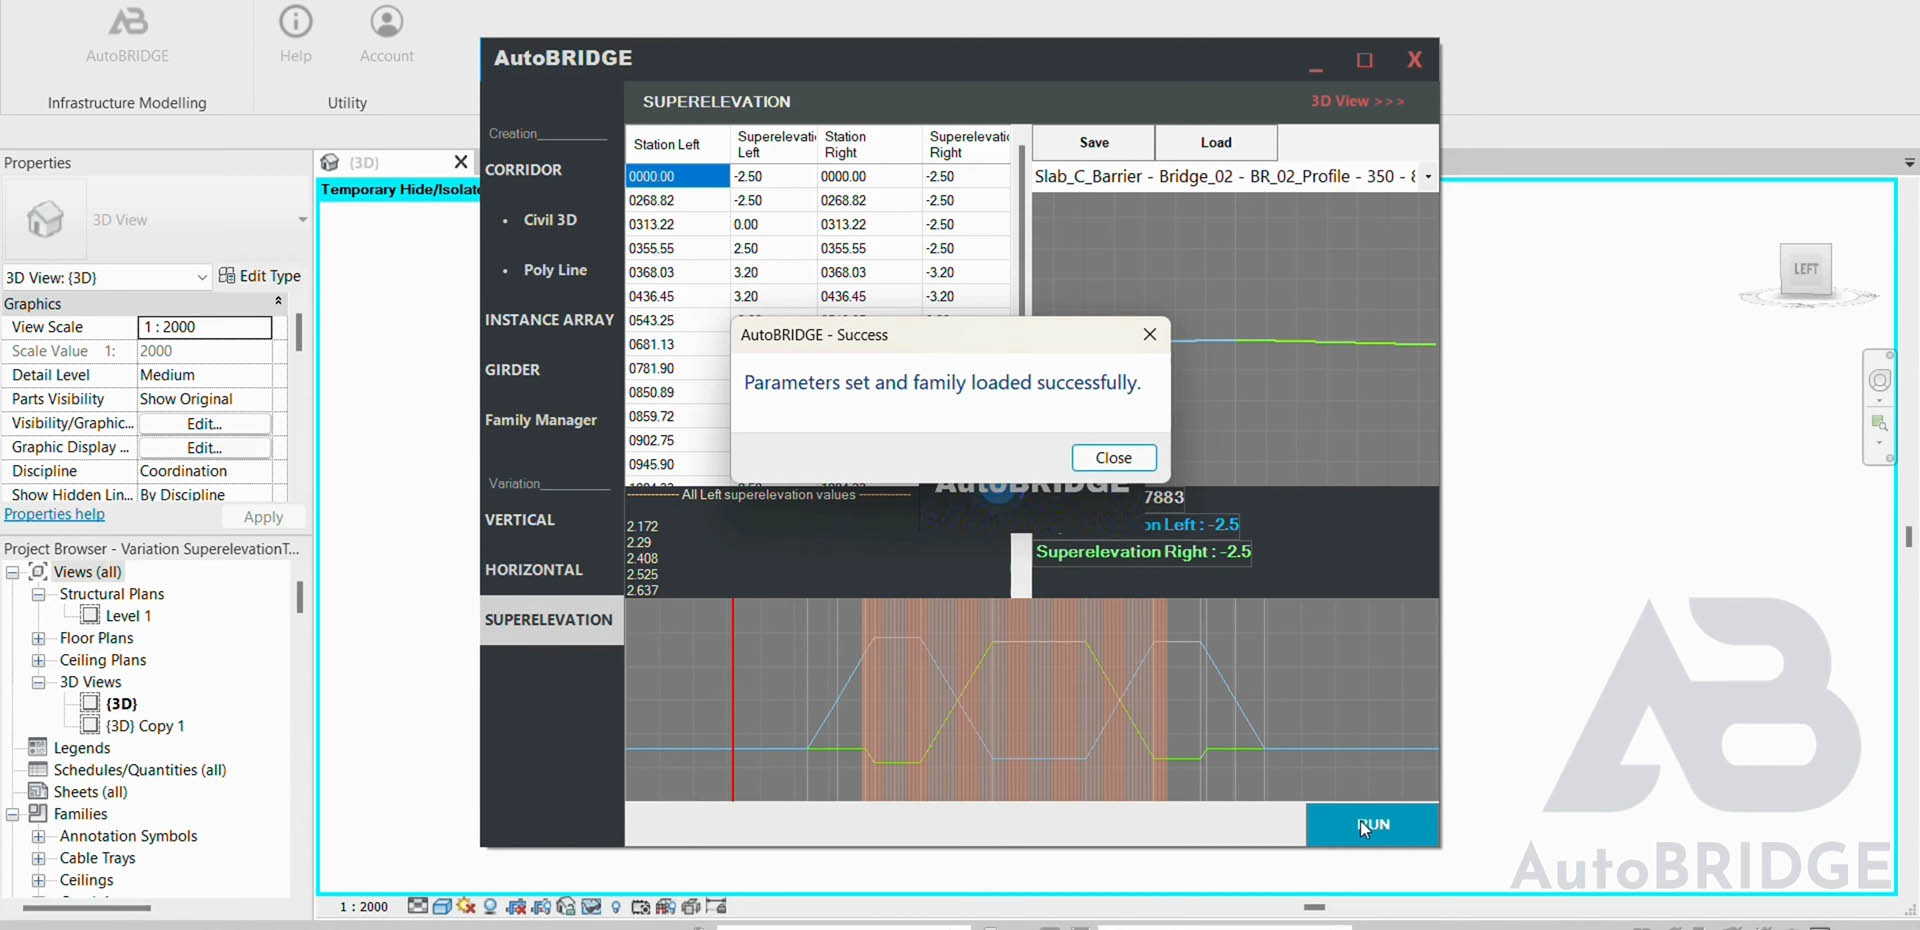
6. Superelevation Management:
Allows engineers to efficiently manage superelevation in road elements by importing data from Civil 3D or manually inputting designs using grids.
Overall, AutoBridge significantly reduces the complexity and time involved in infrastructure modeling within Revit, making it an indispensable tool for engineers and designers.
Infrastructure engineers, designers and BIM Modeler utilize AutoBRIDGE to enhance efficiency and accuracy in modeling 3D infrastructure elements within Revit.
- To activate AutoBRIDGE:
- Ensure you are connected to the internet.
- Enter the activation key exactly as provided.
- If activation fails, double-check the activation key for accuracy (no extra spaces or characters).
- If issues persist, contact AutoBRIDGE support.
Compatible Versions of Autodesk Revit with AutoBridge:
Revit 2023
Revit 2024
For more details, visit the AutoBridge Free Trial page.
Yes, while many AutoBRIDGE features benefit from integration with Civil 3D data (such as alignment profiles for corridor and array creation), certain features, like manual parameter control, family management, and general Revit modeling tools, can be used without Civil 3D.
AutoBridge runs on Microsoft® Windows®.
We're glad you're exploring AutoBridge! To make the most of your free trial, we offer a variety of resources to help you get started:
- Video Tutorials: Check out our Video Tutorials in our YouTube channel for step-by-step guides on using AutoBridge's features.
- User Manual: Our comprehensive User Manual provides detailed instructions and tips for getting the most out of AutoBridge.
- FAQs: Visit our FAQs section to find answers to common questions and issues.
- Support: If you need further assistance, you can contact our support team through the Contact Us page.
These resources are designed to help you maximize your productivity and take full advantage of AutoBridge's capabilities during your trial period.
If the email verification link is not functioning, reach out to AutoBRIDGE support at contact@auto-bridge.net for assistance.
AutoBRIDGE is a powerful add-in for Autodesk Revit, specifically designed to streamline and automate the modeling of infrastructure elements, such as bridges, tunnels, retaining walls, and corridors. By integrating data from Civil 3D, AutoBRIDGE simplifies complex tasks like corridor creation, instance array generation, girder modeling, and parameter control, helping engineers and designers save time and maintain precision in their projects.
- If you move an element in Revit and need to update its stored coordinates in AutoBRIDGE:
- Go to the Coordinates Control panel.
- Use Update Parameter to synchronize the coordinate parameters with the element’s new location.
- Alternatively, use Update Insertion to reset the element back to its original saved position if it was moved unintentionally.
- If alignment data is not recognized:
- Ensure that Civil 3D is open with the correct document active.
- Check that the alignment and profile are fully defined in Civil 3D.
- Verify that the Civil 3D version matches the version required by AutoBRIDGE (see Help > About AutoBRIDGE Modeler for compatibility details).
- Try refreshing the Civil 3D panel in AutoBRIDGE or restarting both Revit and Civil 3D.
- Yes, AutoBRIDGE allows you to apply parameter values to elements from different families, as long as they share common parameters. Use the Parameter Control feature to select and adjust parameters consistently across multiple elements.
- The Superelevation feature allows you to manage and visualize superelevation data for road elements. You can input superelevation values manually or import them from Civil 3D. The graph displays left and right superelevation values across stations, helping you verify and adjust them accurately.
- Yes, you can export coordinate data to a CSV file using the Coordinates Control panel. Select the parameters you want to include and click the CSV button. This is useful for documenting or analyzing spatial data outside of AutoBRIDGE.
- Open the Instance Array panel.
- Select the Civil 3D document, alignment, and profile.
- Choose the Revit family type and define any necessary parameters (e.g., X, Y, rotation).
- Enter chainages to control element spacing along the alignment, then click Run to generate the instance array.
If the corridor isn’t aligning correctly:
- Verify the alignment and profile in Civil 3D match the settings selected in AutoBRIDGE.
- Ensure chainages and variation parameters (vertical, horizontal, superelevation) are correctly set in AutoBRIDGE.
- Restart Revit and Civil 3D if misalignment persists, as temporary software issues can affect alignment.
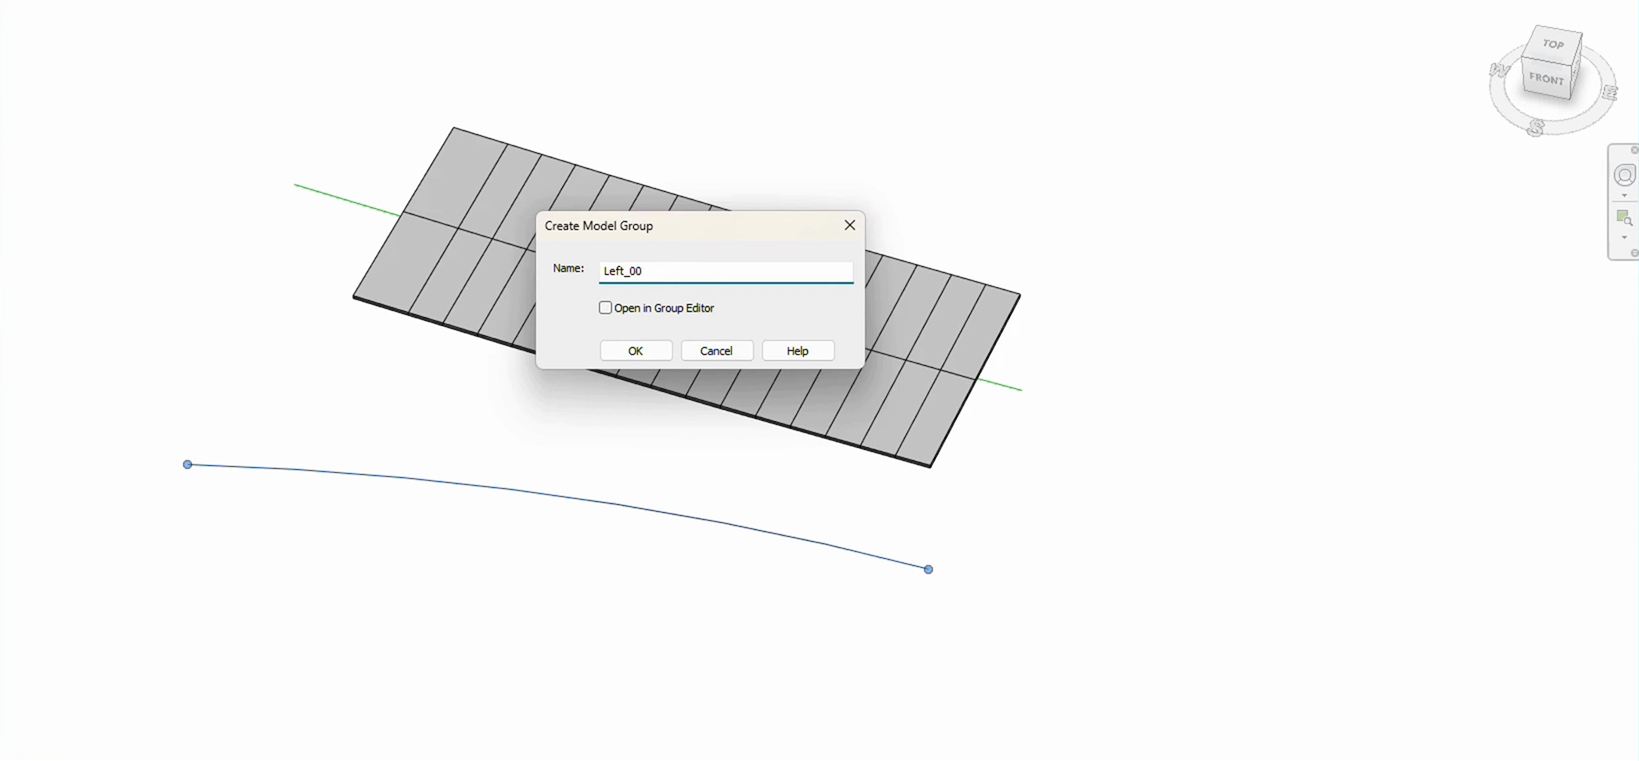
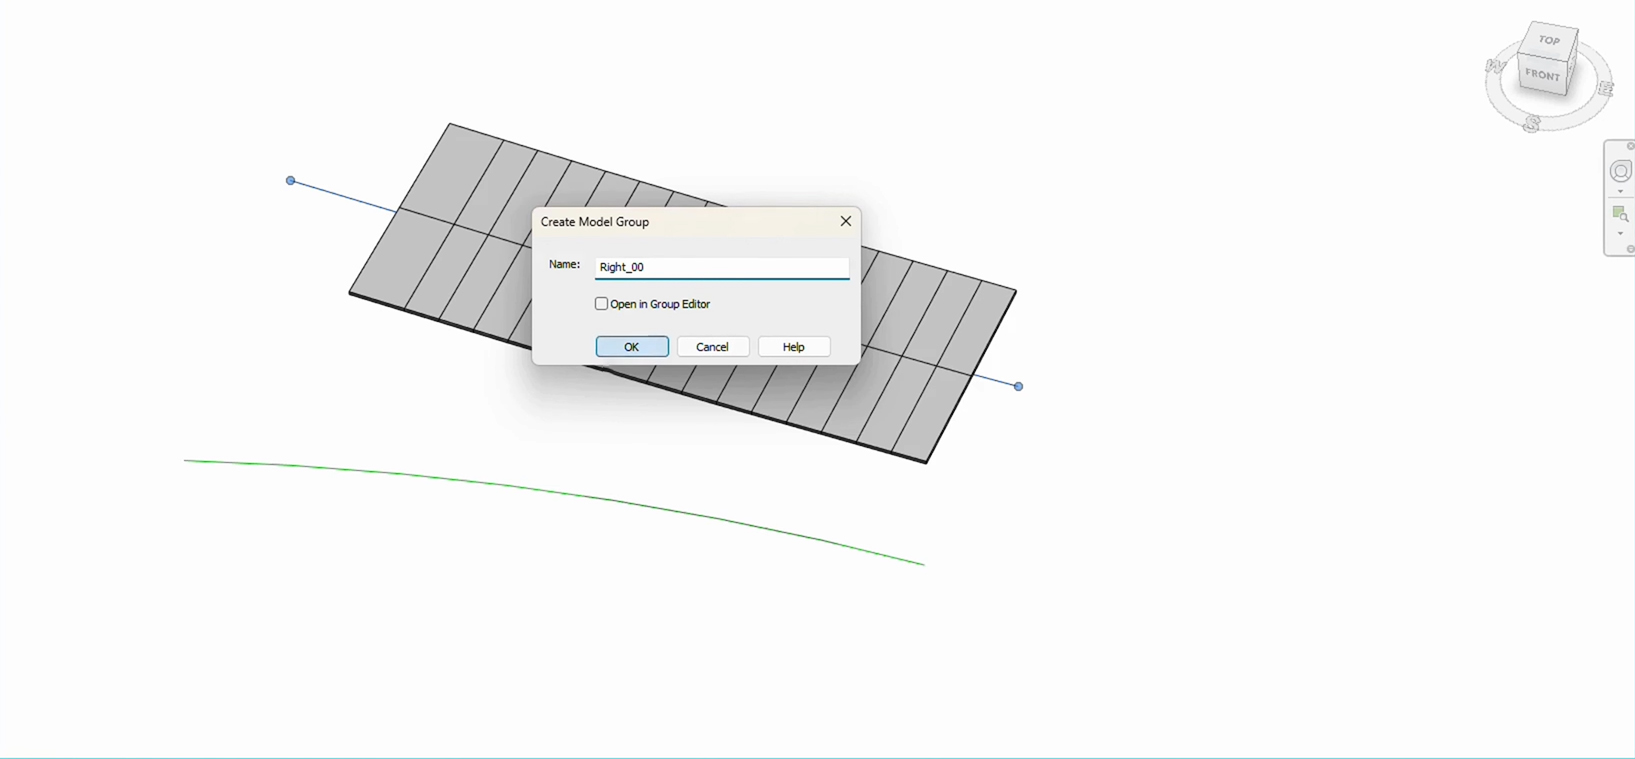
- Yes, AutoBRIDGE supports using model lines for creating corridors and instance arrays. You can select a model line group to define chainages based on intersections with the alignment. This option is useful if you prefer to work with Revit model lines over Civil 3D data.
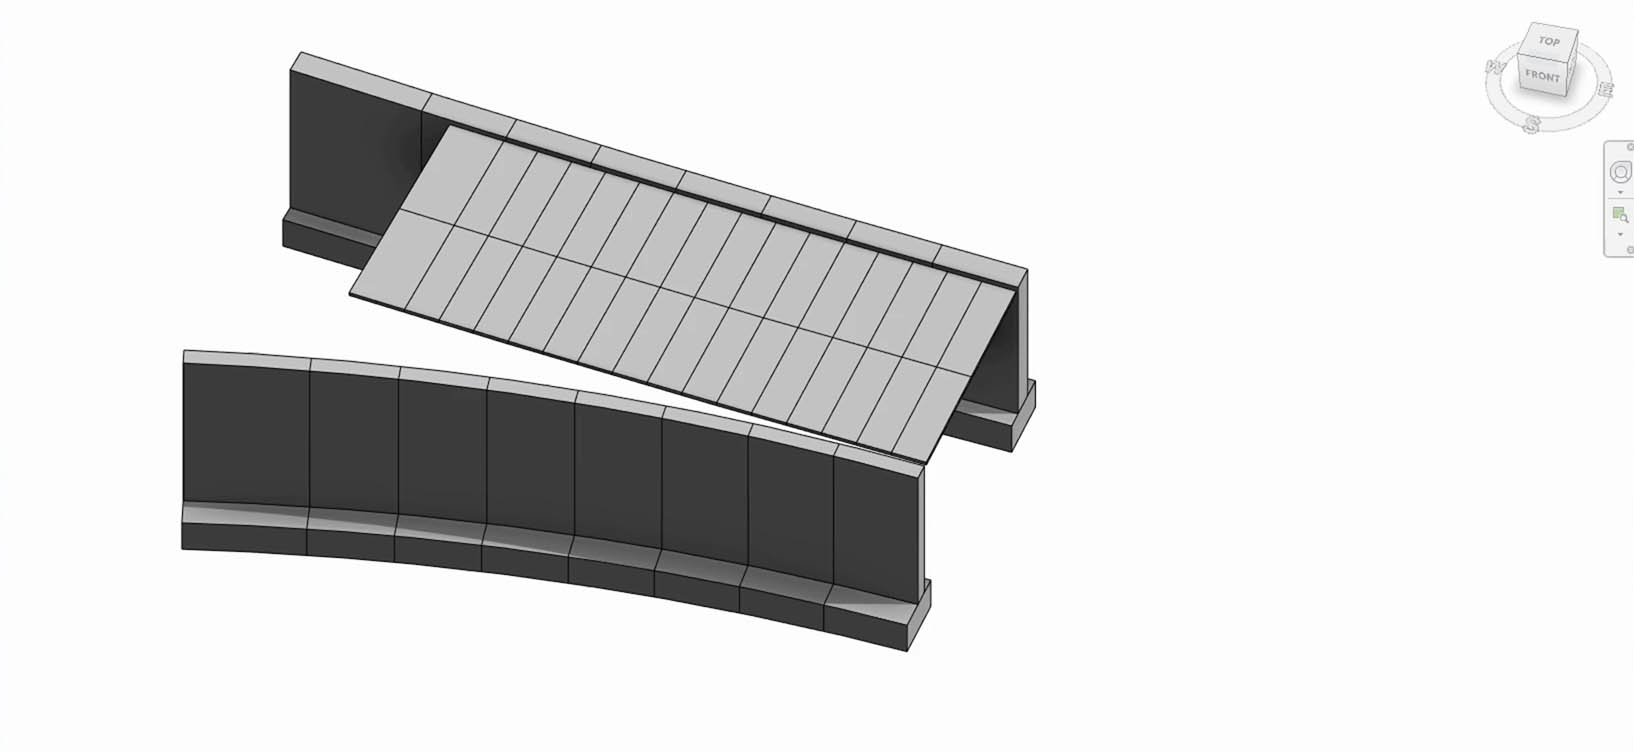
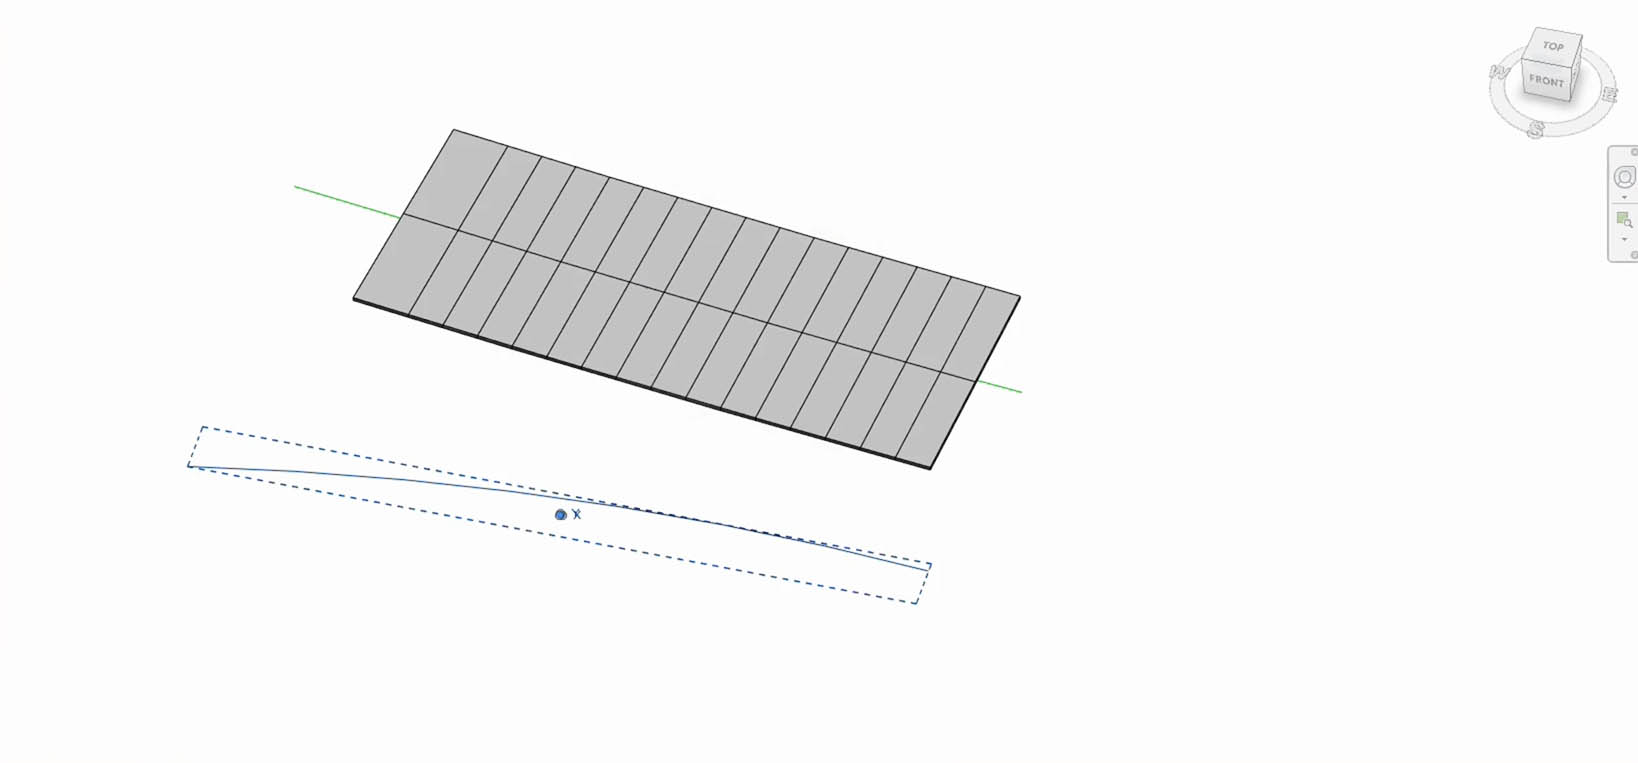
- To adjust a vertical opening shape:
- Go to the Vertical Opening panel.
- Select the family instance and model line group that defines the opening.
- Edit the model lines as needed to create the desired shape (e.g., circular, rectangular).
- Click Run to apply the updated shape to the opening.
- If you encounter installation issues:
- Ensure your system meets the minimum requirements and that Revit 2024 is installed.
- Temporarily disable antivirus software, as it may interfere with installation.
- Run the installer as an Administrator.
- If the AutoBRIDGE tab doesn’t appear in Revit, check the add-ins folder for correct file placement.
- Yes, AutoBRIDGE’s Family Manager feature allows you to save and reuse custom templates, which helps streamline recurring projects by reducing repetitive work. You can add templates with predefined nested families for efficient and consistent project setup.
- If AutoBRIDGE performs slowly or crashes:
- Ensure your system meets the minimum hardware requirements for Revit and AutoBRIDGE.
- Close unnecessary applications to free up system resources.
- Consider upgrading memory (RAM) or graphics capabilities for better performance.
- Restart Revit and Reinstall AutoBRIDGE if issues persist.
- Yes, you can manually update coordinates in the Coordinates Control panel. Enter the desired values in the Coordinates Table, then use Update Parameter to apply the changes to the element’s parameters, ensuring alignment with the new coordinates.
- If you experience issues not covered in the manual, visit our support page or contact our customer service team via email. Our support team is available to help you resolve technical issues and answer questions about AutoBRIDGE.